Review of the US Map for WP. Part 3: Detailed settings
Firstly, the “Detailed settings” section allows adding specific information for each US state. Secondly, you can customize the state color and other settings there.
You can open the “Detailed settings” section by selecting the “Detailed settings” tab at the WordPress administrator dashboard menu on the left side of the screen.
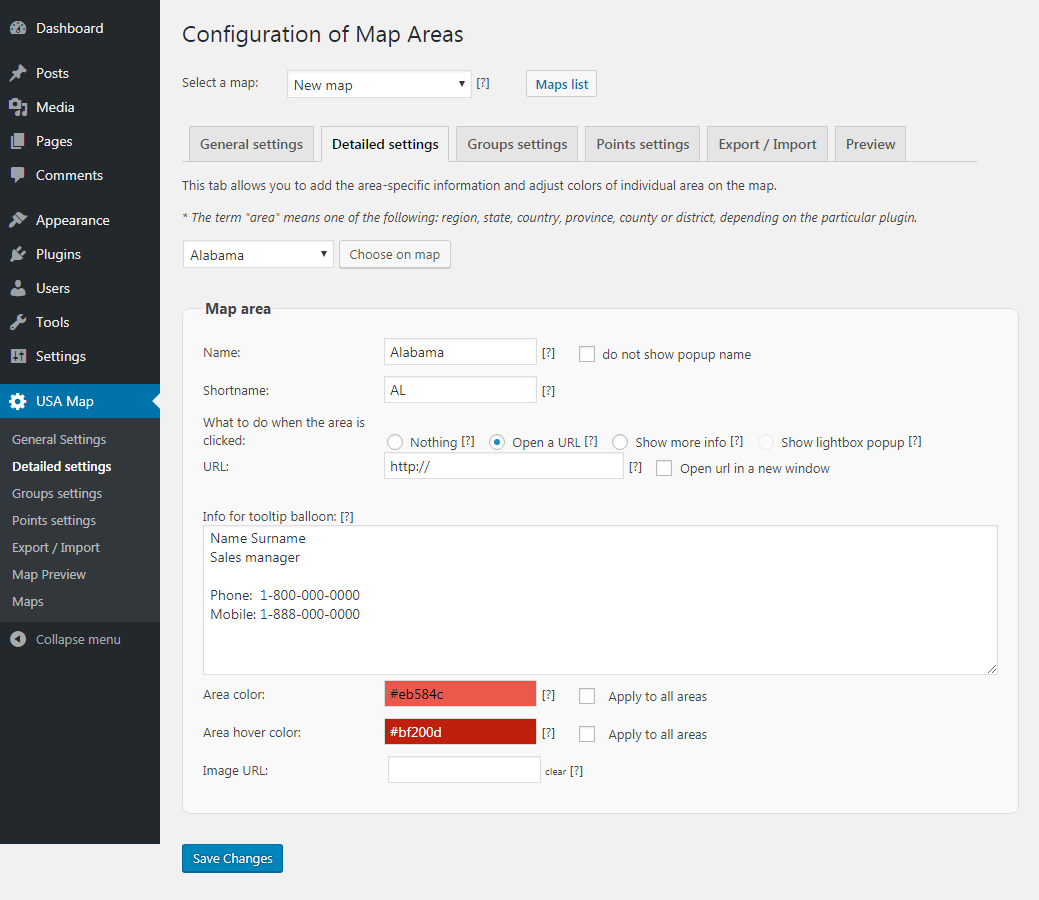
Also, for your convenience, we made a screenshot of this section with a comprehensive review of its fields and checkboxes:
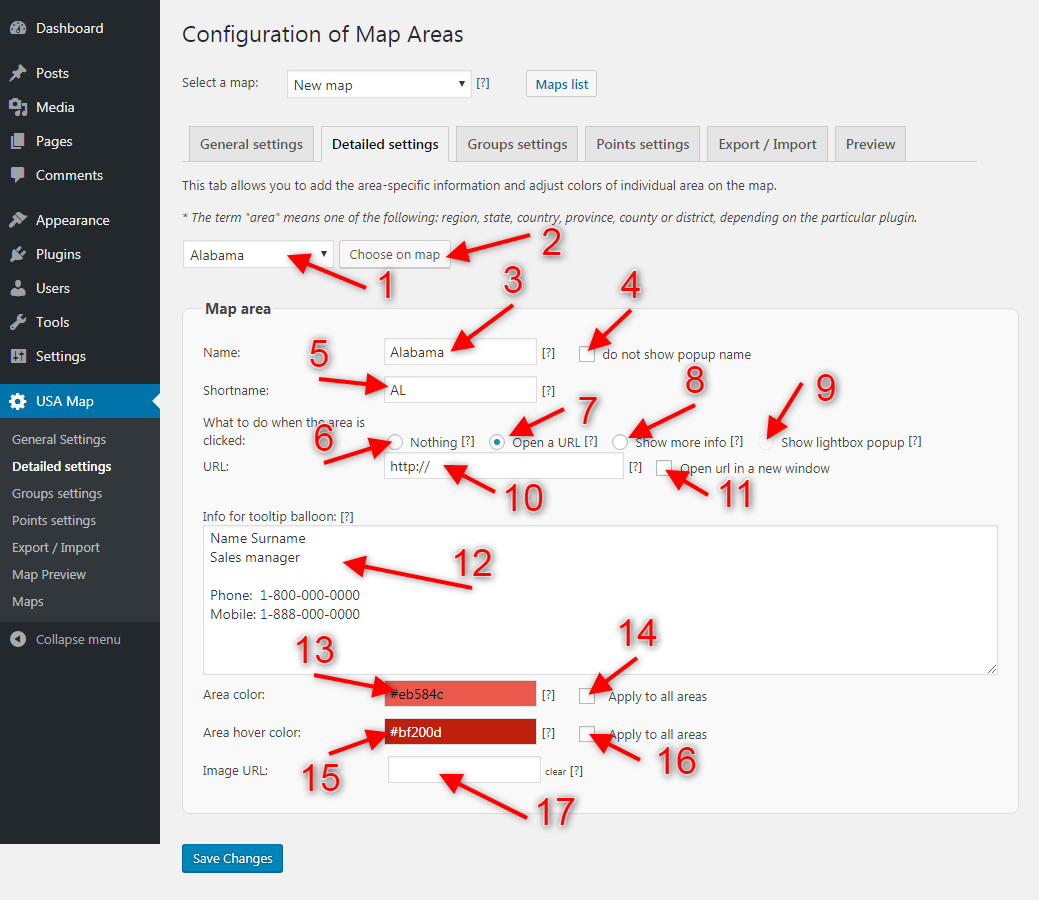
[1] “State name” – here you can choose the state you want to edit. Please note, that if you will not select a state, the settings window will not appear!
[2] “Choose on the map” – this button leads you to the interactive map and allows selecting of the state directly.
Map area settings group
Here you can set up all necessary settings for the state.
[3] “Name” – edit the state name displayed on the map.
[4] “Do not show popup name” – when this checkbox is activated, the state name will not be displayed in the pop-up window when the user hovers the mouse over the state.
[5] “Shortname” – here you can customize the state label displayed on the map.
What should you do by clicking on the area? This short sub-section is very important because it sets the behavior when the user clicks on the state area.
[6] “Nothing” – nothing will happen when the user clicks on the state area
[7] “Open an URL” – by clicking on the state the user opens the chosen URL
[8] “Show more info” – by clicking on the state the information window pops up
[9] “Show lightbox popup” – by clicking on the state the lightbox window pops up. Please note, that you need to install the WordPress “Pop-up builder” plugin to create the pop-up windows. Otherwise, you can’t manage them.
[10] “URL” – sets up the URL, which will be used at point [7]
[11] “Open URL in a new window” – adds the target=”_blank” attribute to URL (point [10]), so it will appear in the new window.
[12] “Info for tooltip balloons” – here you can set all necessary additional information that appears in the tooltip balloon (if the checkbox [8] is checked). Also, as in the screenshot above, you can add the name of the local representative of your company, address, phone number, etc.
[13] “Area color” – sets up the state color in HEX format.
[14] “Apply to all areas” – if this checkbox is checked, the selected color will apply to all states on the map.
[15] “Area hover color” – sets up the hover color for the state (when the user hovers the mouse color over it).
[16] “Apply to all areas” – applies the hover color to all states on the map.
Working with images
Each pop-up window in the WordPress interactive US map can have an icon that you can add in the “Detailed settings” section.
[17] “Image URL” – this input box opens the standard WordPress Media Gallery, where you can choose the image from all your website images or upload it from your local PC. As in the screenshot below, working with an icon image is simple.
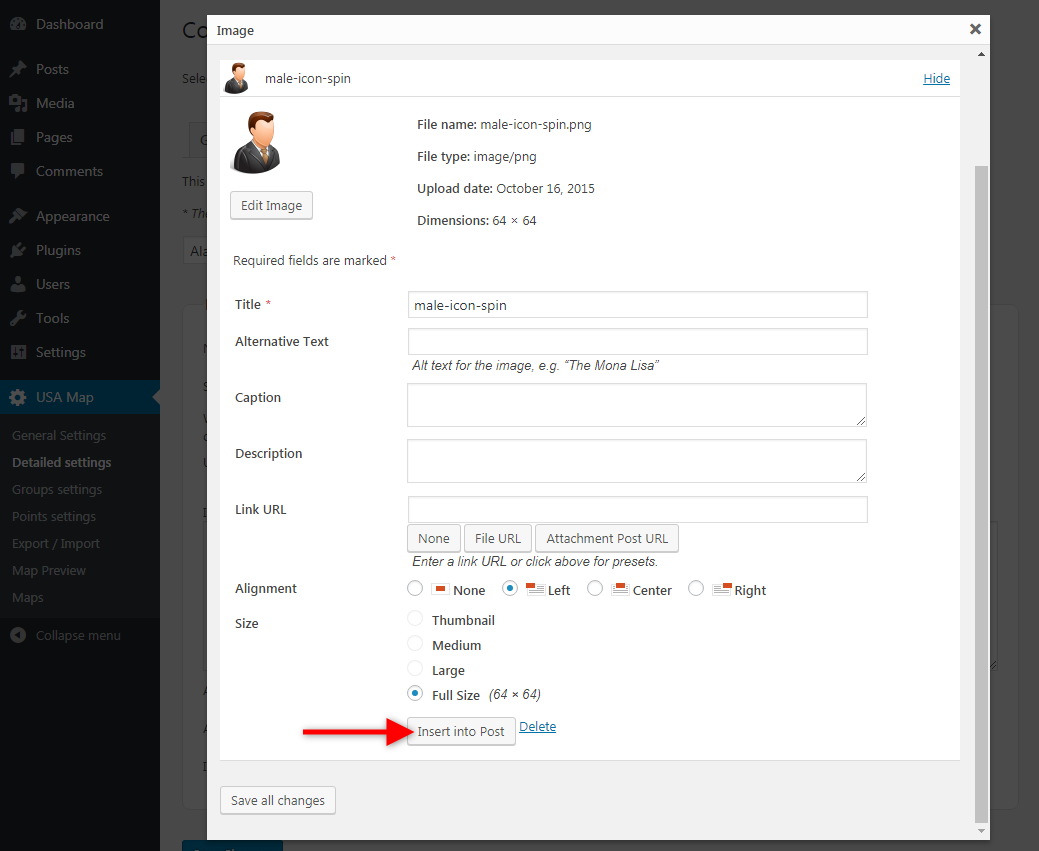
After all, you need to do the following:
- Set the icon title;
- Set the icon alternative text (“alt” attribute of the image);
- Choose the alignment and image size;
- Click on the “insert into post” button to add the icon to the state information window.
Conclusion
In conclusion, this short review shows you how to manage the separate state settings in the US Interactive Map plugin. So, we hope that answers all the questions.