Review of the US Map for WP. Part 5: Points settings
Each interactive map plugin from Fla-shop.com has the ability to add points to the map. What is a point? Points are markers or icons added to the map and for which you can assign color, link, tooltip, and other options. Do you want to know more?
The “Points settings” section can be opened by selecting the tab at the WordPress administrator dashboard menu on the left side of the screen.
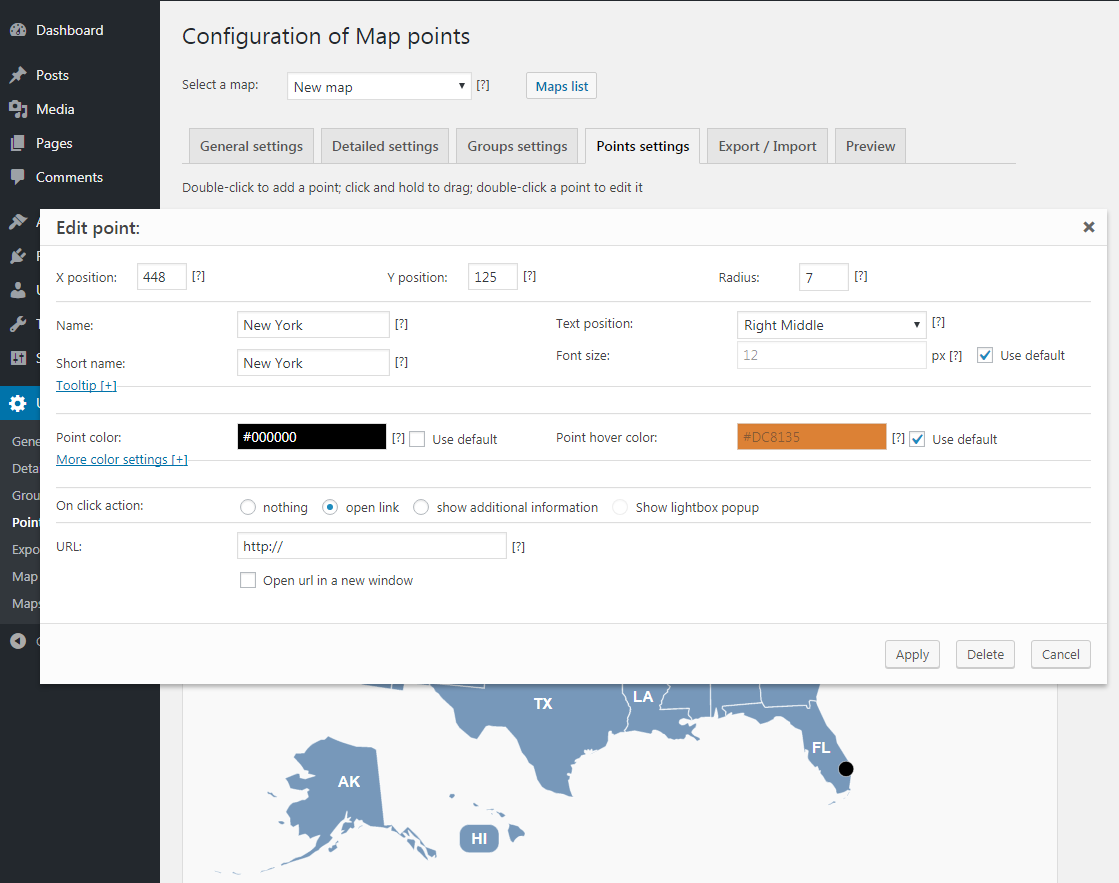
After that, you will just need to place the point on the map (double-click with the left mouse button) and the configuration menu will appear. Also, for your convenience, we made a screenshot of this section with a comprehensive review of its fields and checkboxes:
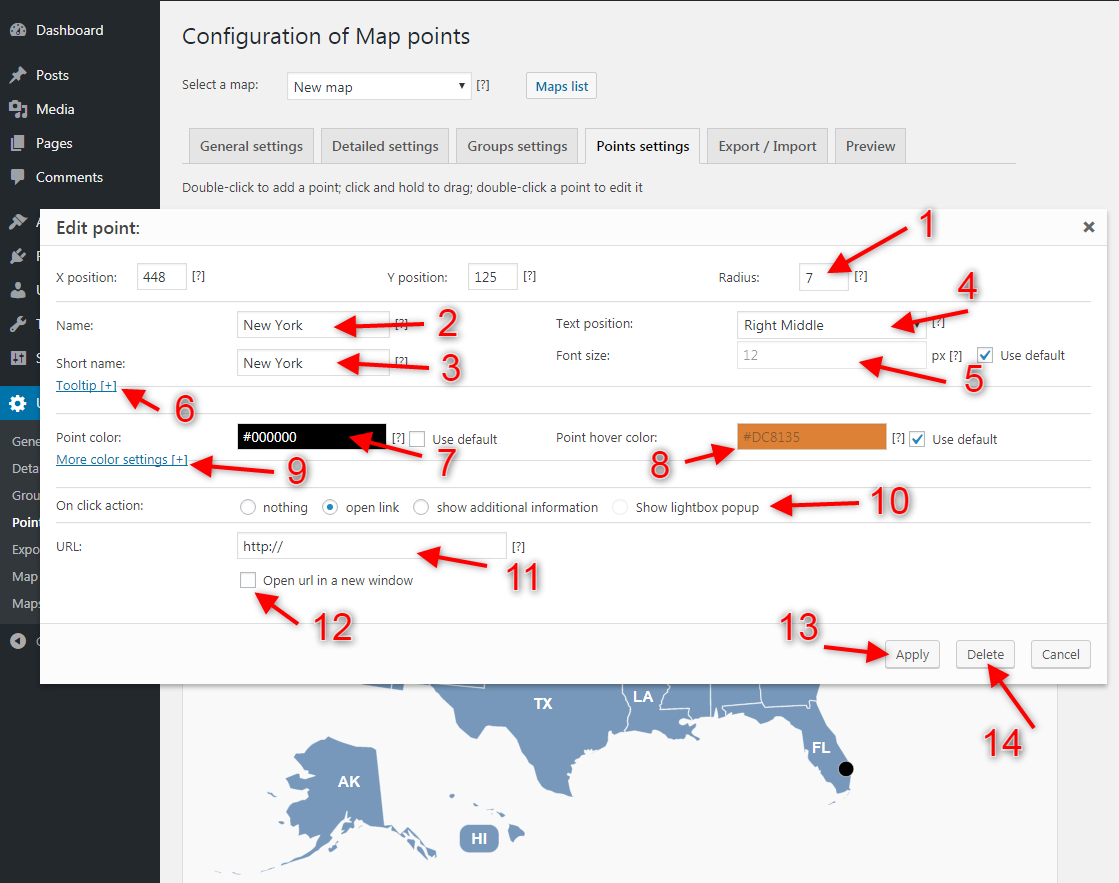
[1] “Position” – sets up the position coordinates of the point and its radius.
[2] “Name” – sets up the point name.
[3] “Short name” – sets up the point shortname.
[4] “Text position” – sets up the position of the point text.
[5] “Font size” – sets up the font size of the point information text.
[6] “Tooltip” – shows the tooltip settings window, where you can add any text information to the point and image icon.
[7] “Point color” – sets up the point color. The “Use default” checkbox sets the default point color (black).
[8] “Point hover color” – sets up the point hover color (when the user hovers the mouse cursor over the point). The “Use default” checkbox sets the default color for the point.
[9] “More color settings” – opens the extra menu with additional color settings. Here you can set:
- point border-color;
- point border hover color;
- point name color;
- point name hover color;
- point name stroke color;
- point name stroke hover color.
Also, you can set all these parameters to default values by checking the “Use default” checkbox.
On click action subsection
This subsection manages the action when the user clicks on the point:
- “Nothing” – when the user clicks on the point, nothing happens.
- “Open link” – when the user clicks on the point, the selected URL ([11]) will be opened. Also, you can check the checkbox [12] to let the link open in the new window.
- “Show additional information” – when the user clicks on the point, the additional information window will appear.
- “Show lightbox popup” – when the user clicks on the point, the lightbox popup window will appear. Please note, that you need to install the “Popup builder” WordPress plugin to manage popup windows.
Thus, when all settings are set, you can select the button “Apply” [13] to apply them or the button “Delete” [14] to delete the point.
Conclusion
To sum up, the Points are very powerful when you need to show different types of information. For example, you can show visited places or several state shops of your company. We hope that this quick guide will answer most of your questions about how to configure point settings.