Using CSS Class to Deactivate Points on a Map for WordPress
Maps for WordPress can display regional areas with tooltips within each region – in this example, we are looking at the United States. Showing tooltips in each state is a perfect way to use the interactive infographic to show regional representations of your company in each state, however, if you add a high number of points in a single region, you may experience a ‘disappearing’ tooltip issue.

By default, points added to a map are active. When you hover a cursor over the point, the tooltip of the state disappears and the name of the point will appear. By assigning CSS classes to points, you can quickly make them “invisible” for the cursor and solve the issue with the state tooltip disappearing.
Table of contents
- Introduction
- How to add points on an interactive USA map
- How to add a user-defined CSS class for a point
- Modifying the style file with the help of a customizer
- How to modify Stylesheet with the help of Theme Editor
- How to modify style files via FTP
- How to quickly add a class for a set of points
- Conclusion
Introduction
Sites with a high number of regional representations frequently face a problem of visualizing business geography. How do you show users where to benefit from a service, or purchase a product (for example)? Showing individual locations is easy on a website that runs on WordPress with the help of the interactive maps plugin from Fla-shop.com.
How to Add Points on an Interactive USA Map
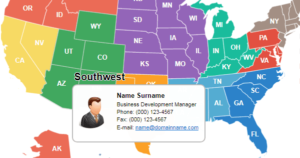
An interactive infographic is a useful tool that makes a website memorable and unique. For instance, your company’s map with commercial representations could look like this:
To create a map like this, load, install, and activate using the standard instructions found here: US Map plugin for WordPress (Admin Panel→ ‘Plugins’ → ‘Add Plugins’ → ‘Upload Plugin’ → choose the archive with the plugin→ ‘Install Now’ → ‘Activate Plugin’).
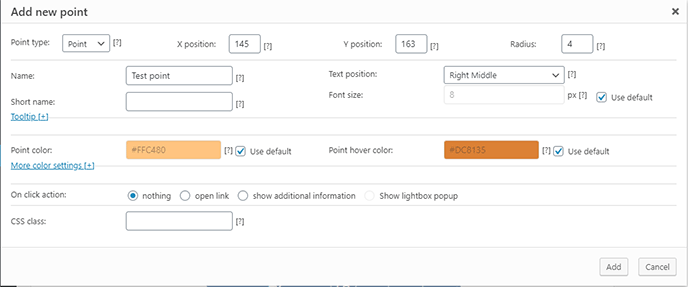
In the left menu of the WordPress dashboard, the ‘USA Map’ section will appear. Choose ‘Point Settings’ to manage the points. To add a marker or a location, double click anywhere on the map, this will bring settings window; I; the ‘Name’ field enter the point’s name; configure its type, size, color, position, and action after the click; add info to the ‘Tooltip’; click ‘Apply’.
In the above example, added points are not the company’s physical locations; they represent the company’s dealer network that is scattered throughout the United States. Let’s agree that this is impressive, however, if points are placed as densely as in our example, you will face a new problem. When you hover the cursor on a state, you will notice that the tooltip for the state starts “blinking” (continuously appearing and disappearing).
To fix this issue, it is necessary to make points invisible to the cursor.
How to add a user-defined CSS class for a point
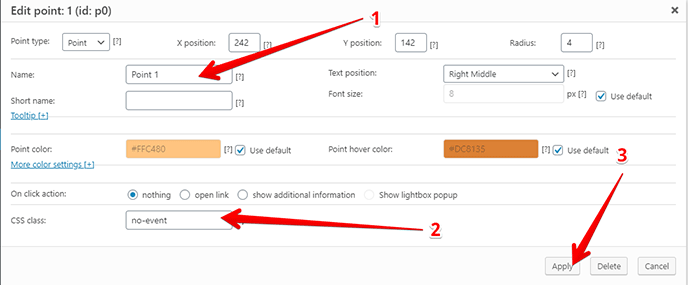
The US map for WordPress plugin allows you to add a user-defined CSS class for each point. This feature is used to manage the ‘hover state’ for points. Appointing a unique CSS class to a point is possible while creating or editing it. The edit menu can be brought up by double-clicking any point on a map in the ‘Point settings’ tab. To assign the CSS class, put its name in the appropriate field, and click the button ‘Apply’.
This, for instance, is how it looks adding the no-event class to Point 1 in edit mode:
After adding the CSS class to all points, it is necessary to add to a style file the theme properties of this class:
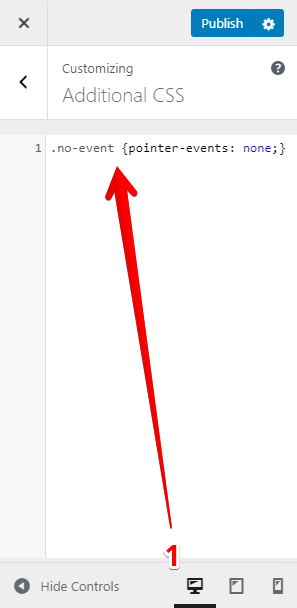
.no-event {pointer-events: none;}
This can be accomplished via a Customizer, via an internal theme editor, or an FTP.
Modifying a Style File with the Help of a Customizer
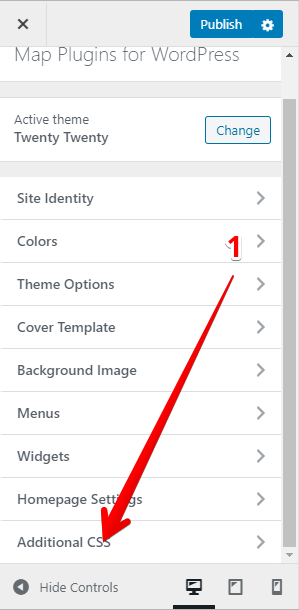
To add user-defined CSS via a customizer, navigate to the visual settings mode of the site (Admin panel → ‘Appearance’ → ‘Customize’); select ‘Additional CSS’; then paste the property of the class to the text box.
How to Modify Stylesheet with the Help of Theme Editor
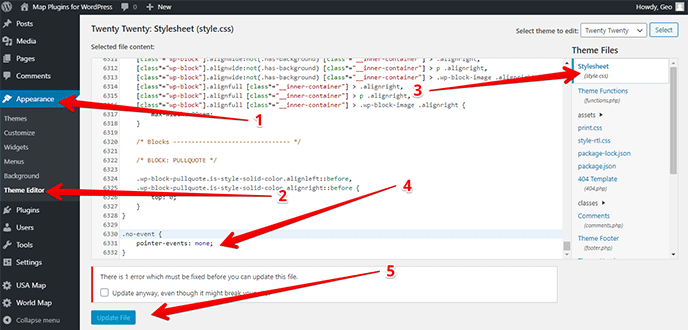
To complete this operation via theme editor, open in the left menu of the admin panel ‘Appearance’ tab and go to the ‘Theme Editor’ tab. From the right list select ‘Stylesheet’ and paste at the bottom of the file the following strings:
.no-event {
 pointer-events: none;
 }
Click ‘Update file’.
How to Modify CSS File via FTP
To modify files via FTP, establish a connection with a server and open theme style file for editing. It may be located in the root theme directory or the style folder (frequently named style, CSS, etc.). Paste strings with a class name and its properties at the bottom of the style table. Save the file.
That’s all! Refresh the page and check the result. Don’t see the changes? Probably, your browser is picking up cache data. Press Ctrl+F5 in Windows, or Command+R in Mac, to reload the page. If this doesn’t help, clear the cache in all of the caching plugins and the browser settings.
You can read details about the properties of the ‘pointer-events’ on developer.mozilla.org.
How to Quickly Add a Class for a Set of Points
If you have added a couple of hundred points, then assigning a CSS class for each of them via the interface of the plugin could be a daunting task. There is a bulk edit option using the export and import of a CSV file with plugin settings which allows you to edit all of the points quickly.
Use tools on the ‘Tools’ tab to export map settings to a CSV file.
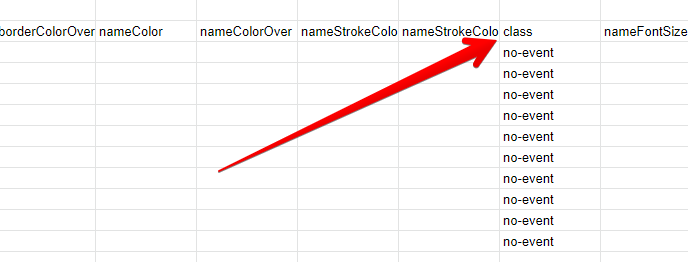
We suggest using the Google Sheets online editor to work with CSV files. In the formed spreadsheet, add the CSS class names in the ‘class’ column.
Save the edited file and use ‘Tools’ to import the settings back to the site.
Before editing the CSV file, we suggest to fully backup the map settings. To do so, on the ‘Maps Dashboard’ tab, select all the maps and export them to a JSON file.
Conclusion
Fla-shop.com plugins for WordPress are a nice addition to a website. You can create an interactive infographic, sales territory maps, office location maps, etc. All of the options are available through a visual interface and do not require any coding. Also, for advanced web developers, useful instruments are available: the ability to use classes, adding custom JS codes, etc.