A Complete Guide To Display Interactive Maps on a Joomla Site Easily
If you want to add interactive HTML5 maps to your articles on Joomla! site, then, this tutorial will help you do that effectively by following 3 simple ways.

Contents
Intro
Joomla! is a popular and widely used content management system (CMS) to create websites. Sometimes you need to add an interactive HTML5 map to a website, for example, an editable US map. This article describes three ways to do so.
Here is the list:
Later, we will discuss all of these methods. However, before using any of those methods, we should complete preparations. It consists of adding a folder with map files to a server into a media folder of the content management system. Moreover, before using the first or second of them, it is necessary to disable tag filtering.
Adding files with a map to the server
To accomplish this, you need to:
- Download ZIP file that includes HTML5 map
- Login to the site using protocols FTP, SFTP, SSH, or via a control panel on the hosting site.
- Open the folder where CMS Joomla is located.
- Navigate to the media sub-folder.
- Create a flamap folder.
- Extract archive with a map
- Copy to that folder map files.
Go to a server with a Joomla folder and create a flamap category in the media folder.
This process depends on the protocol used and the operating system. In Windows OS, it is convenient to use file managers that support sftp protocols like WinScp and others. Besides, you can use the console and SSH protocol to login. If you have access to the control panel on the hosting, it is possible to perform folder creation operations and copy map files.
Go to a media folder.
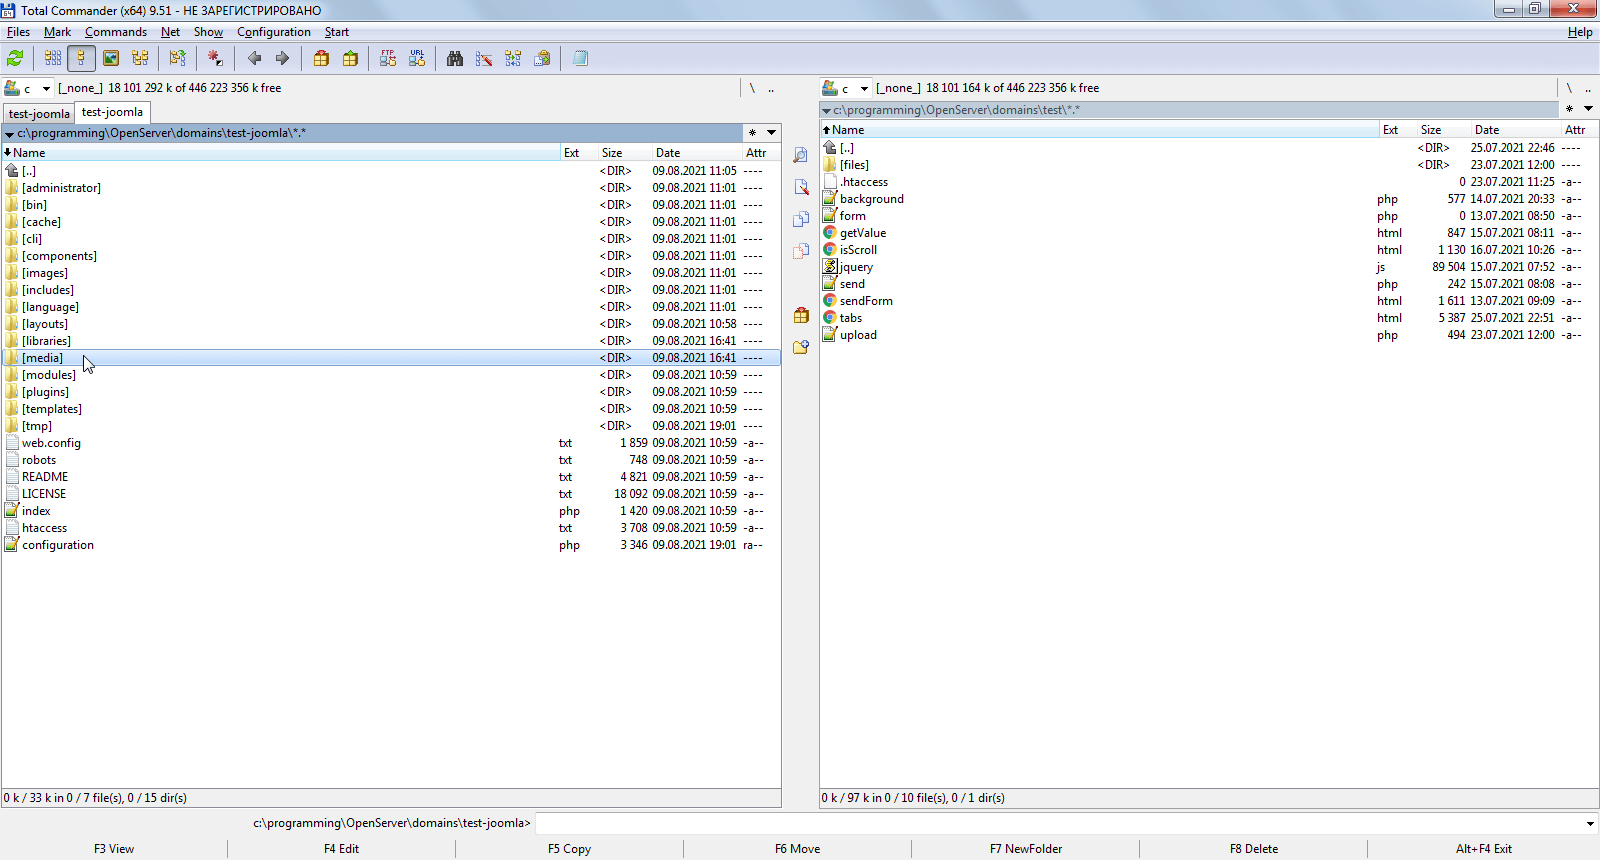
Create a sub-folder named flamap.
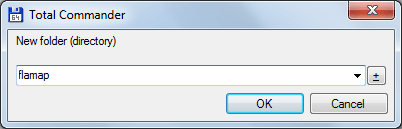
Copying files with map
Copy js, CSS, and HTML files to a server into the flamap sub-folder that we created. After completing this operation, the contents of the folder will be like this:
Disabling text filters
You should disable text filters before adding maps using the first or second method. In the case of the third method (using the Sourcerer method), these actions are not required. This is necessary because Joomla and its visual text editor TinyMCE remove some tags, and as a result, the map will also be cut from the article’s content. So let's get started.
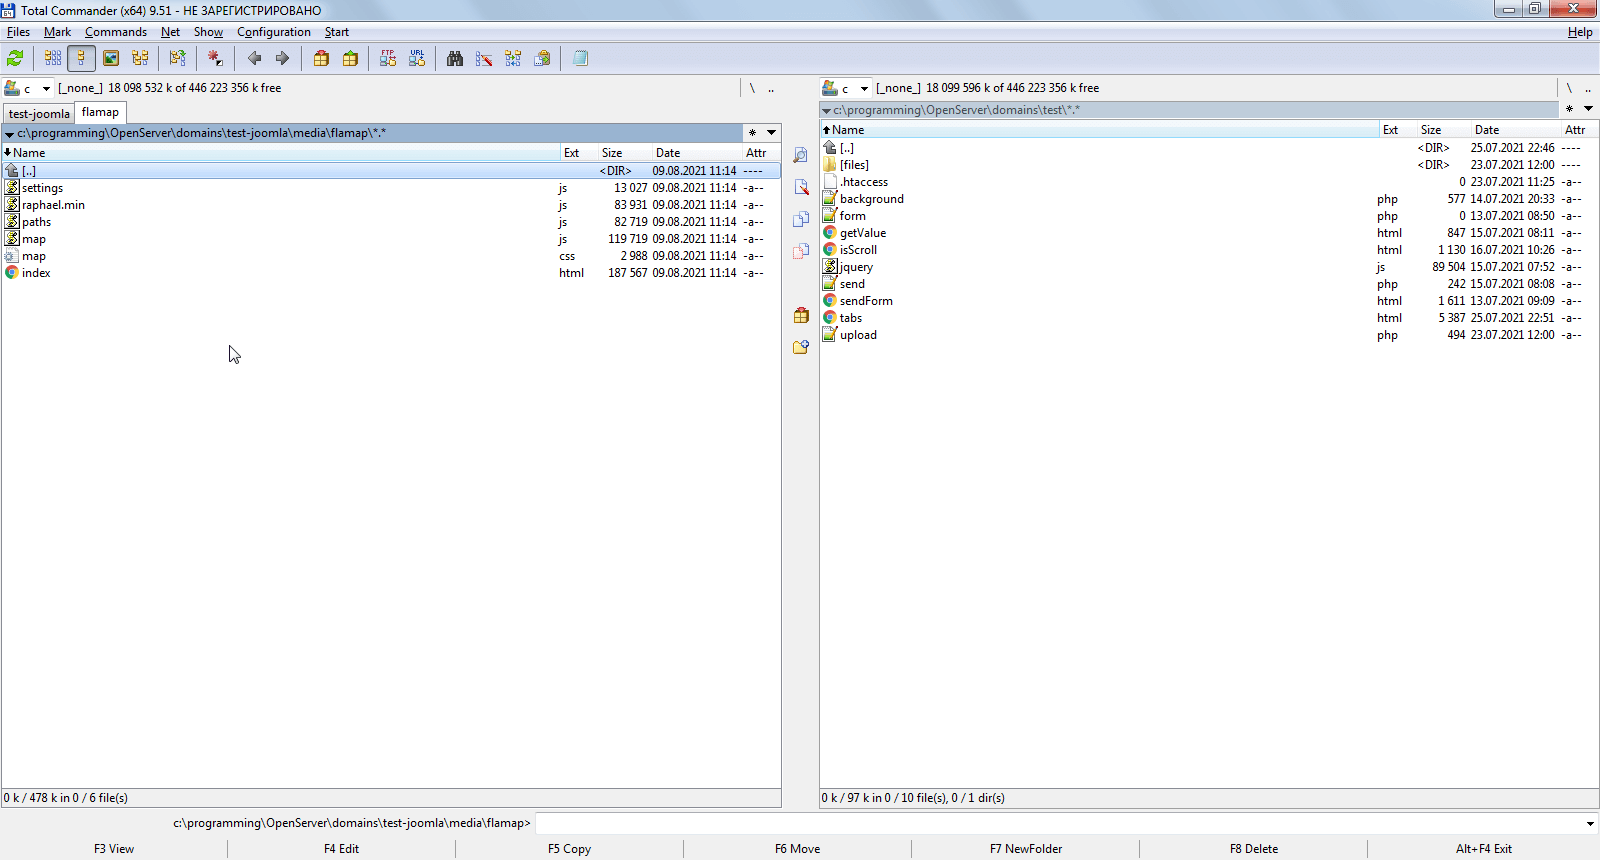
Disabling Joomla filters
Navigate to the control panel. You can use, for instance, the upper menu.
Select the tab "Text filters".
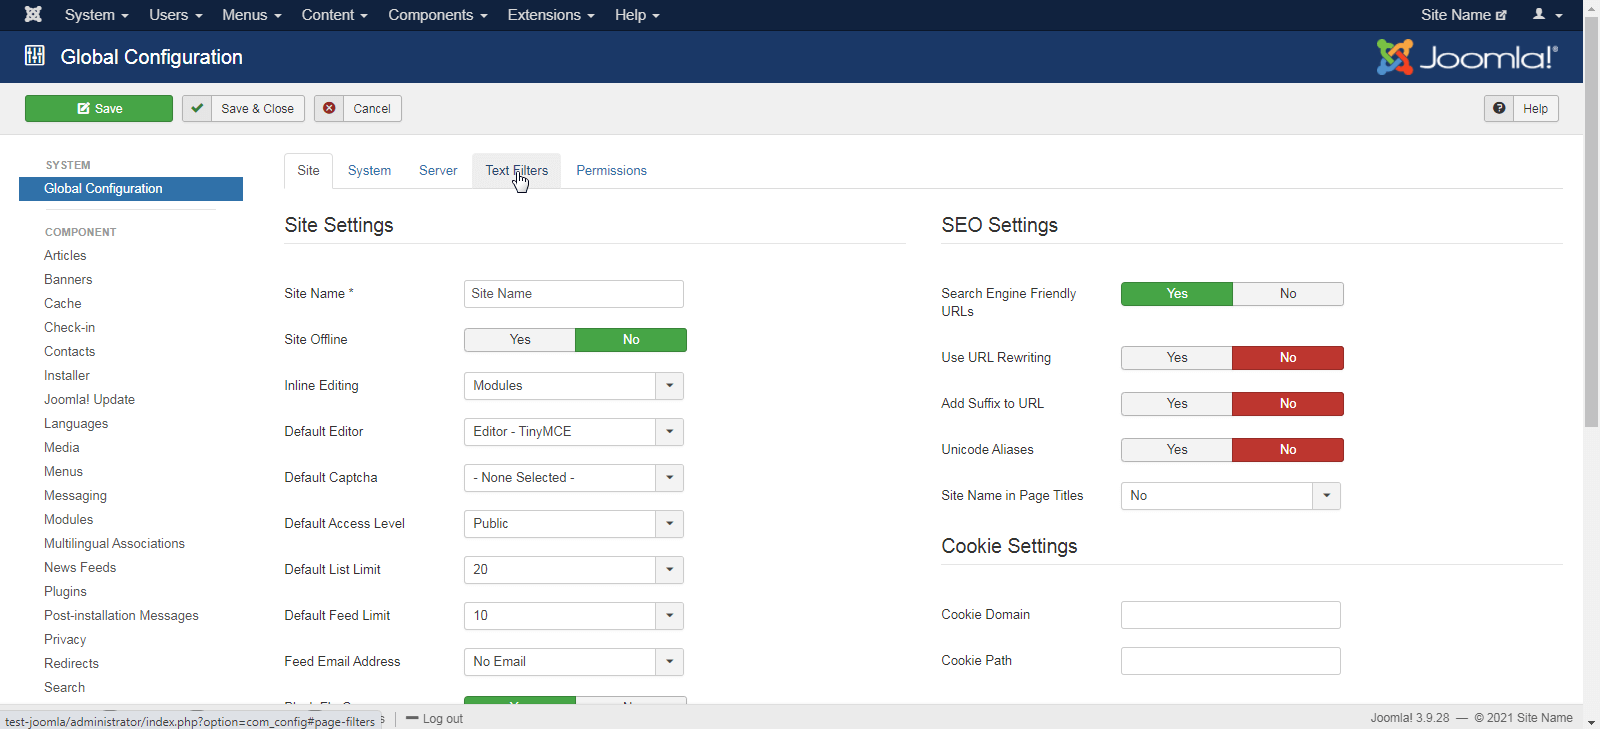
You can find user groups on the left side, while filters are applied to those groups on the right side.
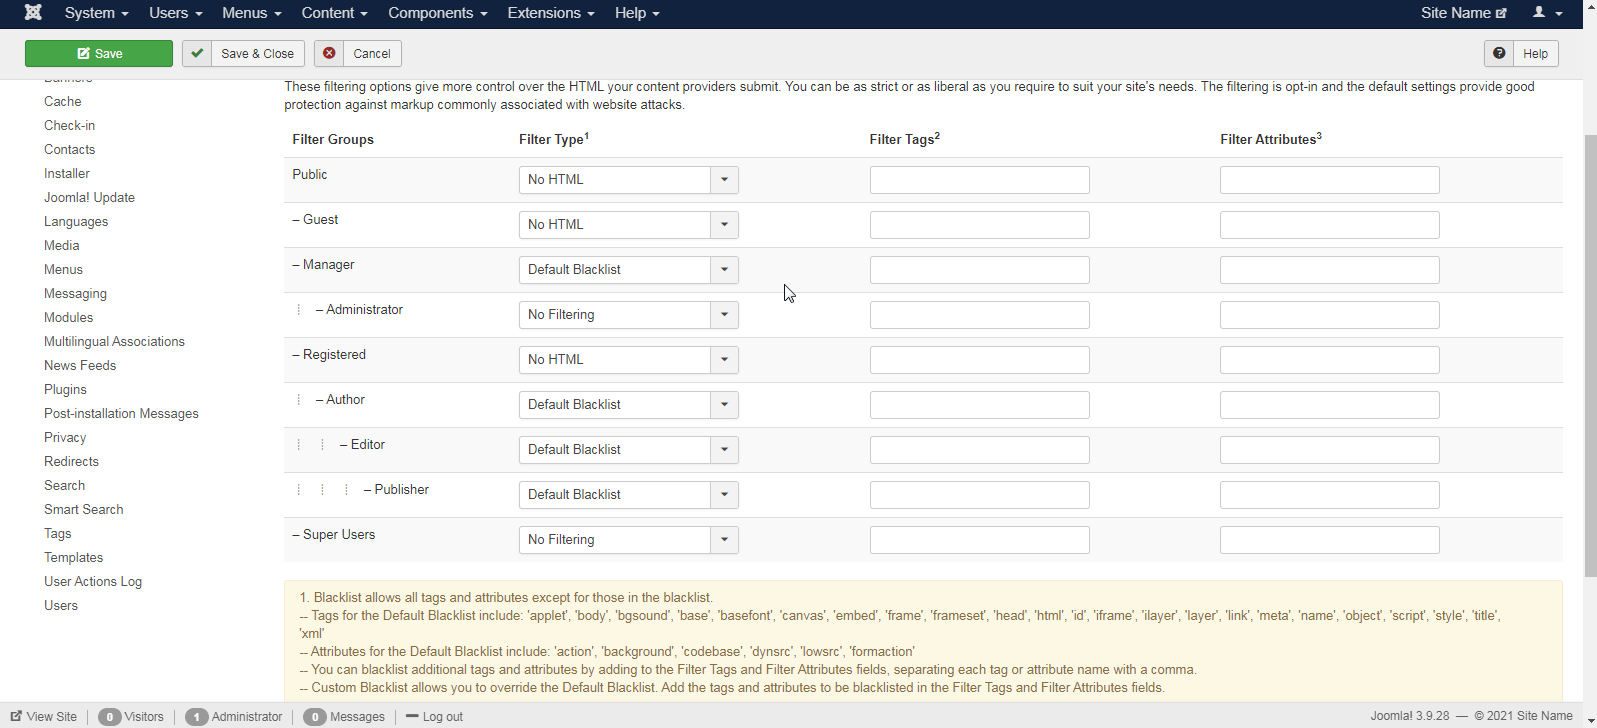
Find a group that your current user belongs to and disable filtering by selecting the "No filtering" option. It should be an administrator group as disabling filters for the group with fewer privileges in some cases may cause security problems. Warning: no matter what, don’t disable the filters for the Guest group! If you do so, any unregistered user can add tags to the input field. For instance, they can add their JavaScript code, including a malicious one, to the comment on your site.
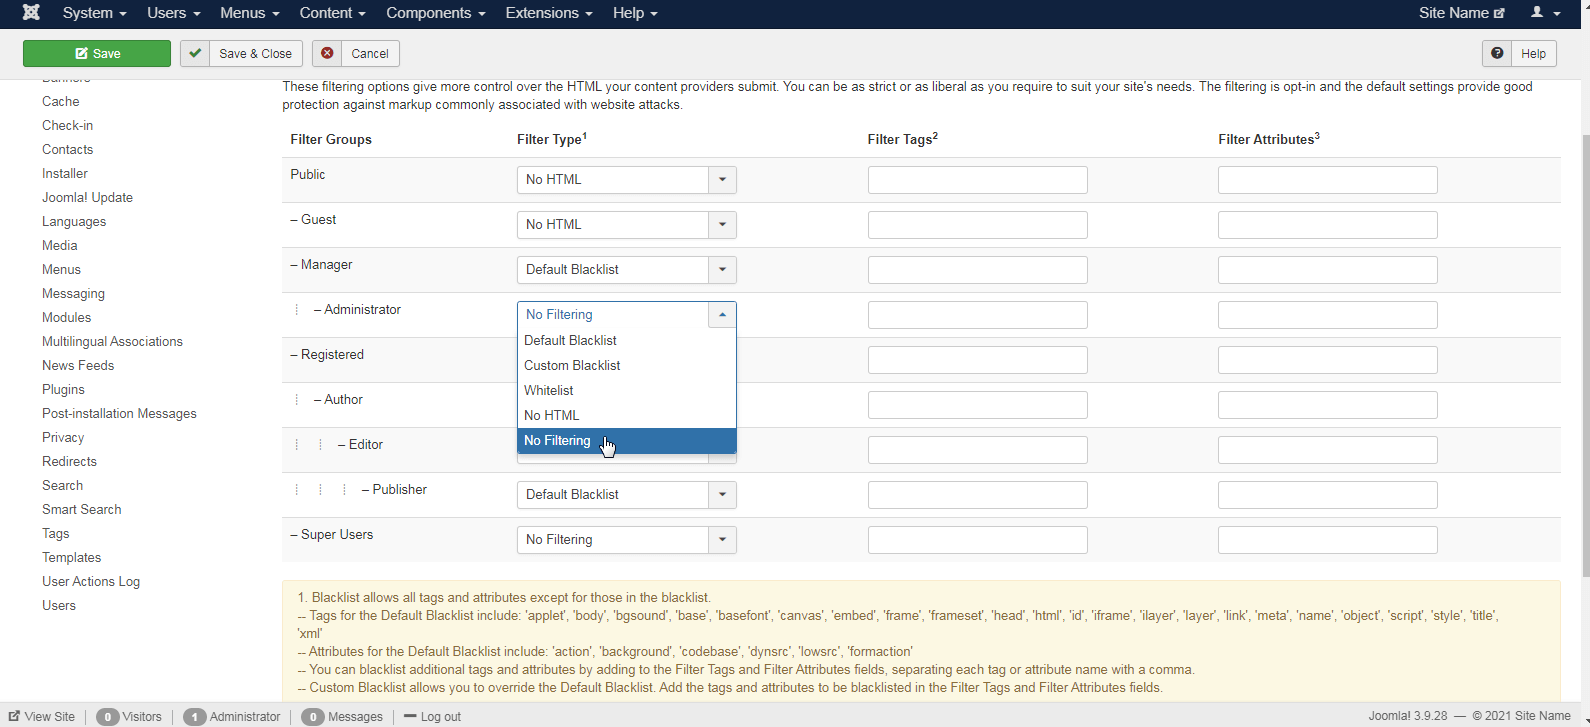
After that, press the "Save" button.
Moreover, instead of entirely disabling the filters, it is possible to customize profile filtering according to your needs, excluding the removal of link and script tags from it. This option is safer as it will still remove some other dangerous tags. But it requires an extra effort on your part.
Disabling filters in the editor settings
Aside from Joomla filters, TinyMCE editor accomplishes pre-filtering, which must also be disabled. Go to the plugin list:
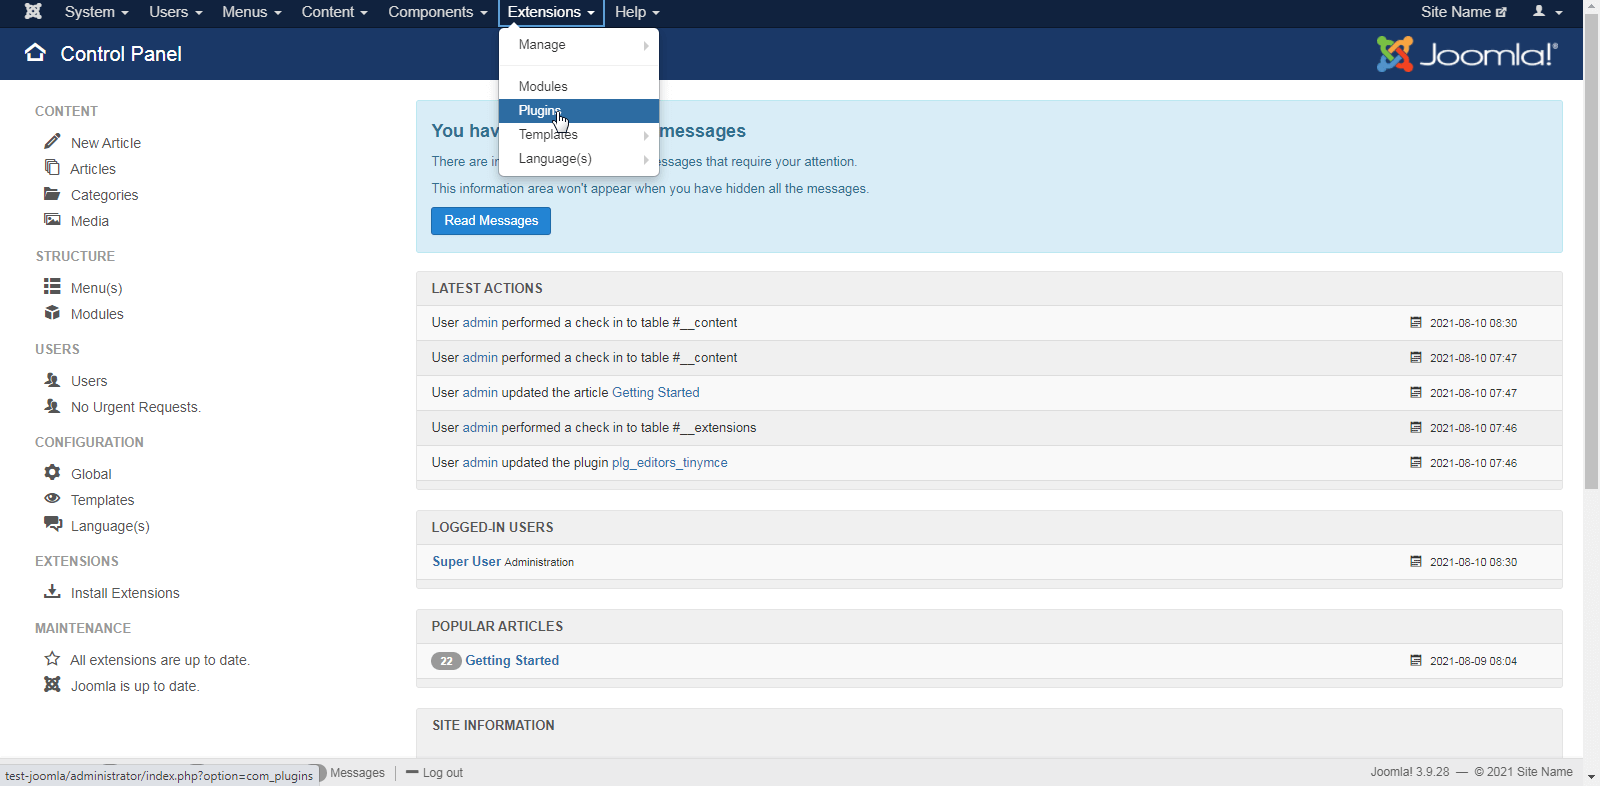
Enter "tinyMCE" to the search field and press Enter. After that, the search will filter plugins, and you will only see the visual editor.
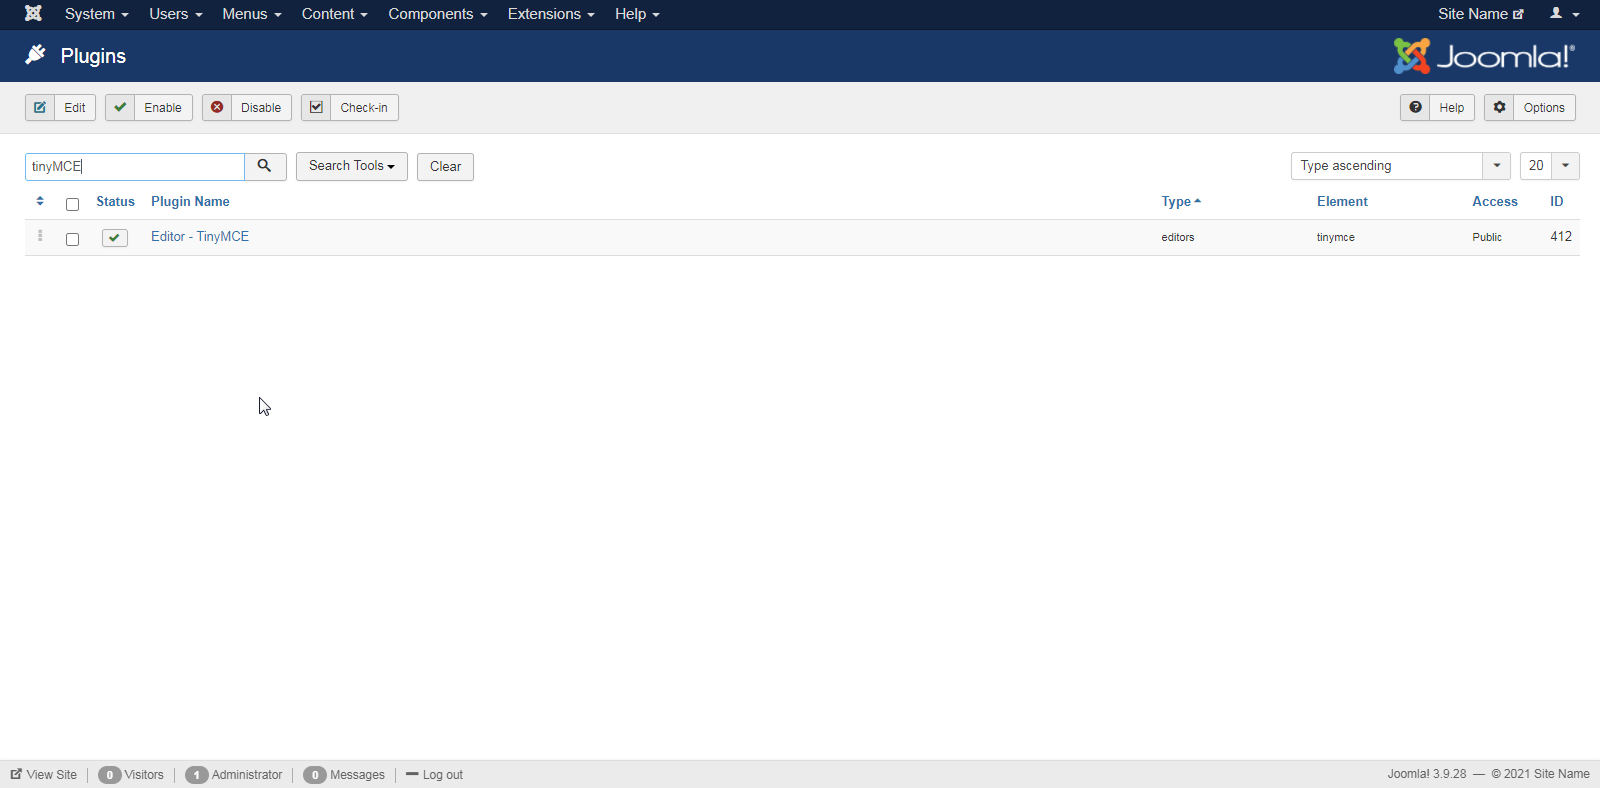
Click on its title.

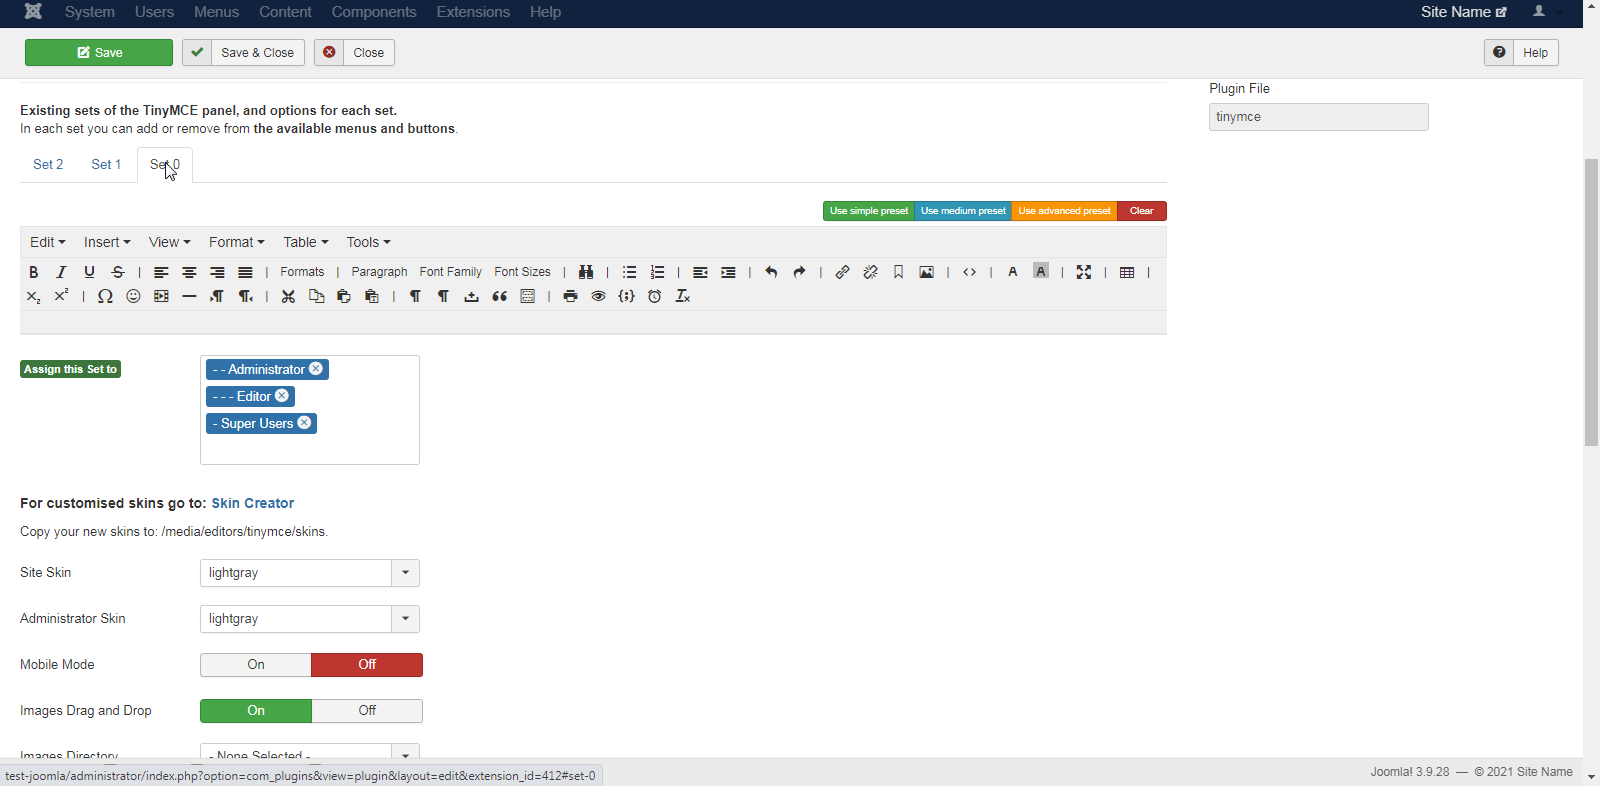
We got on the page of the visual editor settings.

Here, you need to click on the set of settings corresponding to your user group. Most likely, it will be Set 0, which corresponds to administrator, editor, and superuser.
Scroll down the settings and see the option "Use Joomla Text Filter." Turn it on.
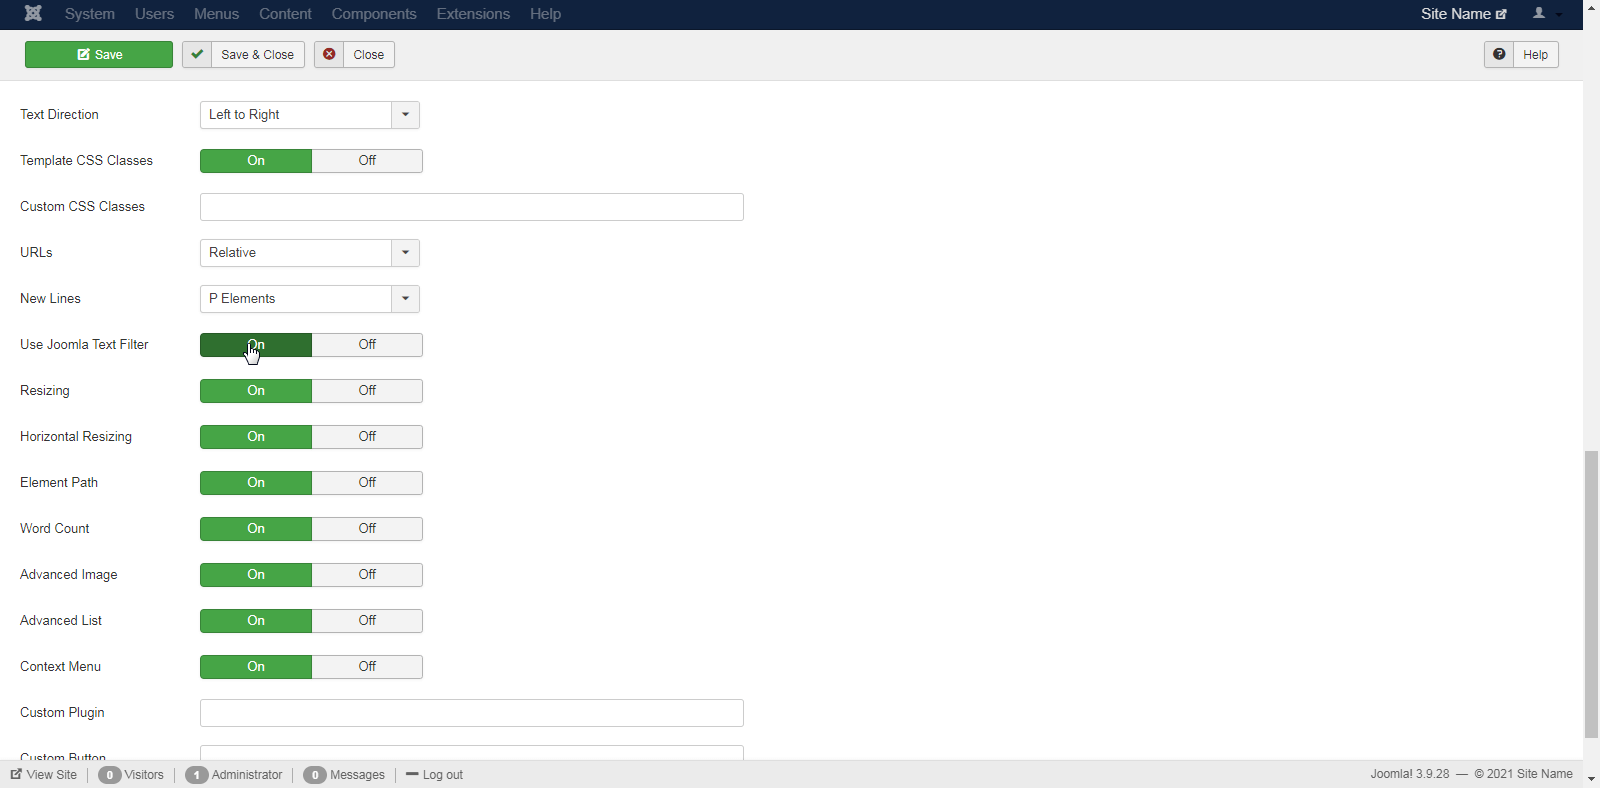
It disables the editor's filtering options and enables filtering settings for the entire CMS. We have already turned off the removal of tags in the previous step. Therefore, it will not cut out tags for the specified user groups. Another option is also available; you can add the script tag with the src attribute and the link tag with rel and href attributes to the list of allowed for these groups and remove the script tag from the list of prohibited ones. In this case, it will look something like this:
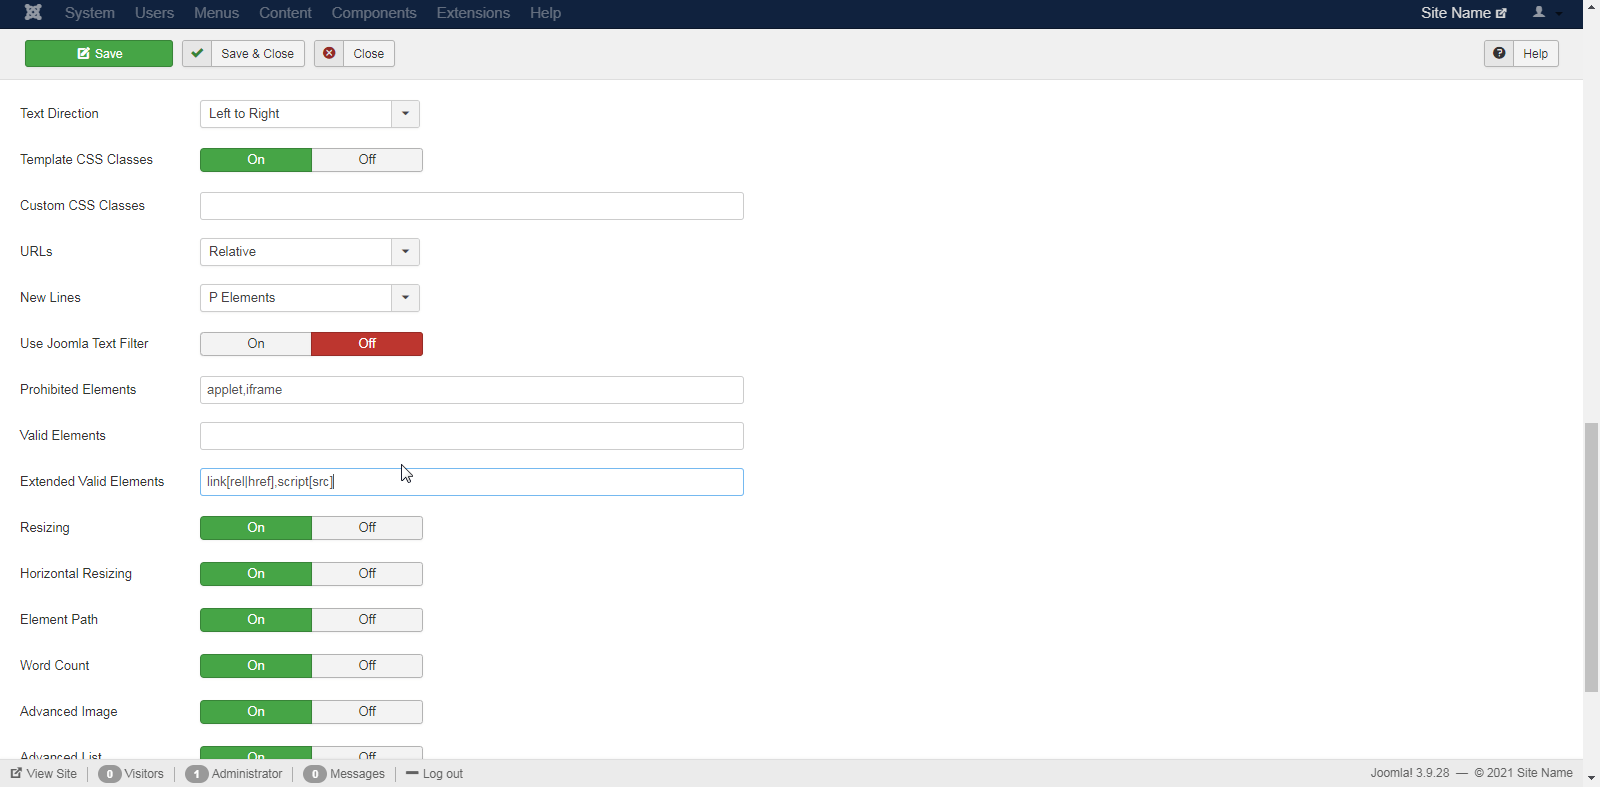
This method is more secure, even if it requires extra effort.
Now, click the "Save & Close" button.
Method 1. Simple insertion of a code with a map to an article
To use this method, you need to perform both preparatory operations - add files with a map to the server and disable text filters (at least disable filtering for link and script tags). They are described above in detail.
Inserting the code to the article
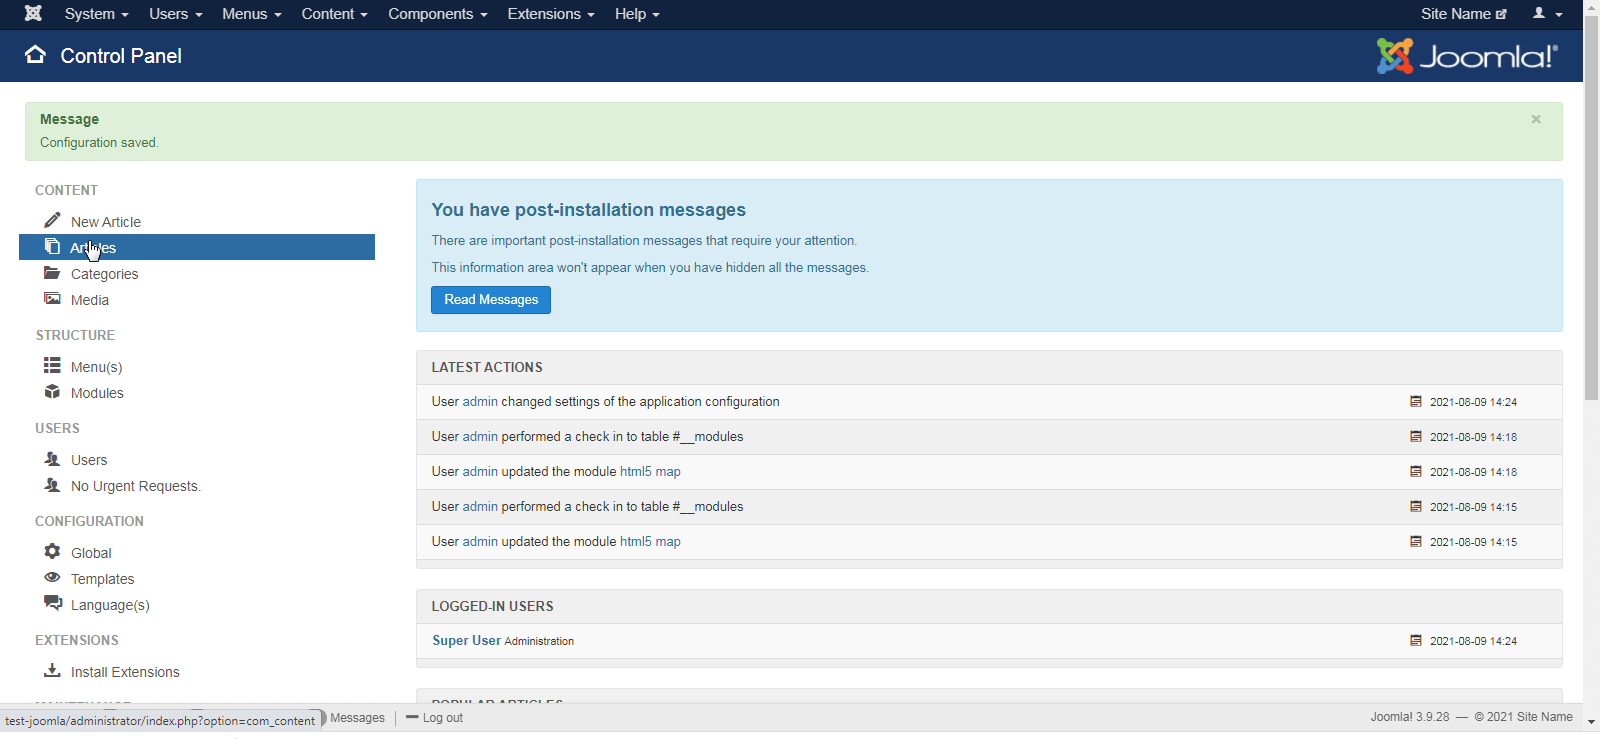
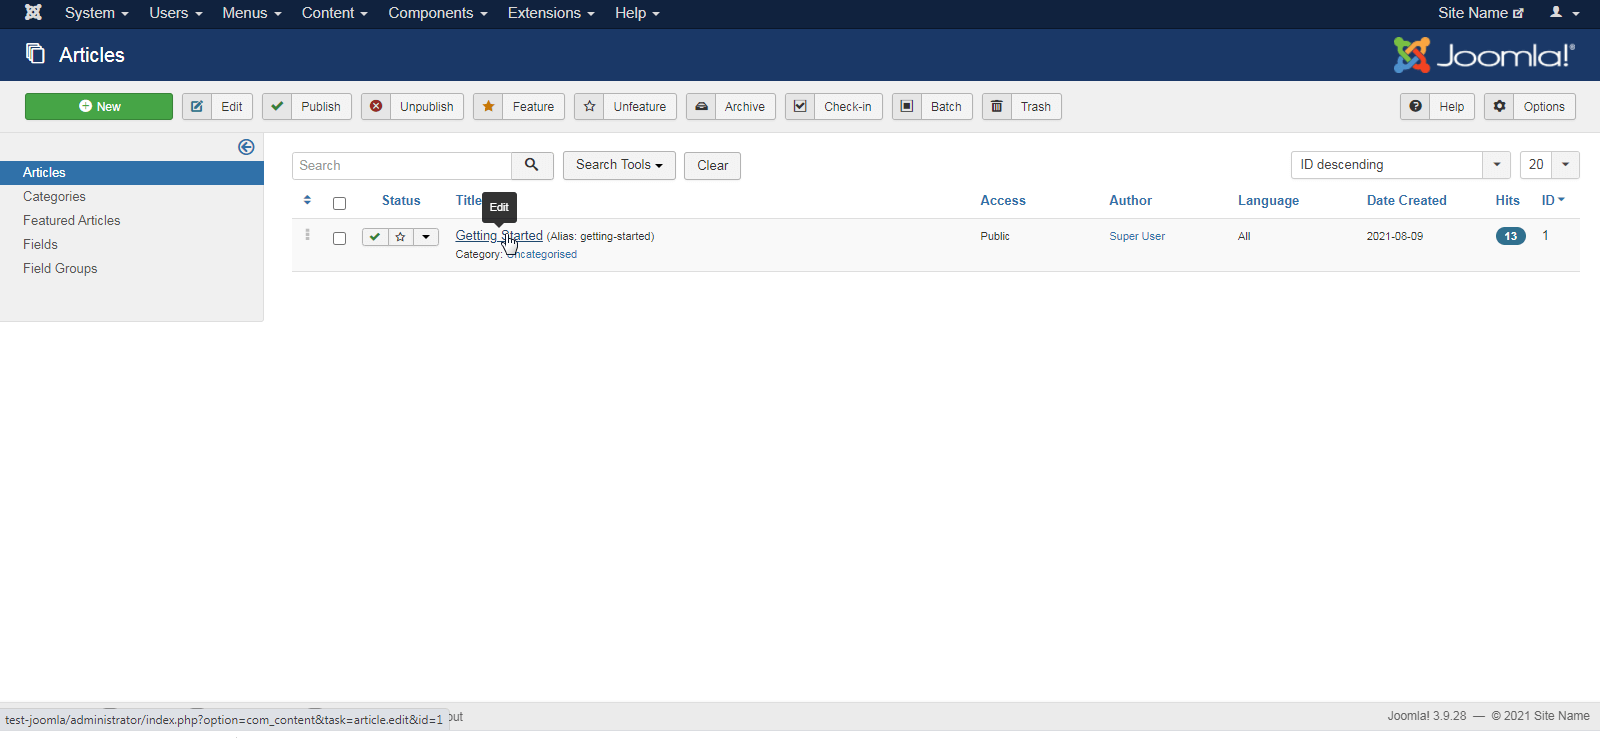
Navigate to the list of articles.

Select the article where we want to add the map by navigating to edit it.
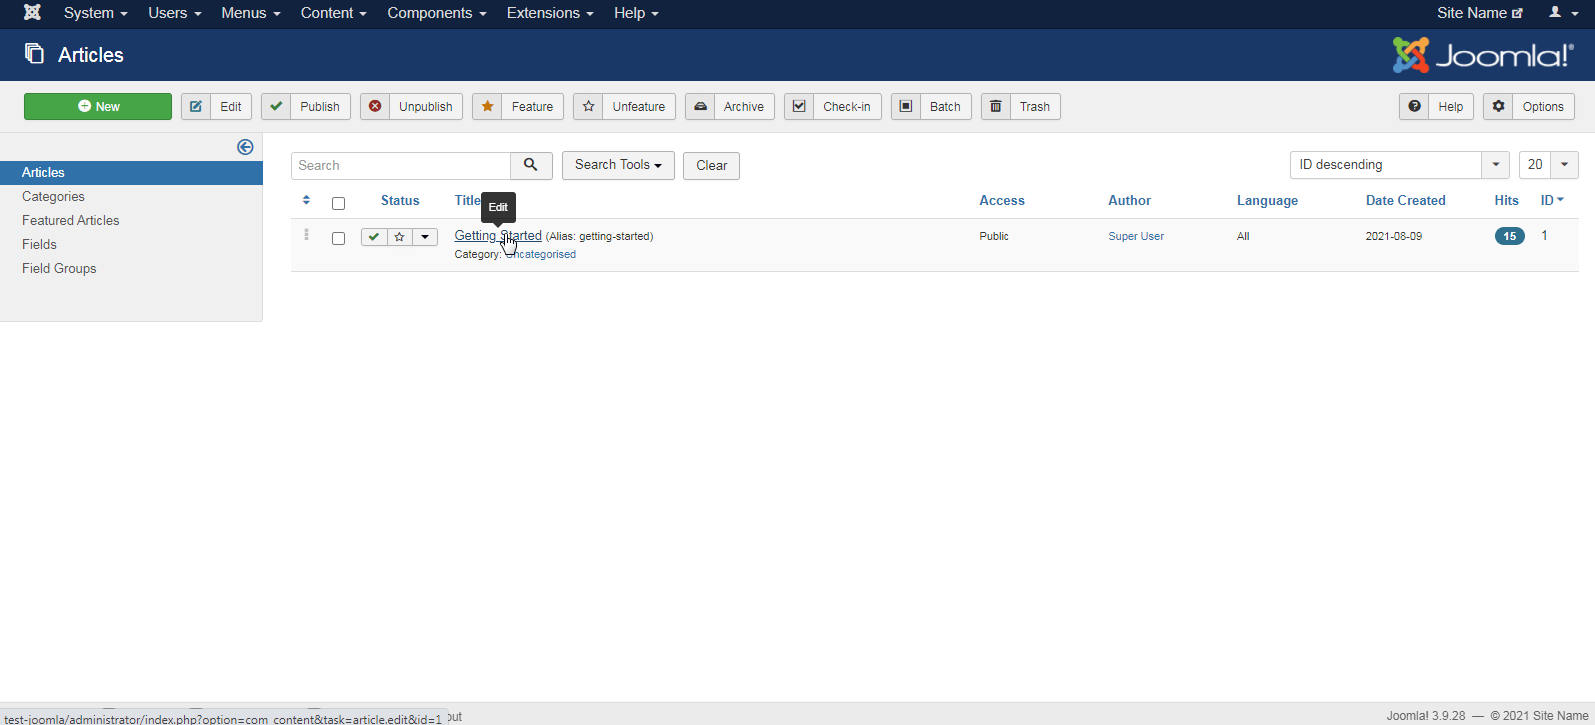
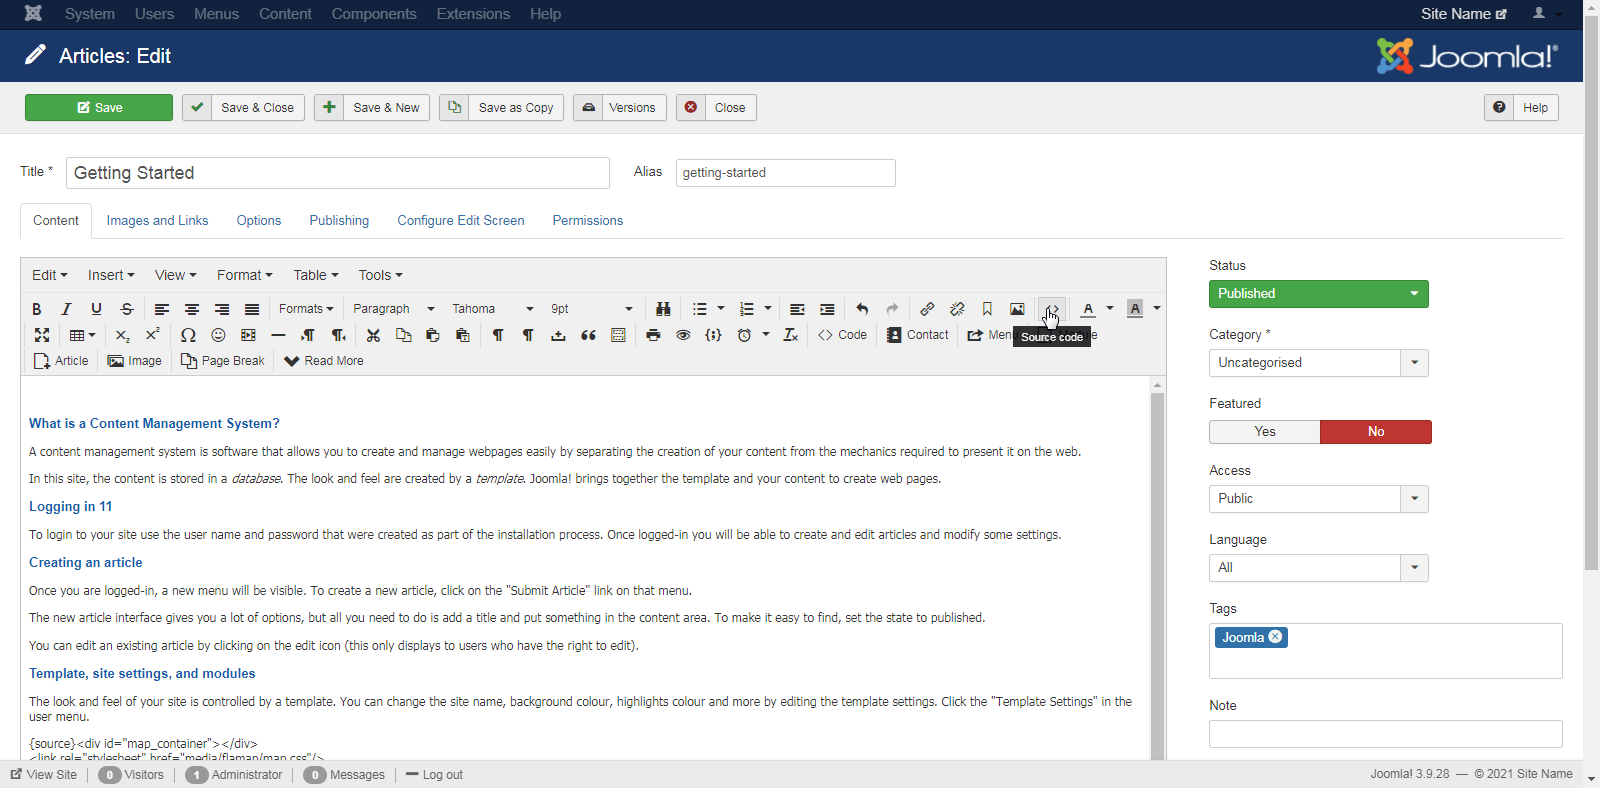
Press the button for editing the source code — "Source Code."
To add the map to the clipboard, copy this code:
<div id="map_container"></div>
<link rel="stylesheet" href="media/flamap/map.css"/>
<script src="media/flamap/raphael.min.js"></script>
<script src="media/flamap/settings.js"></script>
<script src="media/flamap/paths.js"></script>
<script src="media/flamap/map.js"></script>
<script>
  let map=new FlaMap(map_cfg);
  map.drawOnDomReady('map_container');
</script>
Put the cursor in the right place in the article and insert the map code there. In this example, we will insert it at the beginning of the article:
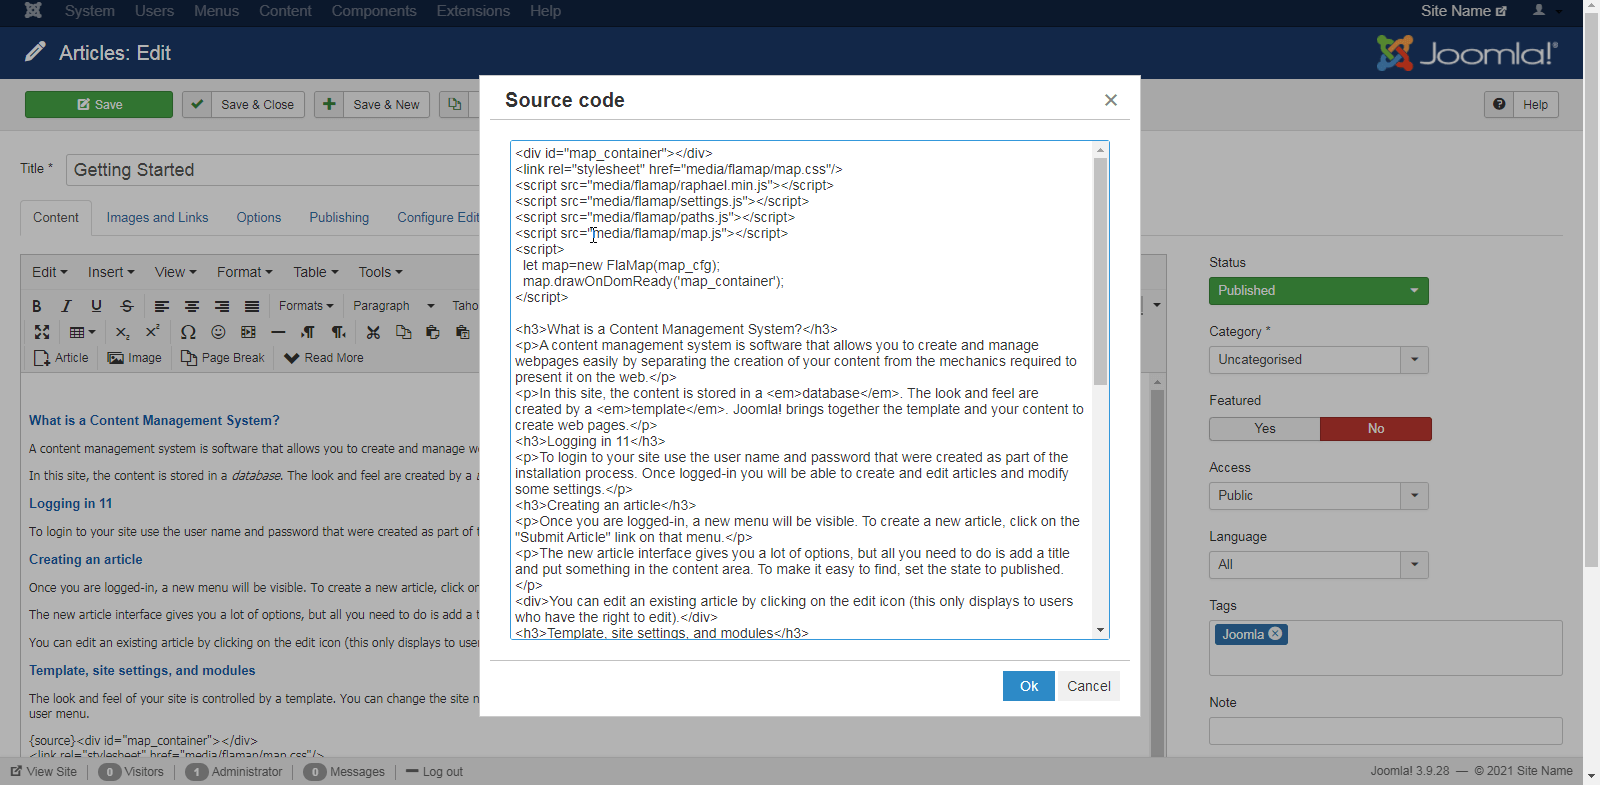
Click"Ok." After that, nothing changed visually, yet the code should already be there; it just does not appear in the editor:
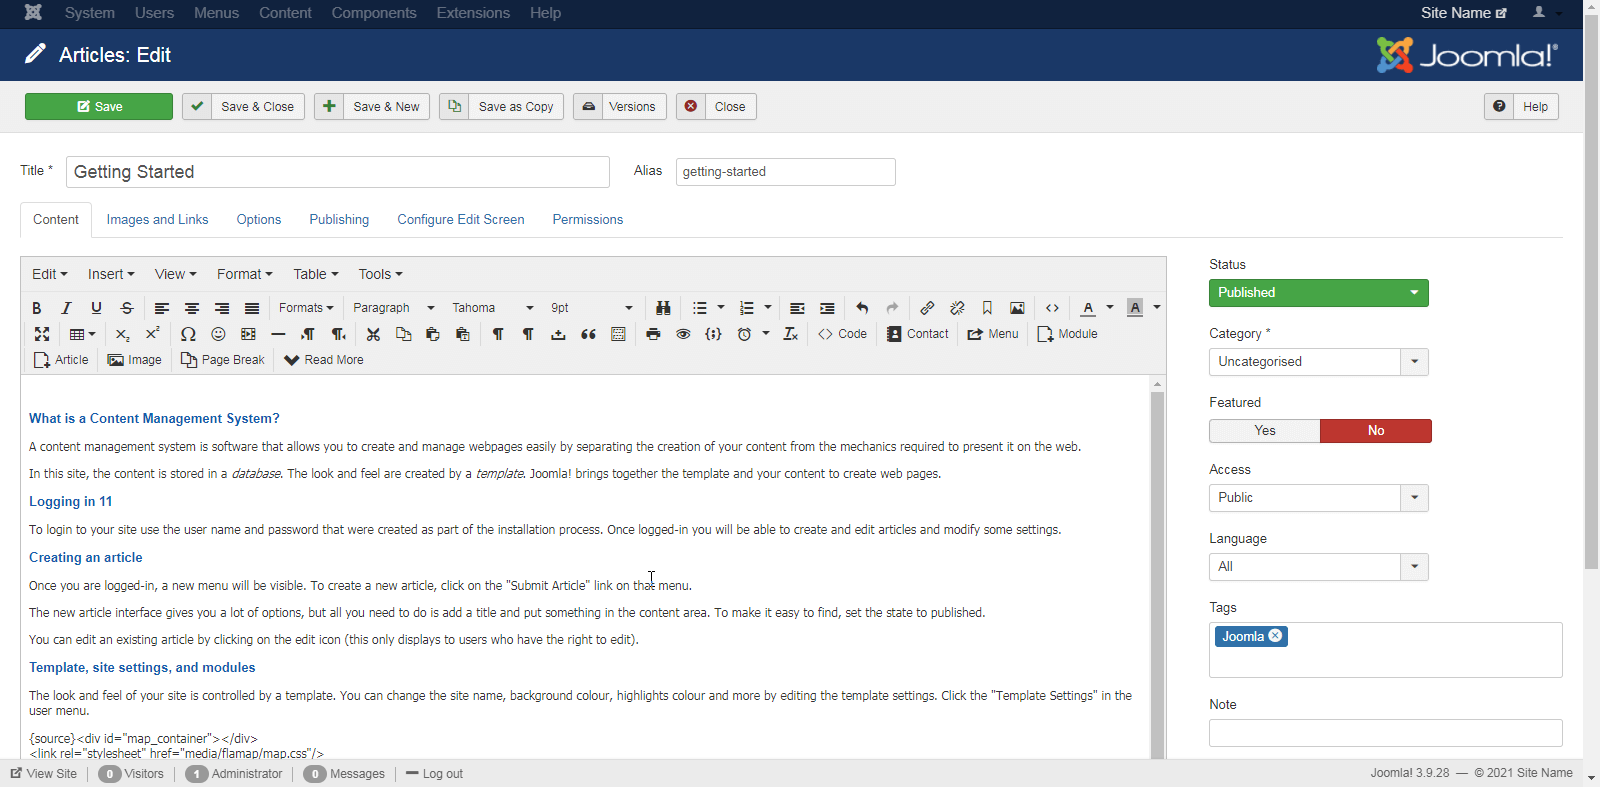
To check whether it really disappeared, you can press the "Source Code" button again. By pressing it, we see that it is in place:
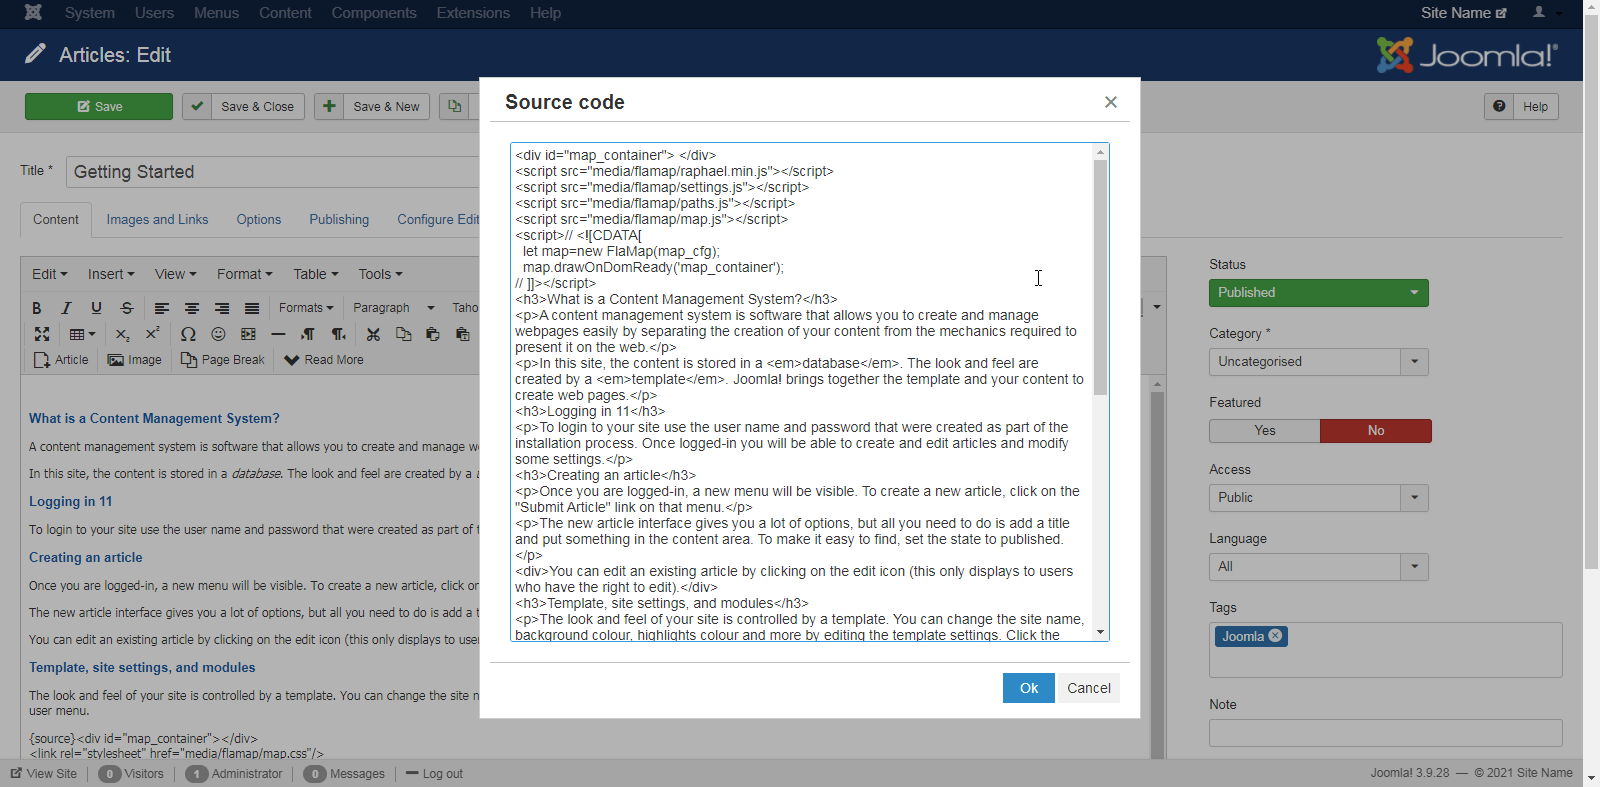
The editor changed it slightly; nevertheless, the map should still work. Close the window with the code and click the button that saves the article.
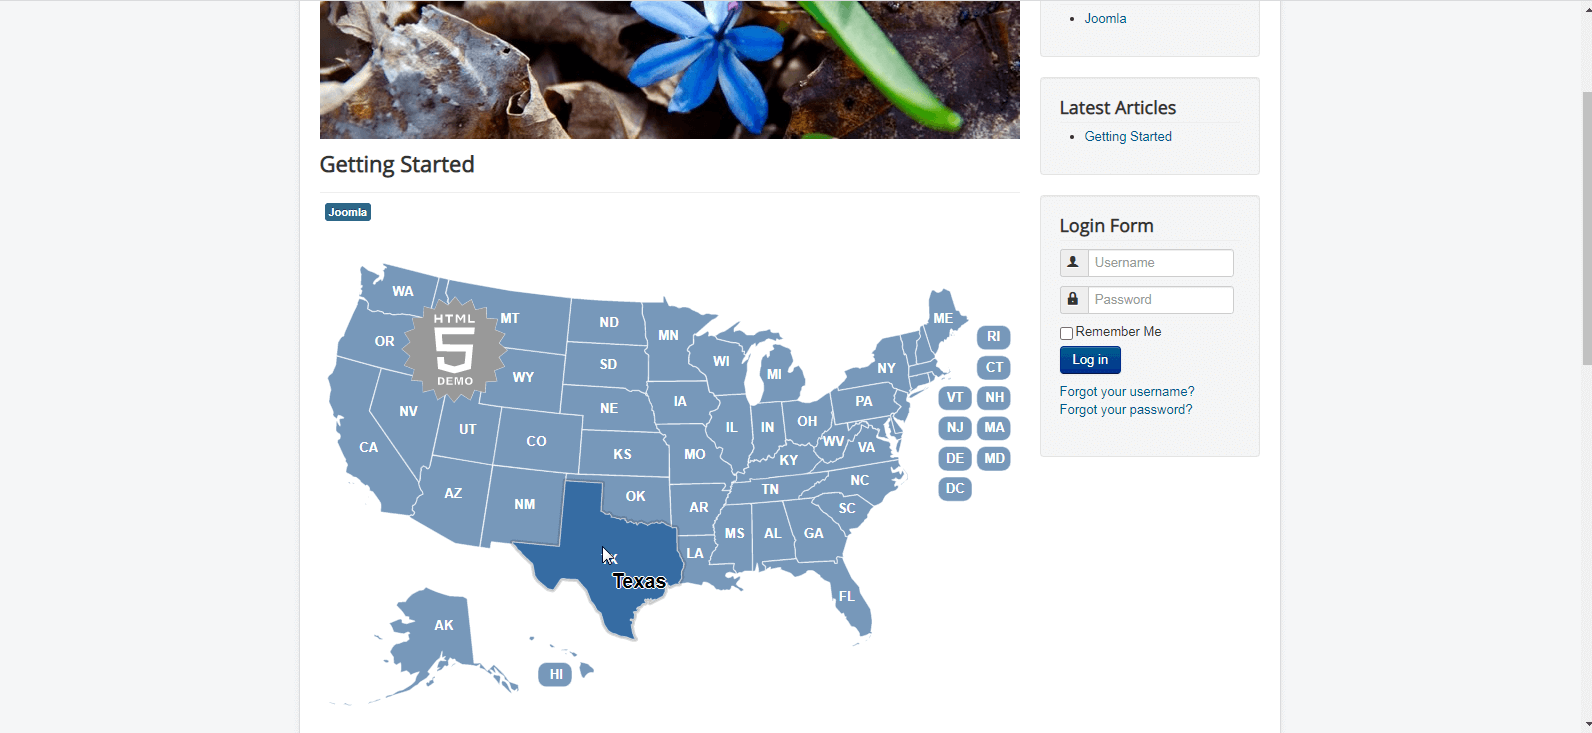
Then, go to the public part of the site and see the result:
Method 2. Adding an interactive map using a custom module
To implement this method, it is necessary to complete the preparatory steps described above for adding files with a map to the server and disabling text filters. Then you need to create a Custom module, save the code for adding a map to it, and then add the module to the desired article in Joomla.
Creating a custom module
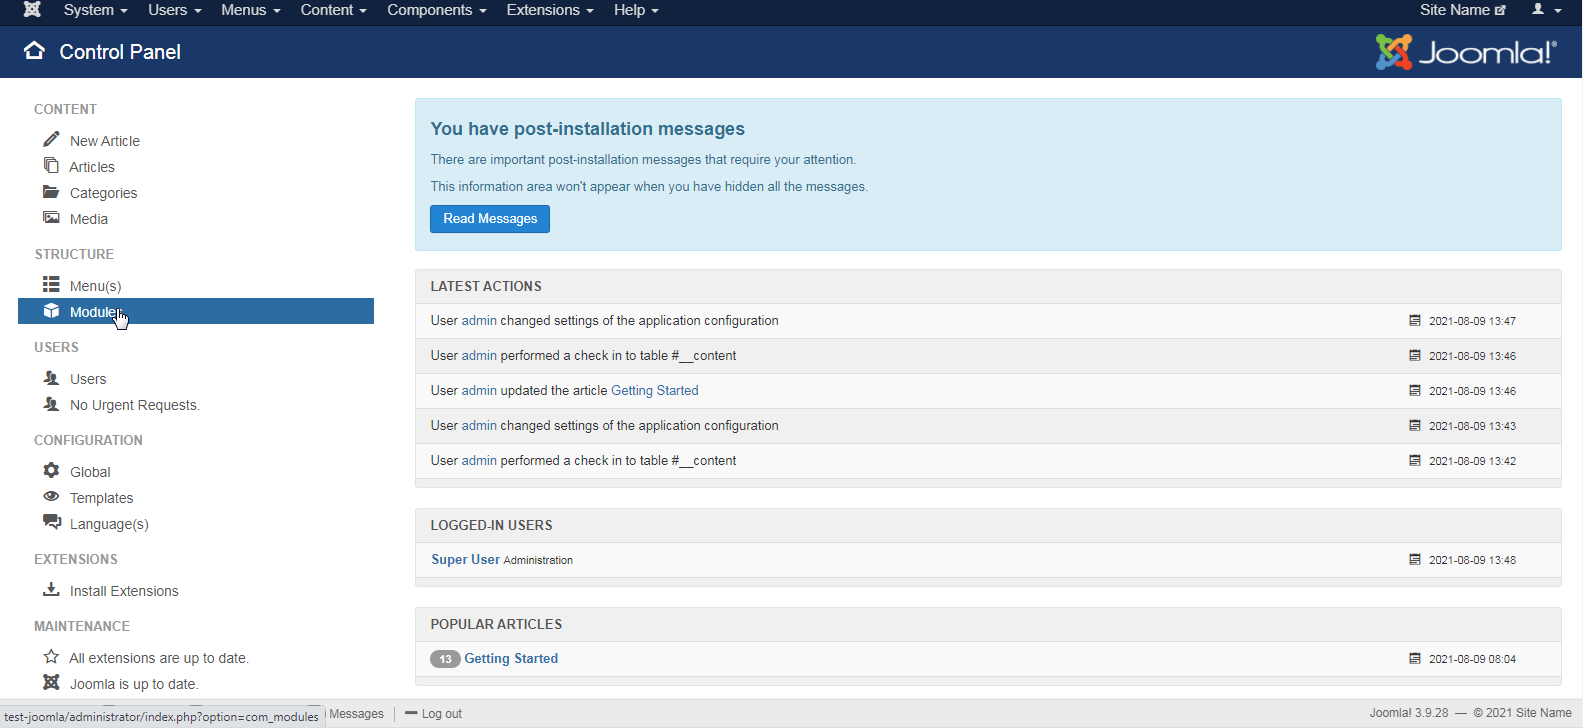
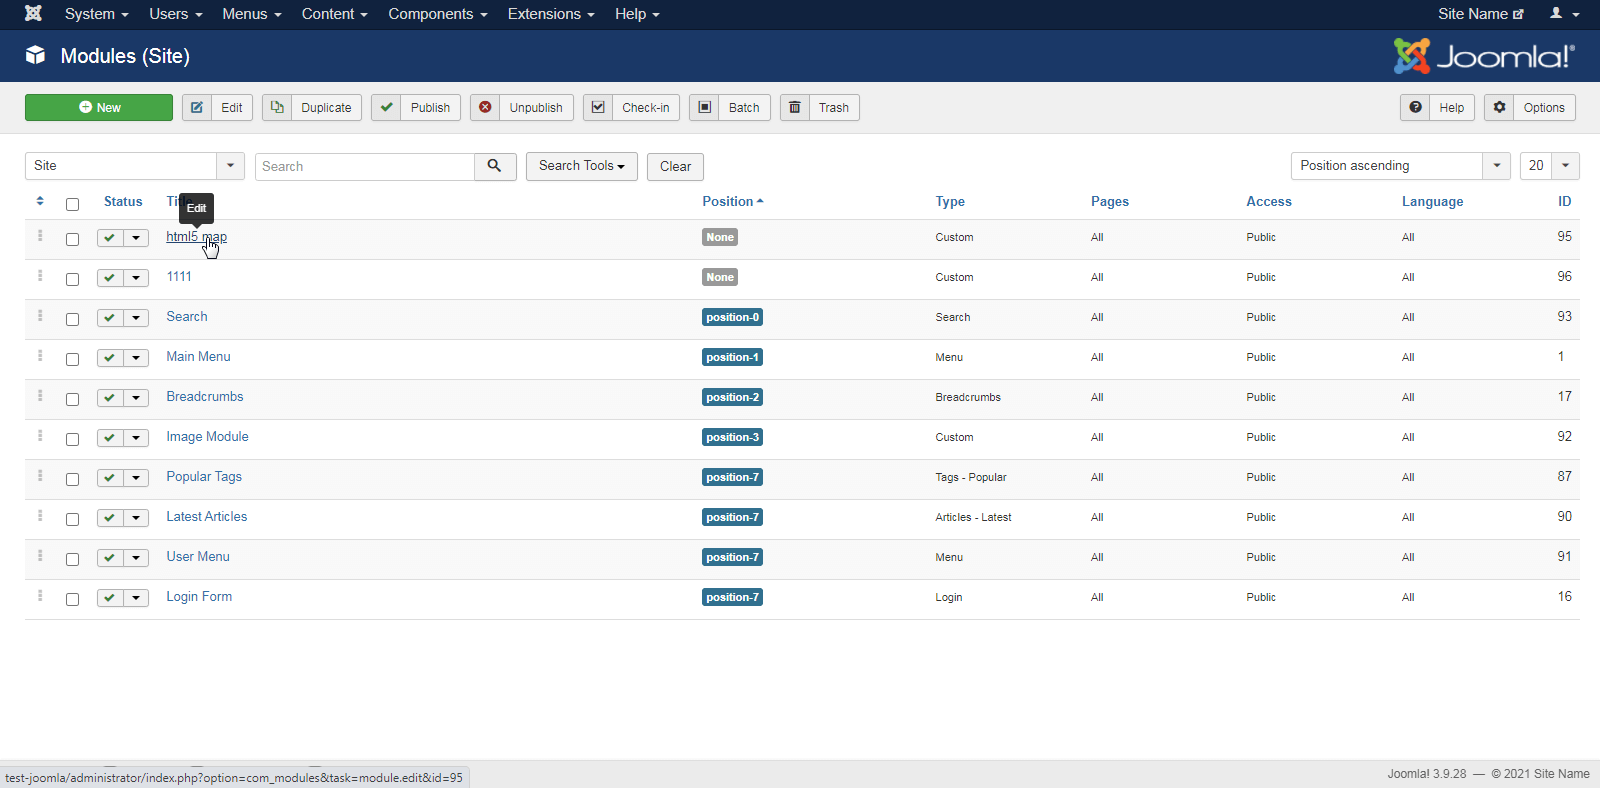
Navigate to the Joomla admin panel, click "Modules" in the left menu.
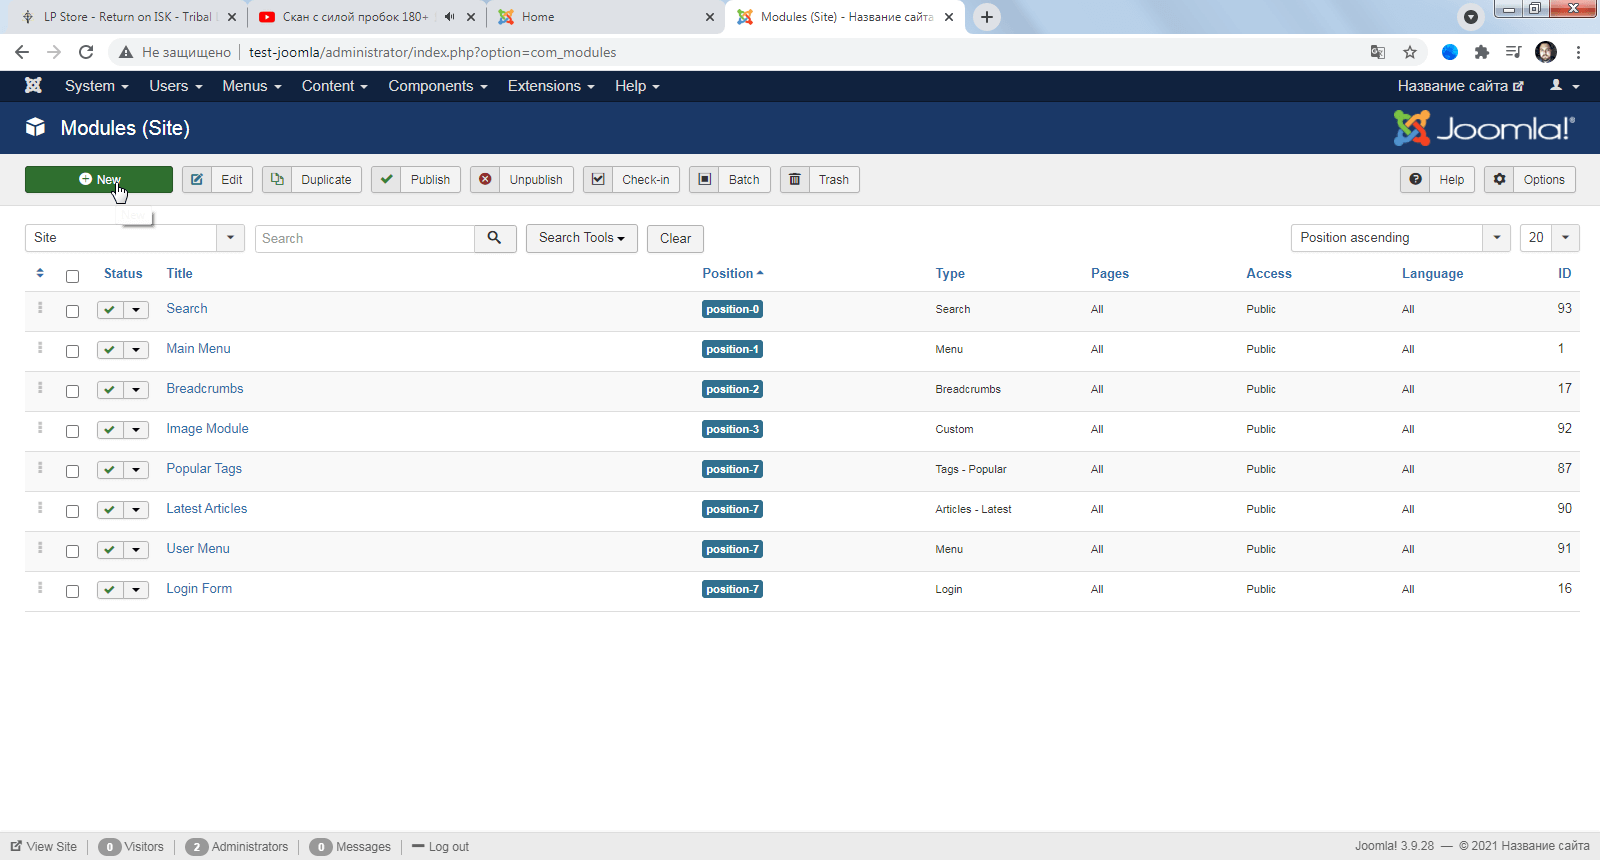
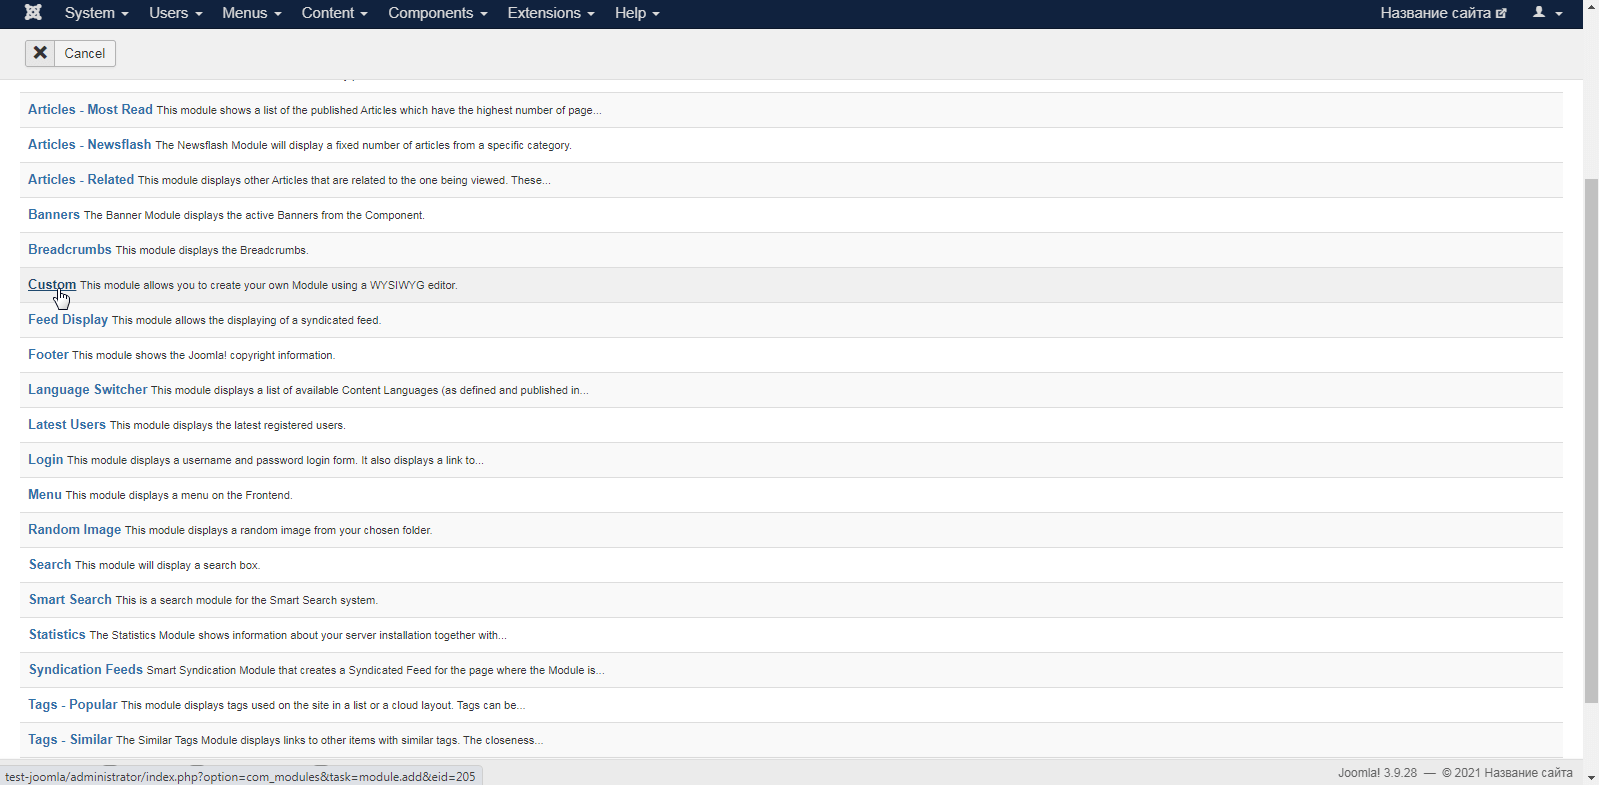
Click the "New" button to create a new module.
Select the type of the module "Custom." It allows you to independently enter HTML and JavaScript code into the module, including the required one to connect our map.
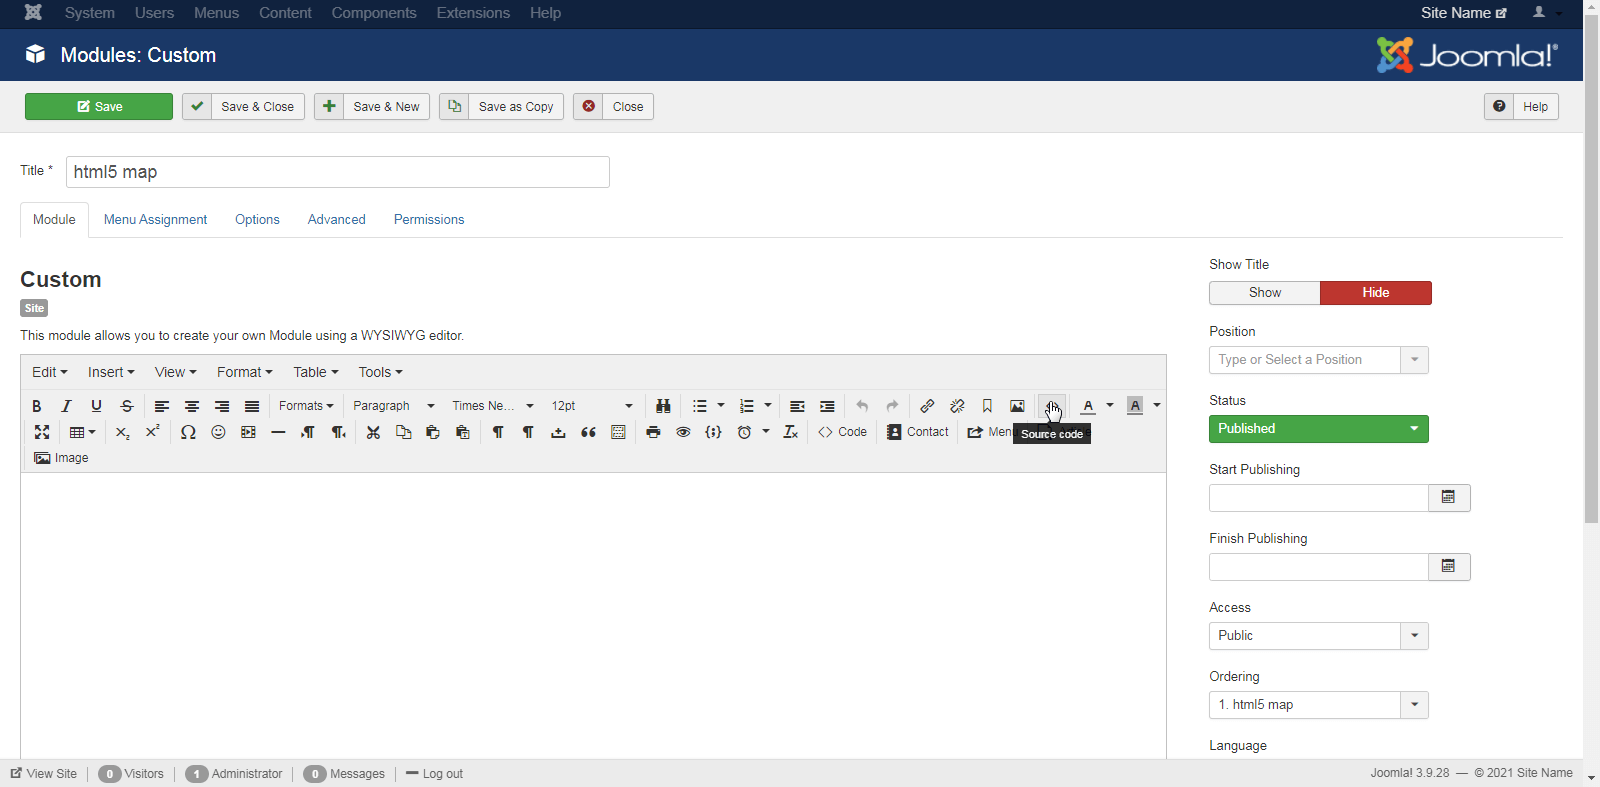
Write down the module’s name. Then press the "Source Code" button if the visual editor is enabled.
Paste the following code into the input field to load and create a map:
<div id="map_container"></div>
<link rel="stylesheet" href="media/flamap/map.css"/>
<script src="media/flamap/raphael.min.js"></script>
<script src="media/flamap/settings.js"></script>
<script src="media/flamap/paths.js"></script>
<script src="media/flamap/map.js"></script>
<script>
  let map=new FlaMap(map_cfg);
  map.drawOnDomReady('map_container');
</script>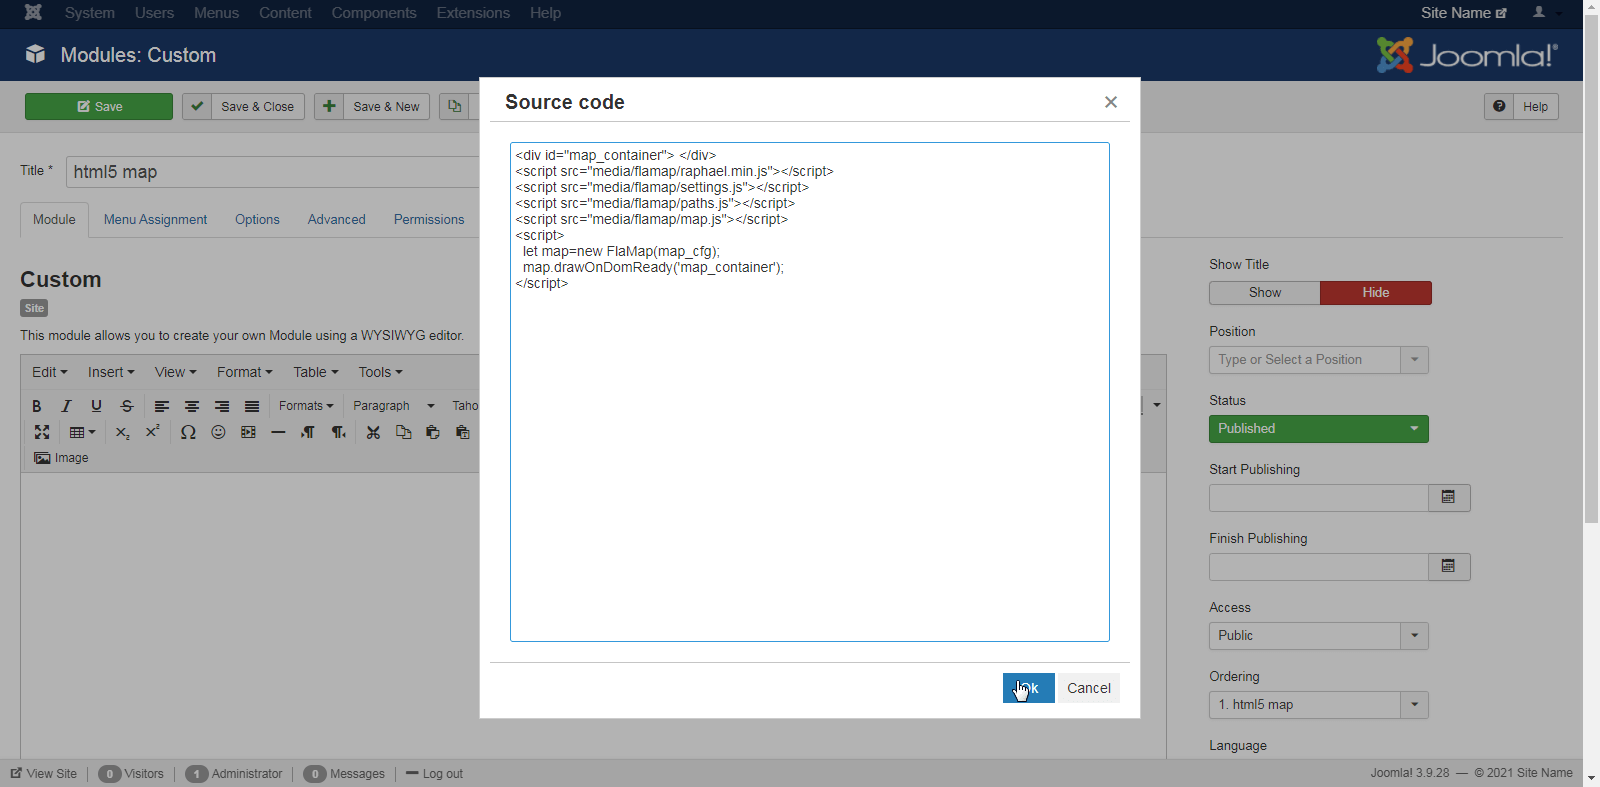
After that, press the "OK" button. The result is not visible in the visual editor since the inserted code does not run in it, but there is now a map code in it.
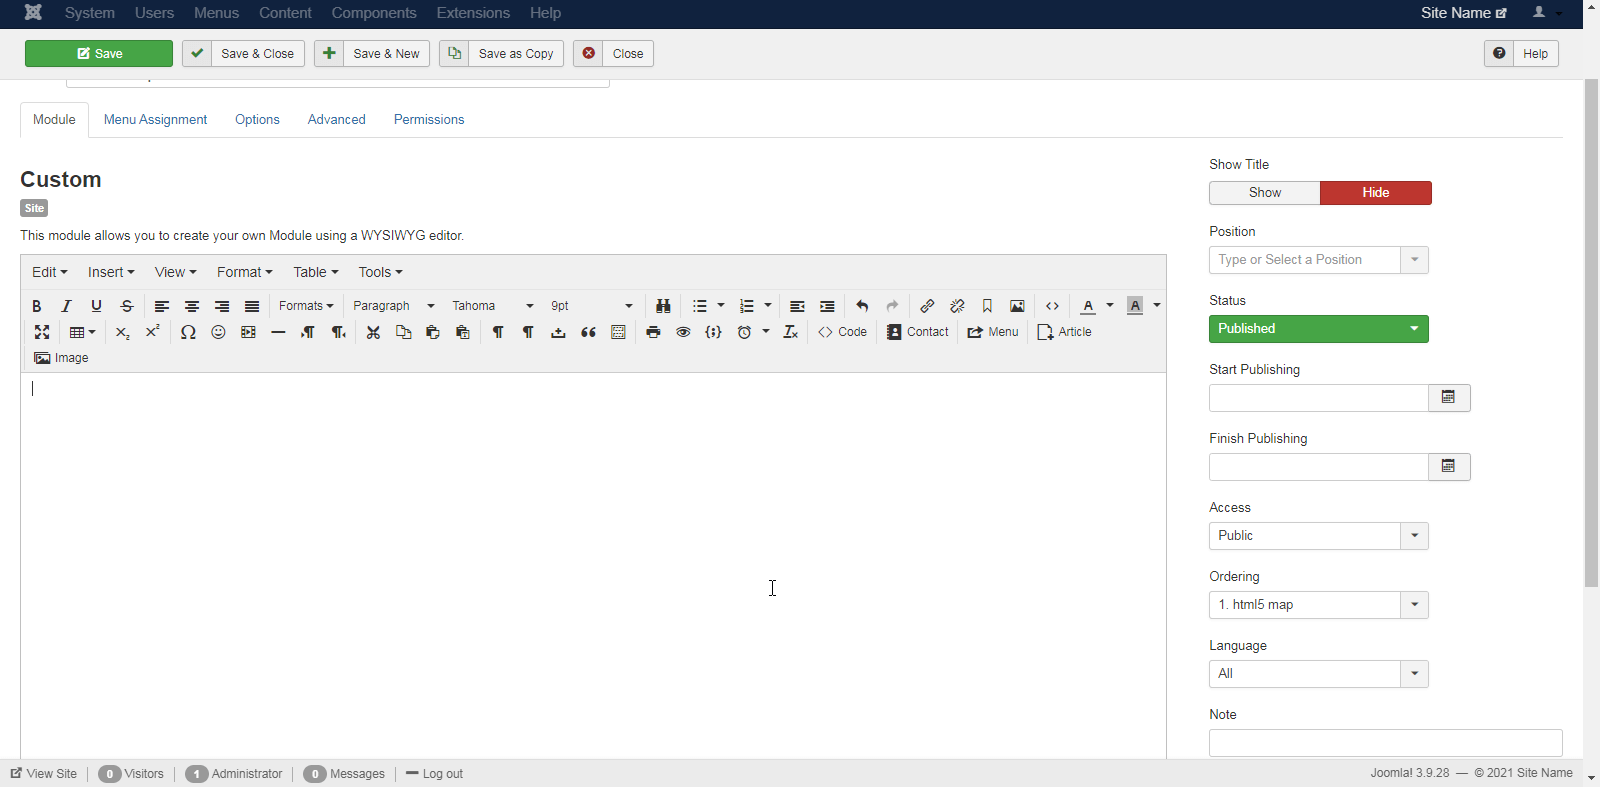
It is possible to check its availability by pressing the "Source Code" button again. Then we will see the following:
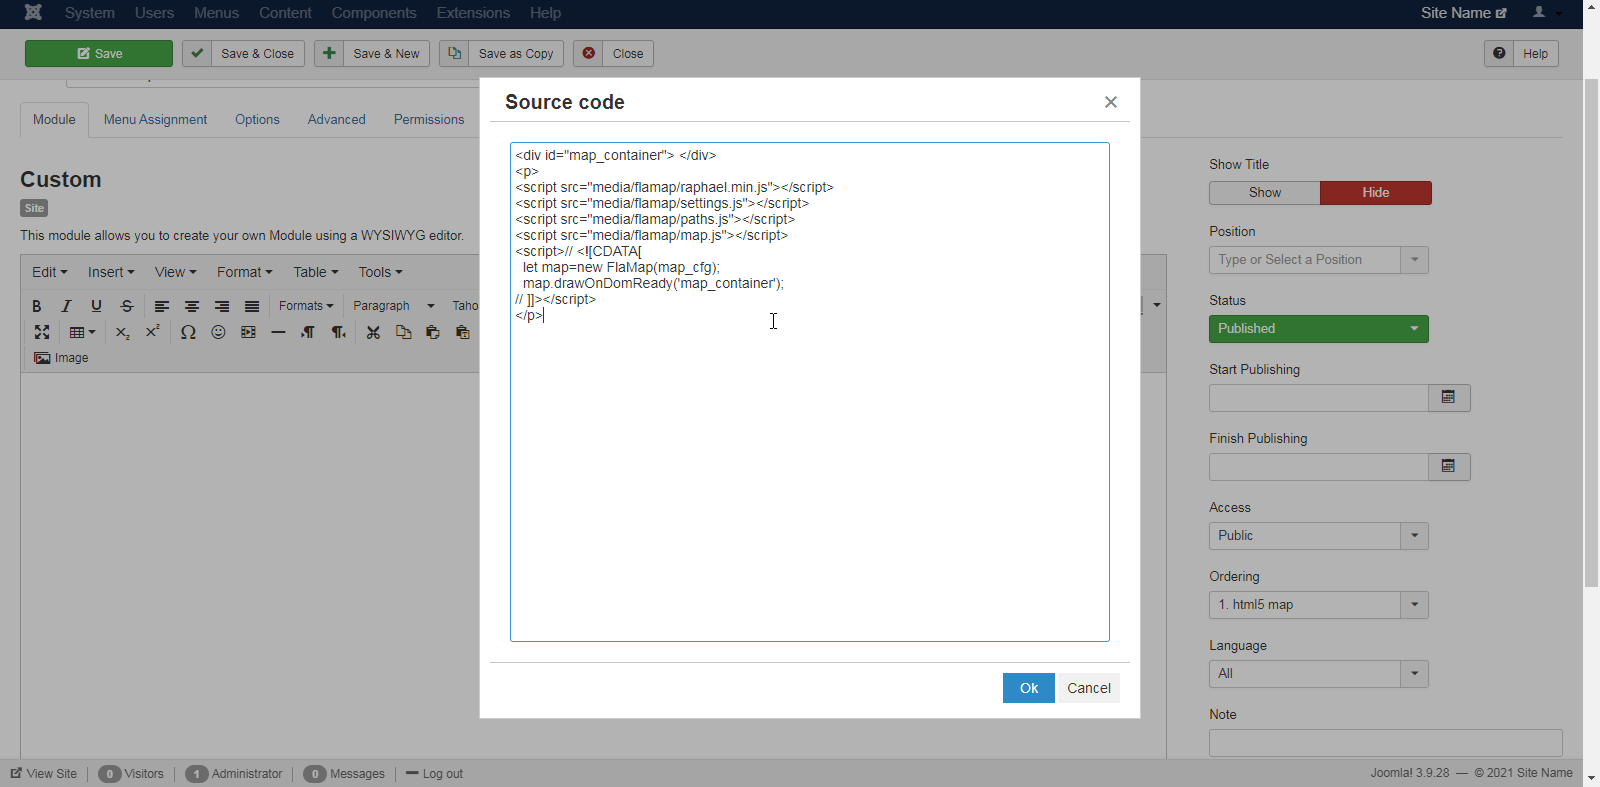
We can see that the code has changed slightly, but it will still work. This window can now be closed.
You can also disable the "Show Title" option by setting it to the "Hide" value if you do not want the module name you entered to be displayed along with the map. After that, we press the "Save & Close" button to save the module and close the current interface.
Now, we can see that our module has appeared in the list.
Inserting a module with a map to the article
Navigate to the list of articles by clicking on the corresponding item in the left menu.
In the list of articles, select where we want to add a map. Click on its title to switch to edit mode.
On the editing page, place the cursor where we want to put the map and press the "+ Module" button. This will add the module with the map that we created to the article.

Click on our module.
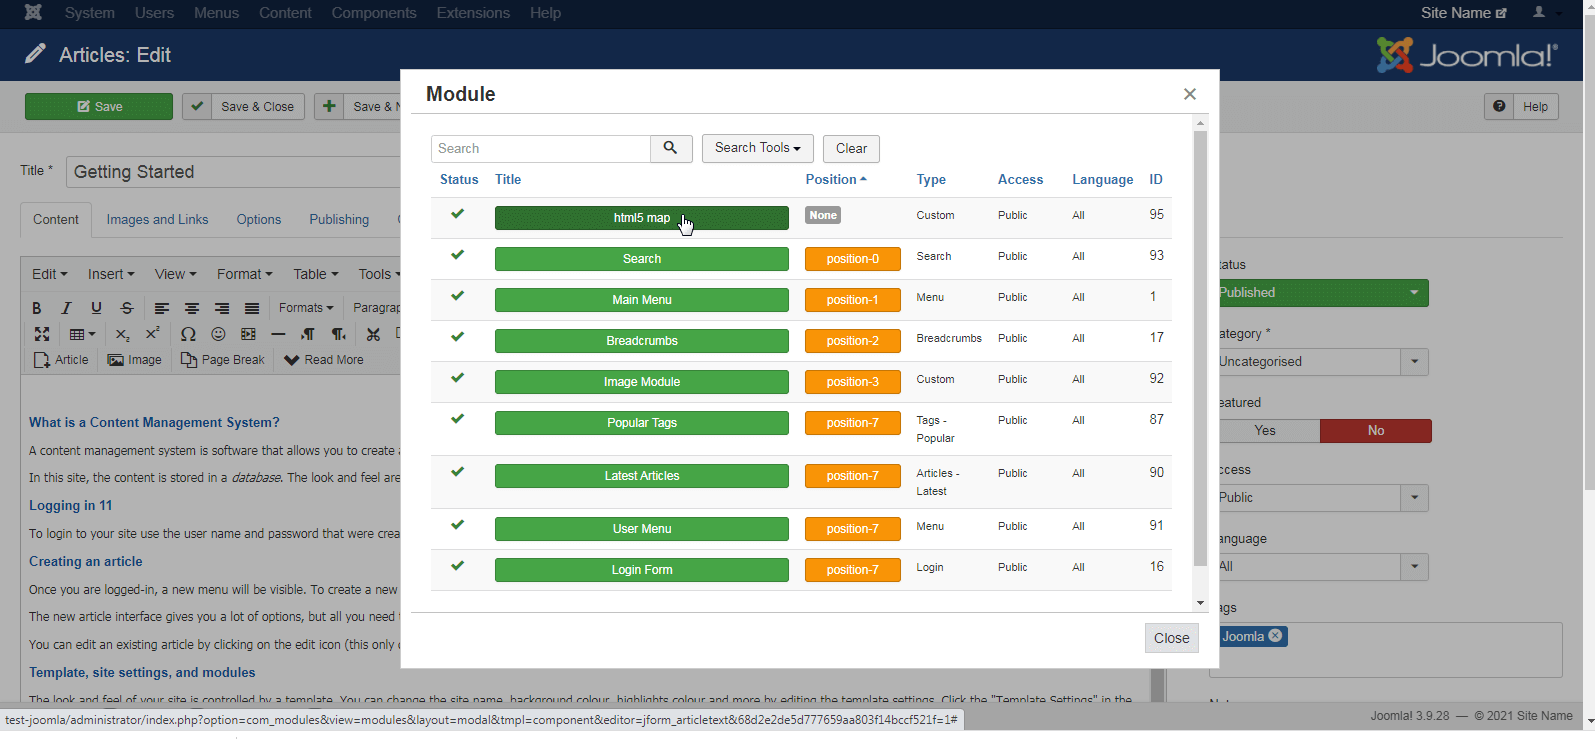
Then we will see the following:
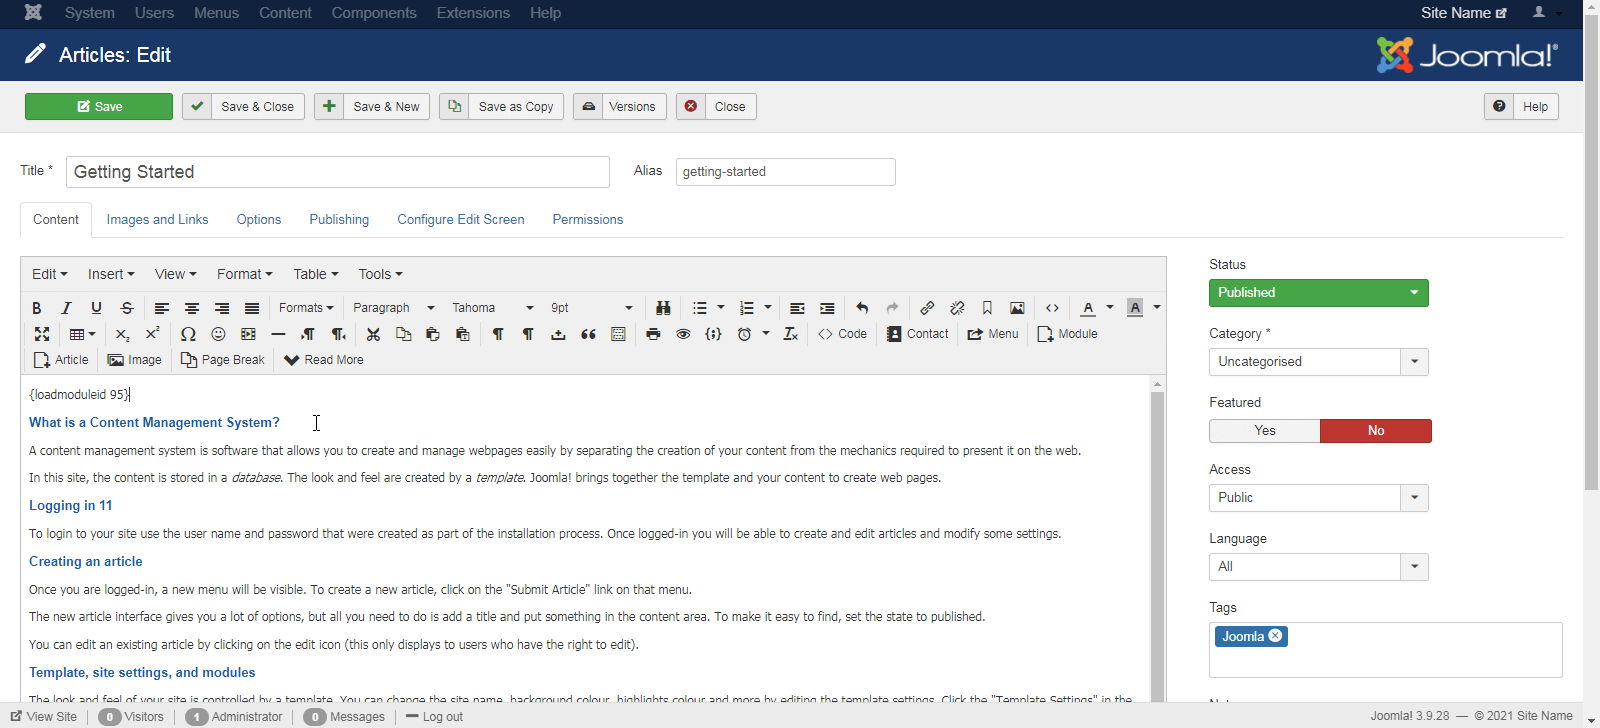
In the place where we wanted to insert the module with the map, the command "{loadmoduleid 95}" appeared. Here, 95 is the module identifier. This value may be different. After that, we can move the map around the article by cutting out this inscription and pasting it to the desired place. Now, you can click the "Save" button. After saving the HTML, the map should appear in the article where we added the module on your site.
Method 3. Using the Sourcerer plugin to add a map to a site on Joomla.
To accomplish this method, you also need to perform preparatory process number 1 of the process described at the beginning of the article - create a flamap folder in the media directory of your CMS Joomla on the server and place the map files there. Unlike the previous two methods, you don’t need to perform the 2nd operation - text filtering does not need to be disabled.
Next, you need to find and download the Sourcerer plugin, which allows you to insert JavaScript, CSS, and PHP code using a visual editor on a site that runs on CMS Joomla. We can do this on the official website of this CMS.
Download the plugin
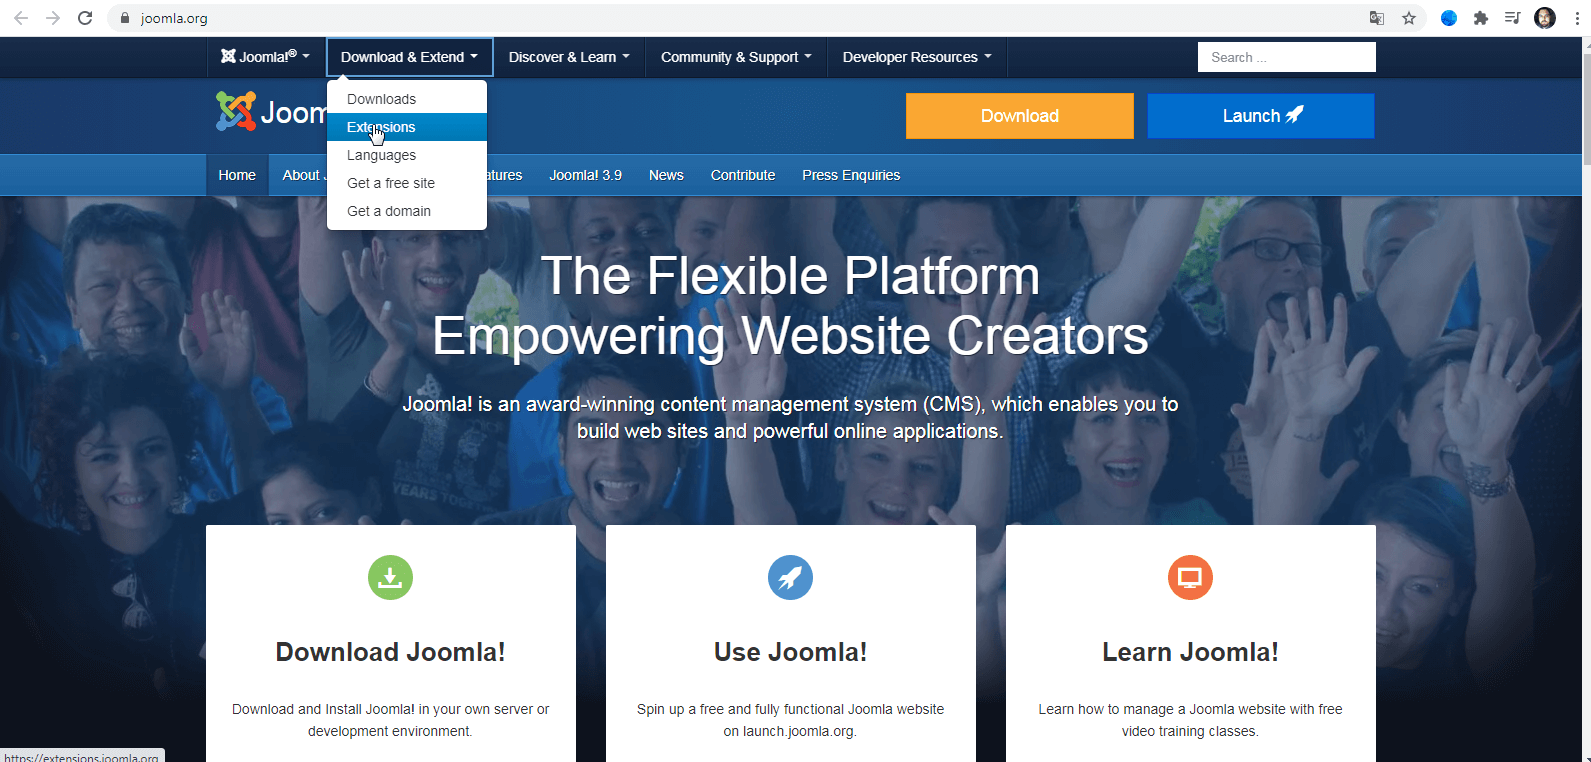
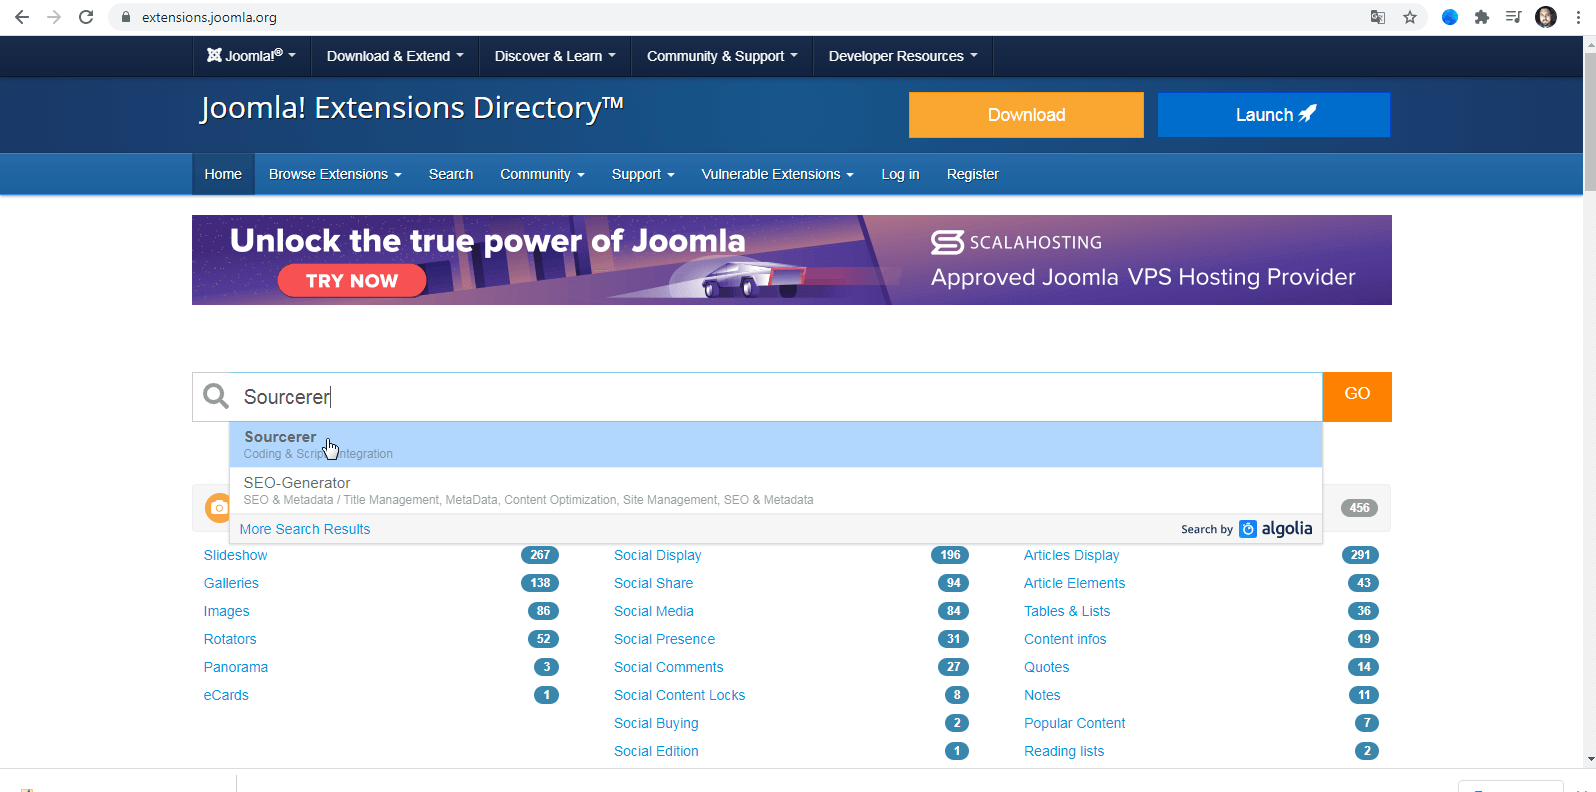
Navigate to the official site joomla.org.

Click on the "Extensions" menu item.
Enter "Sourcerer" in the search field for extensions. In the drop-down list, click on this extension.
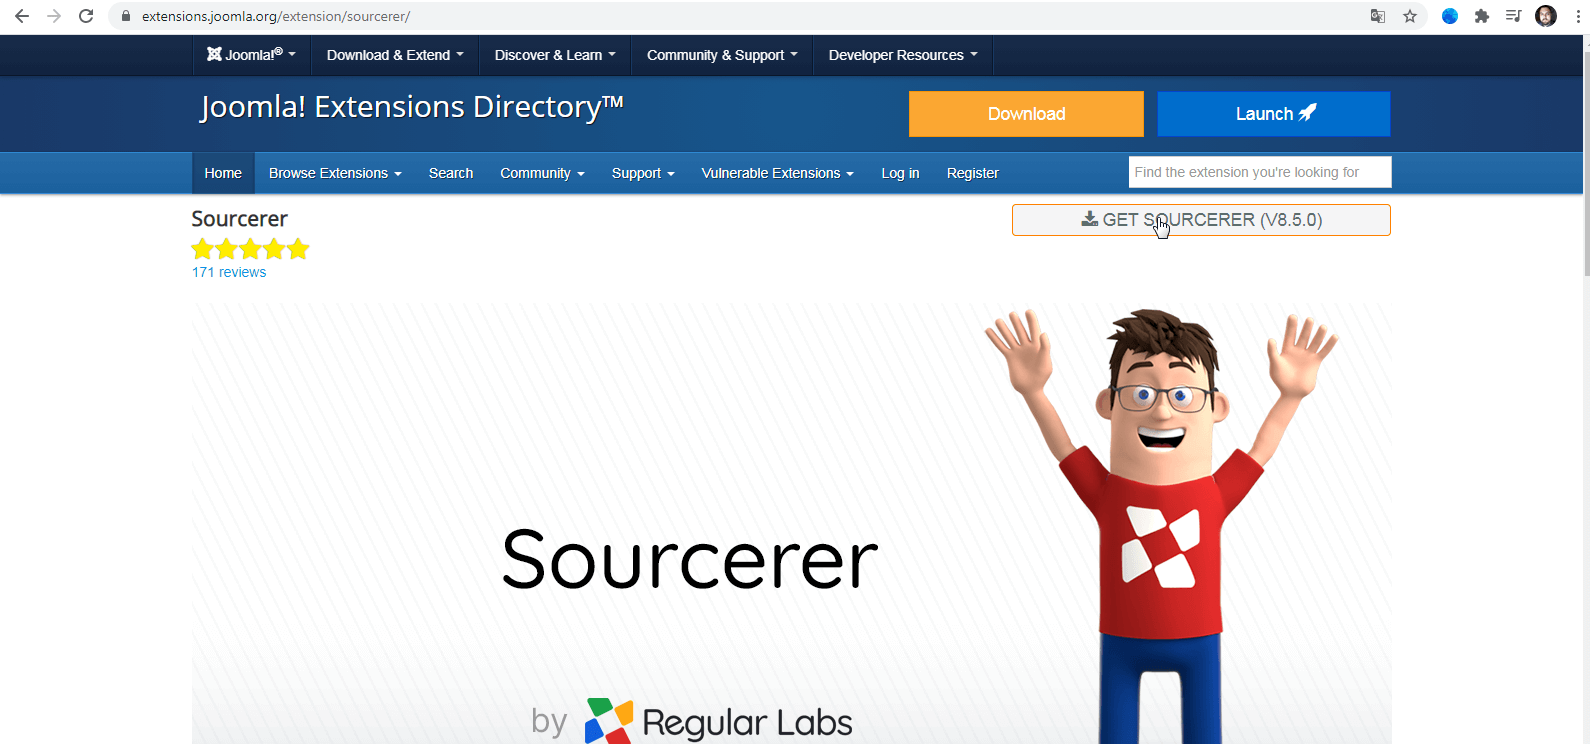
Click on the button to get the extension.
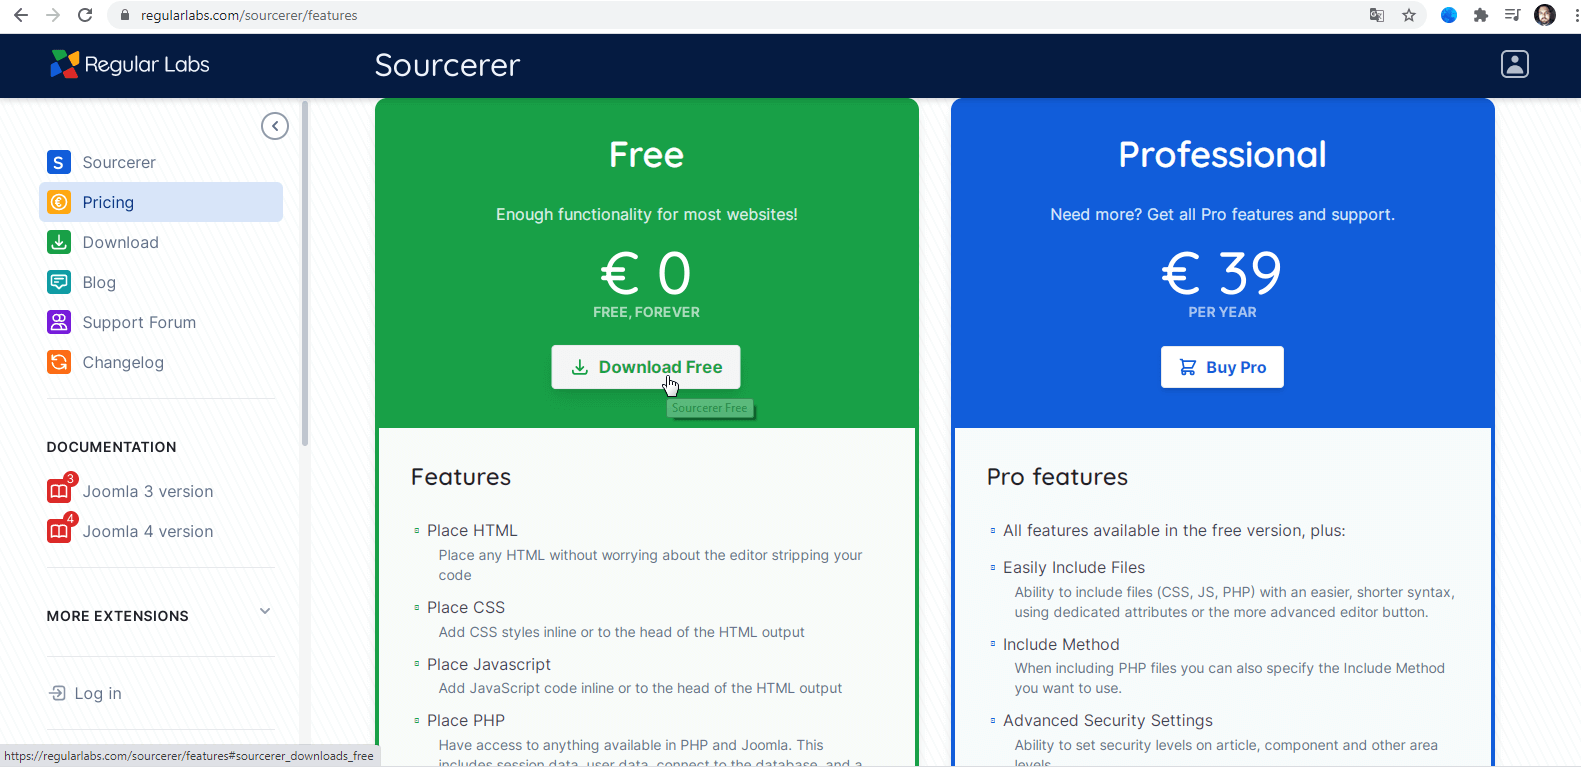
Click the download button.
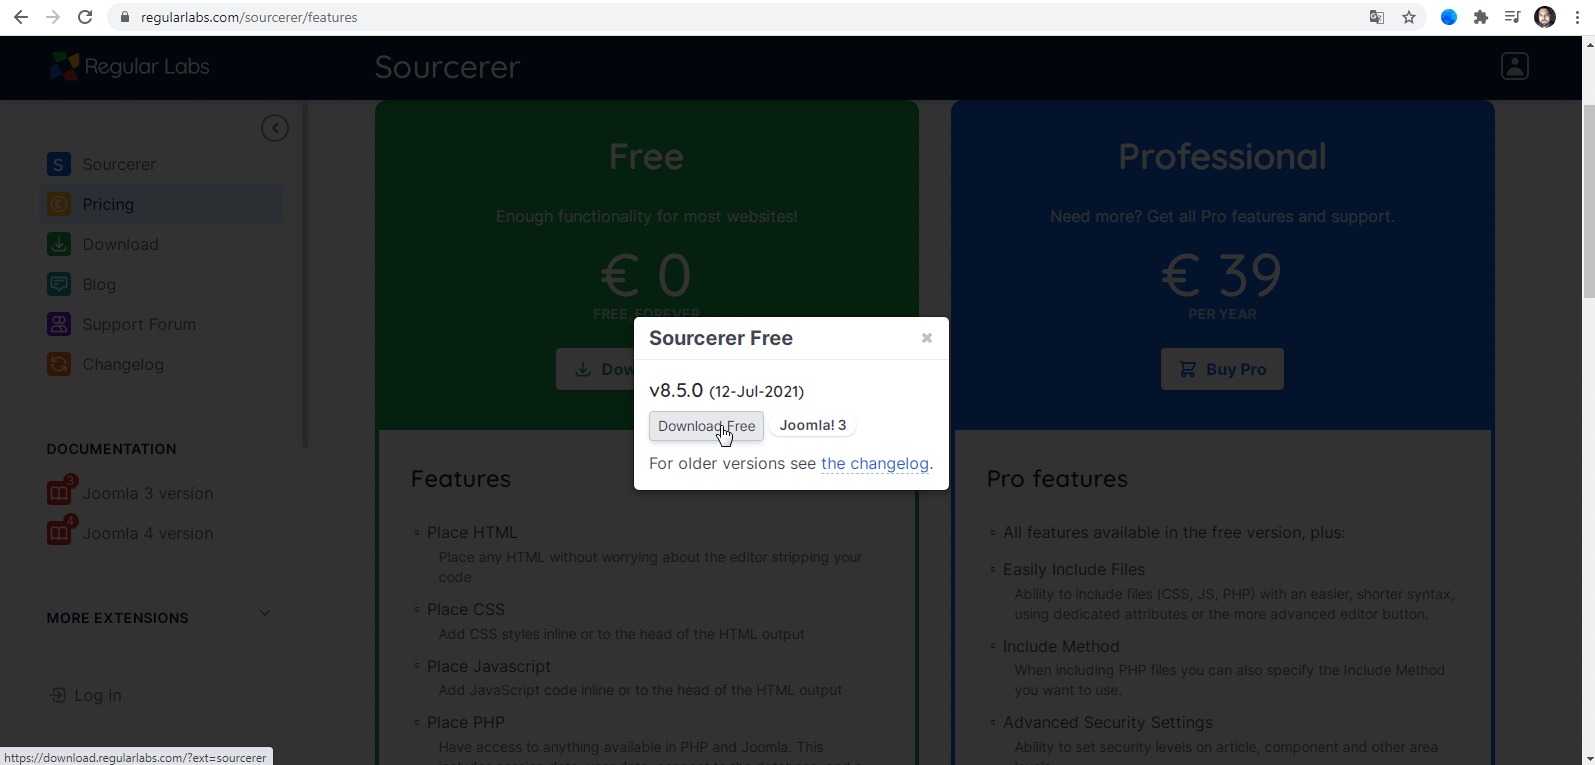
Wait until the download completes
After the download completes, we need to add the plugin to our site.
Adding the Sourcerer plugin to a Joomla site
Go to the extensions installing section. Completes this using the top menu.
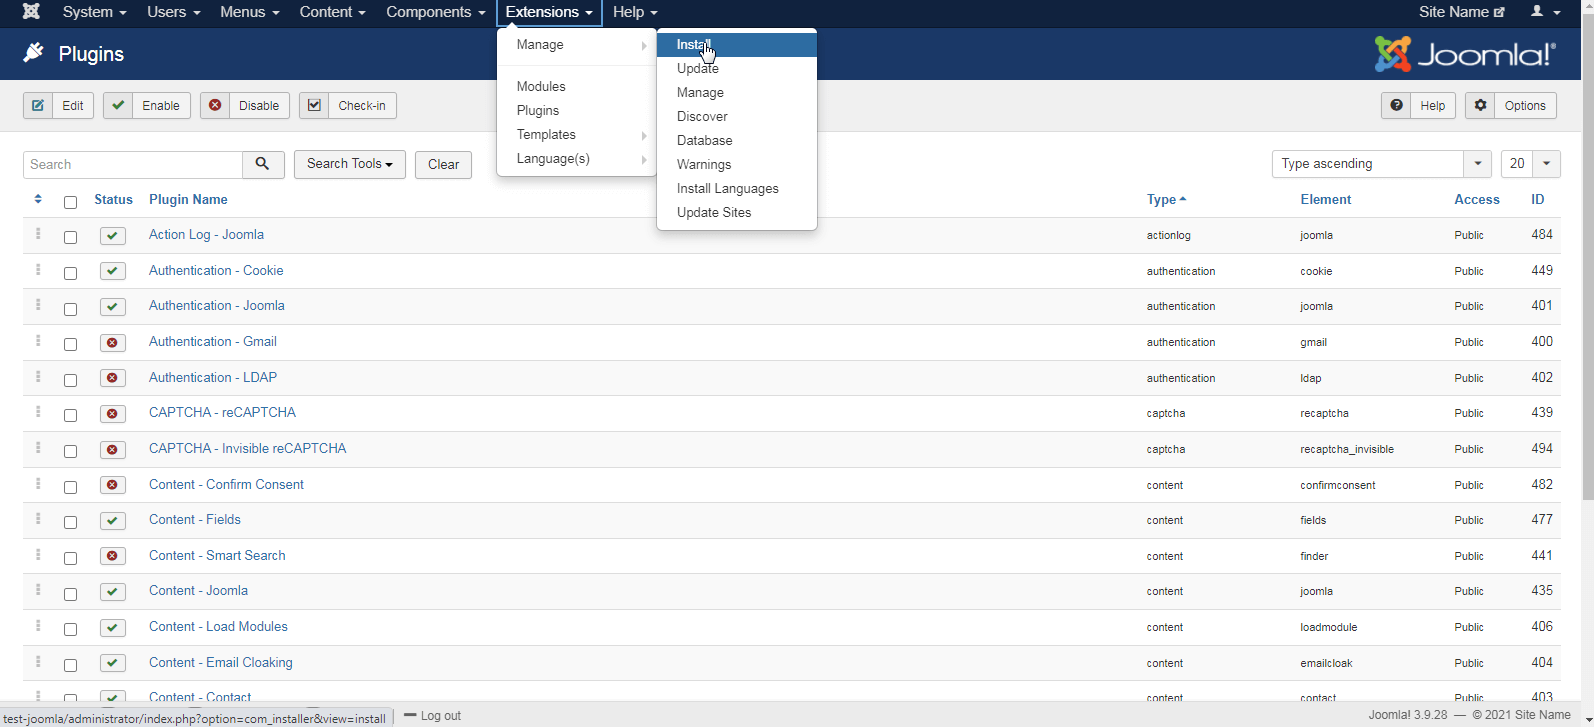
Click the button to upload the extension from your local computer.
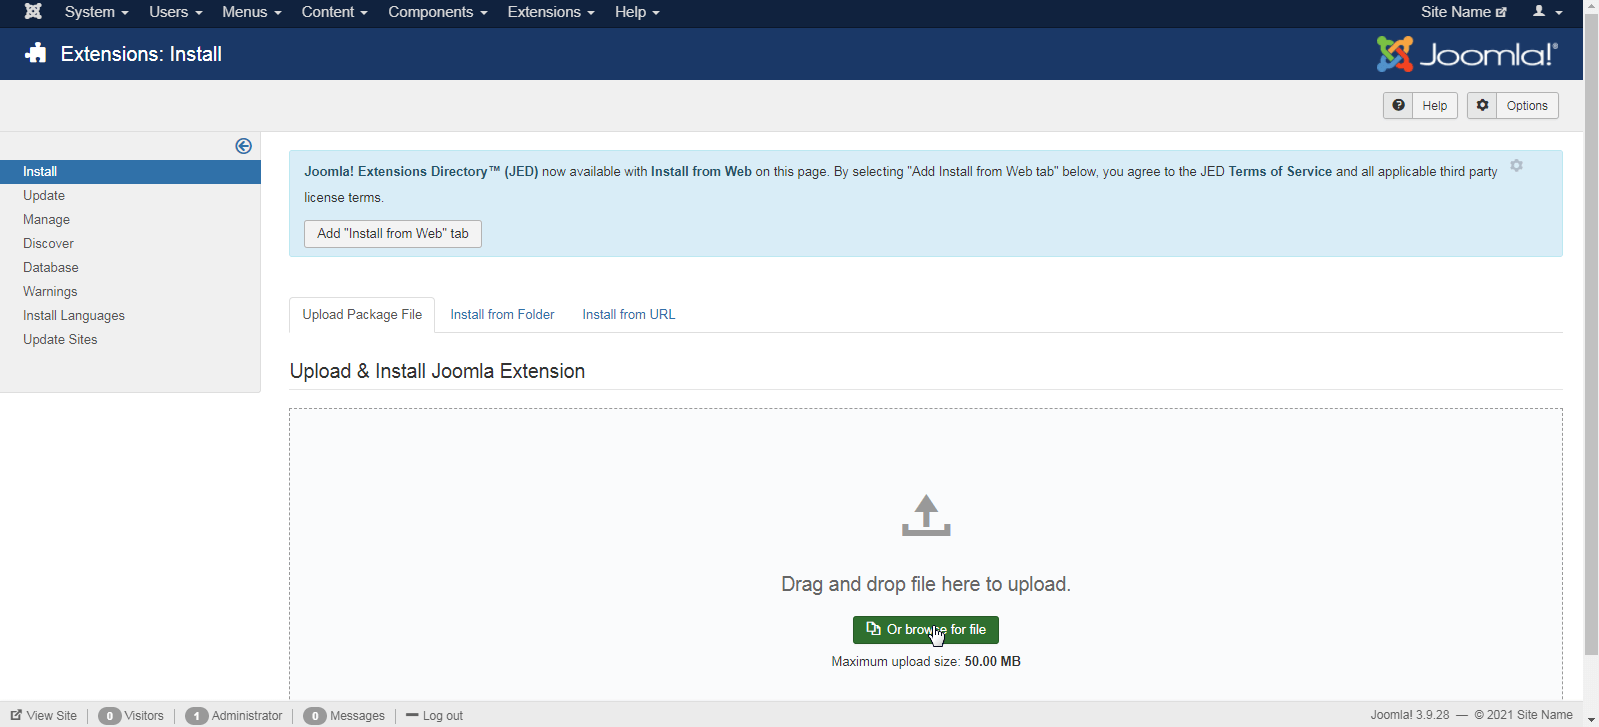
Select the downloaded ZIP file of the Sourcerer plugin and wait for the plugin to install.
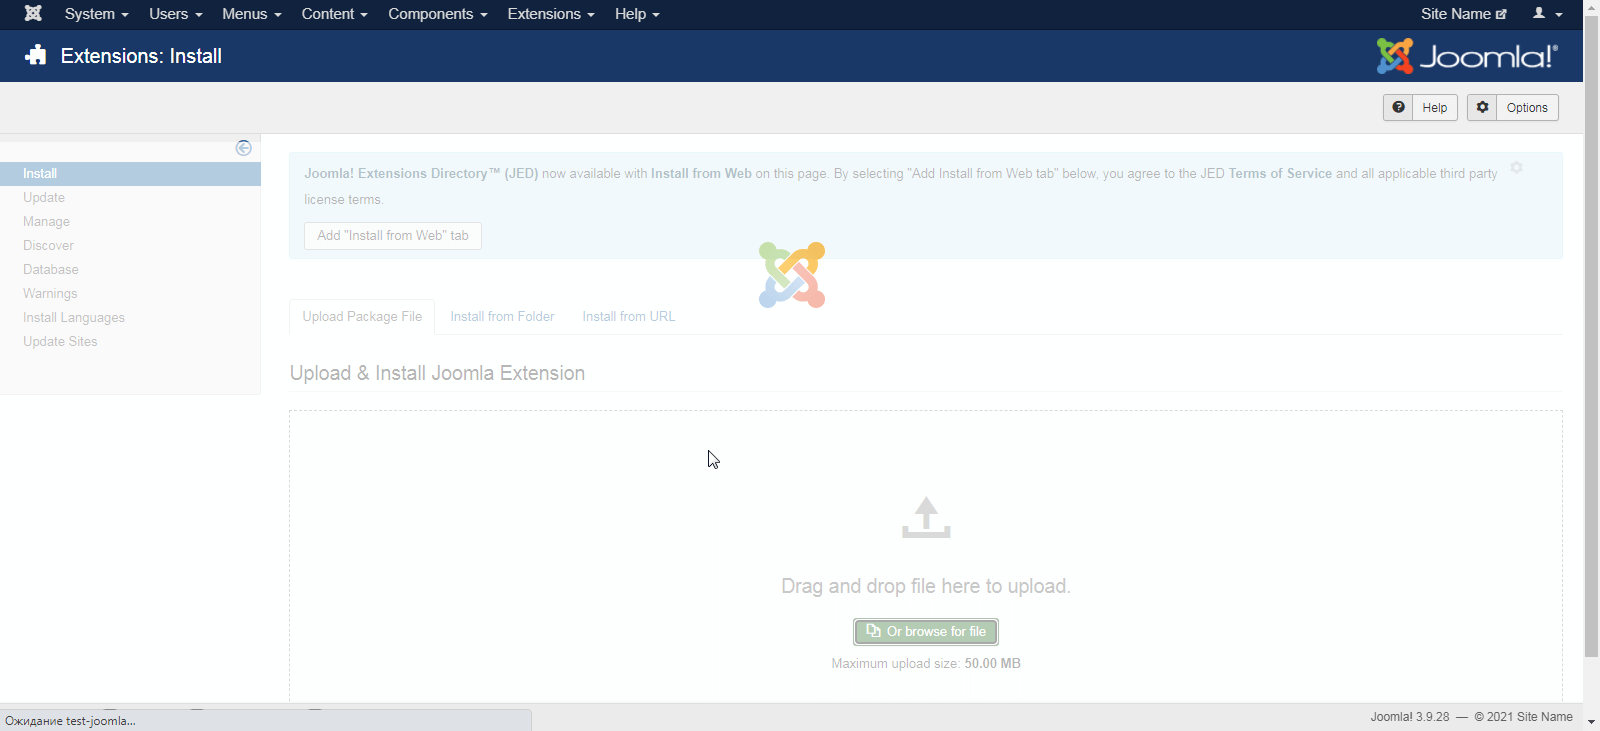
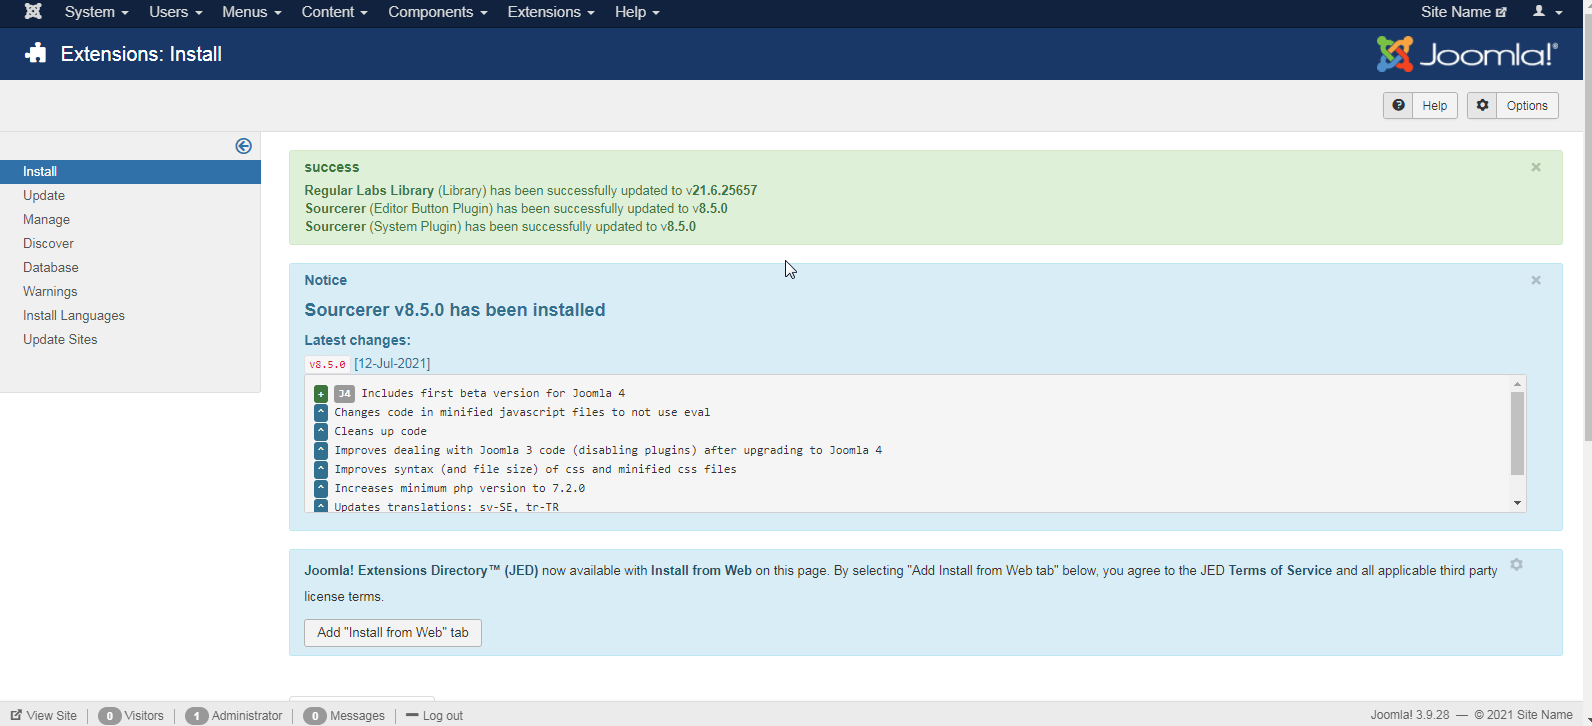
We can see a message about a successful installation.
Adding the interactive map to the article
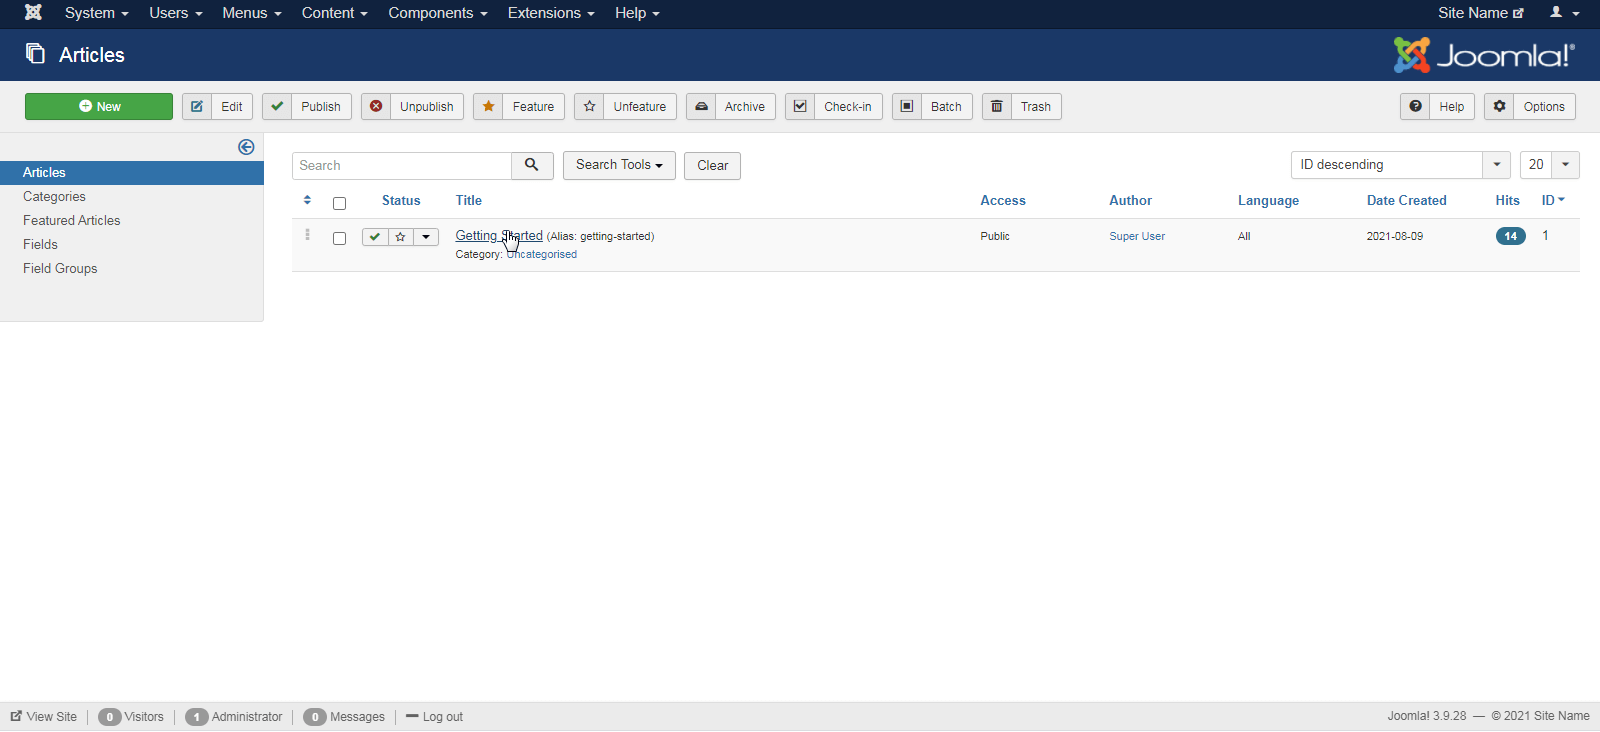
Navigate to the list of articles to add the map’s code to the article.
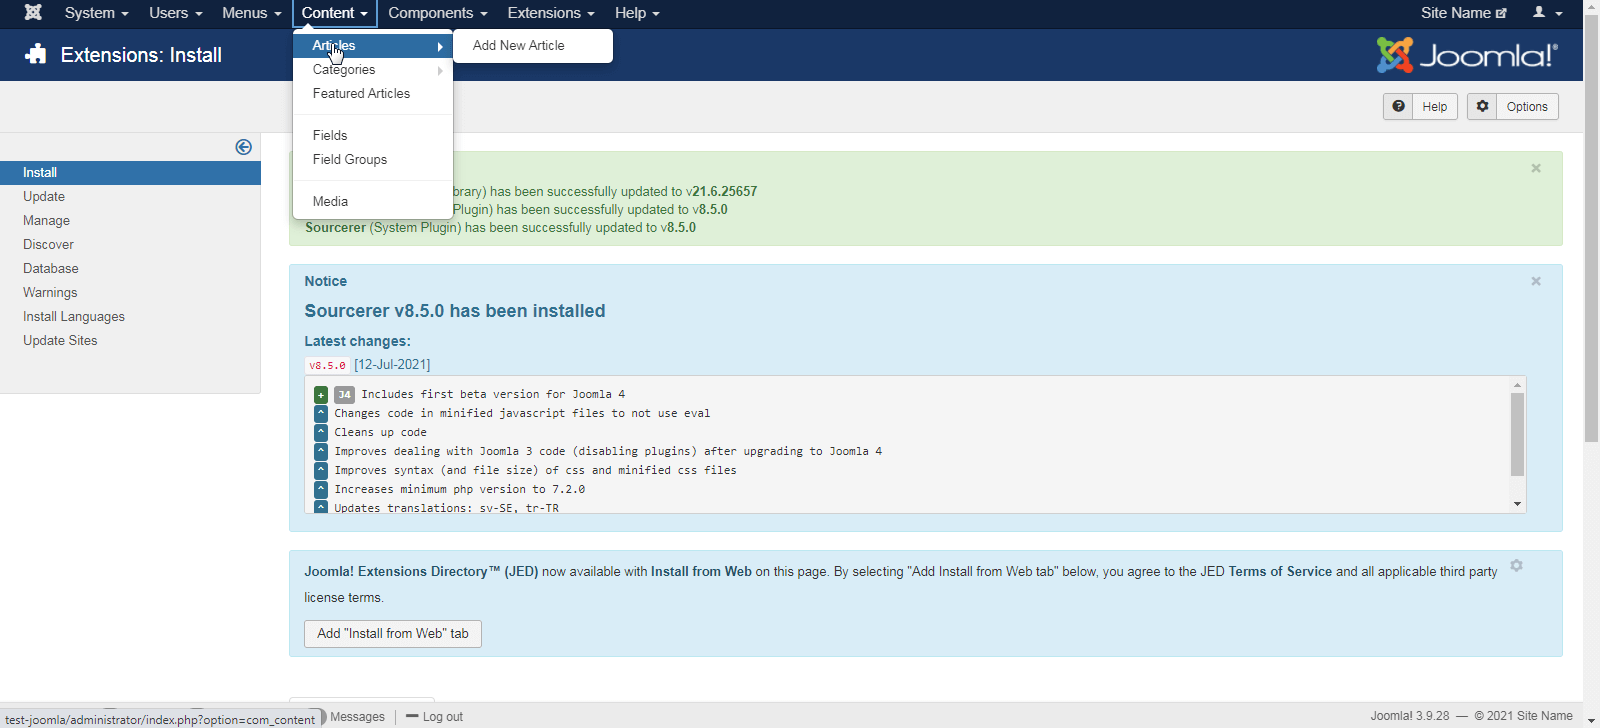
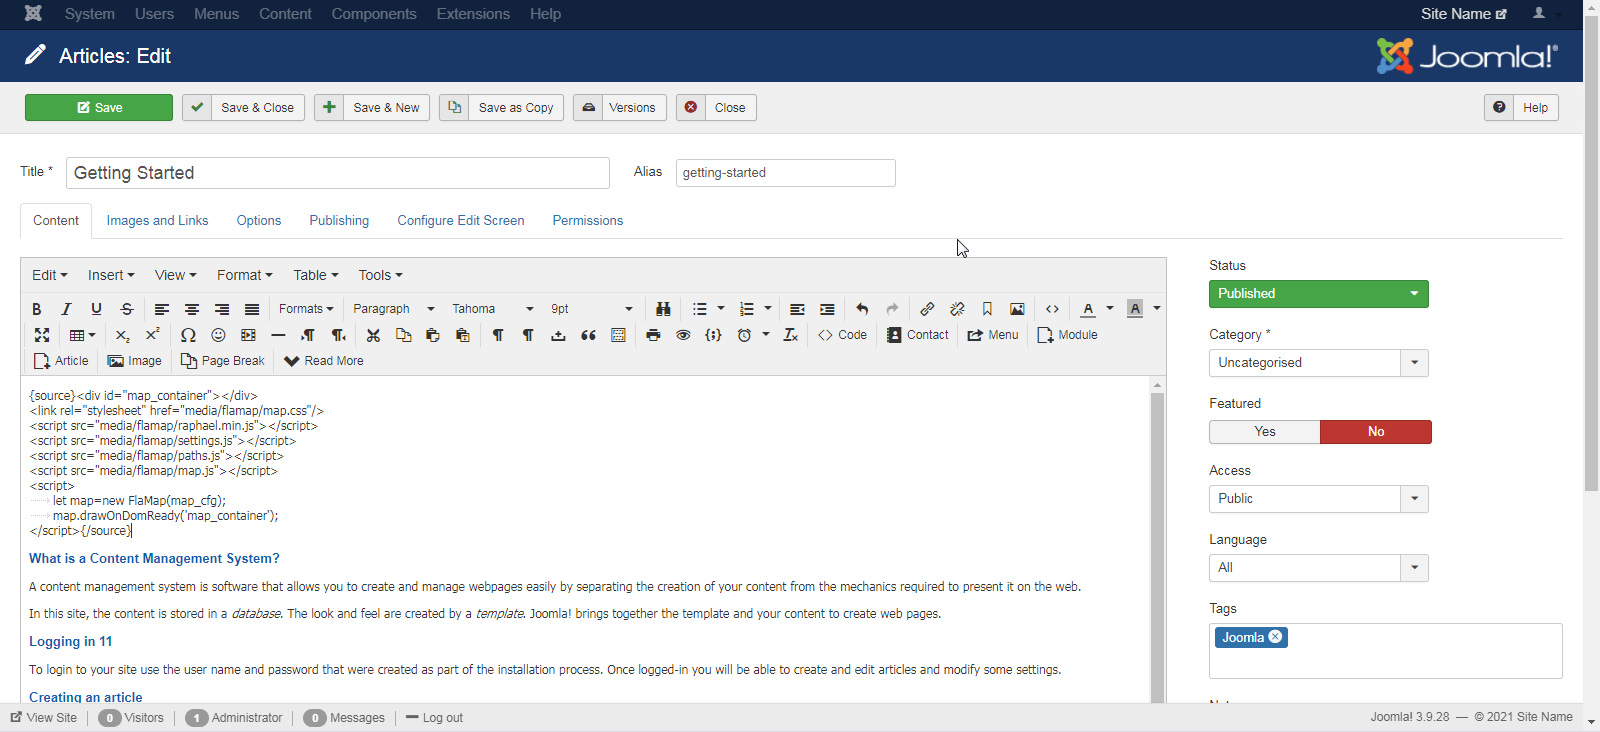
Select the desired article, and proceed to edit it.
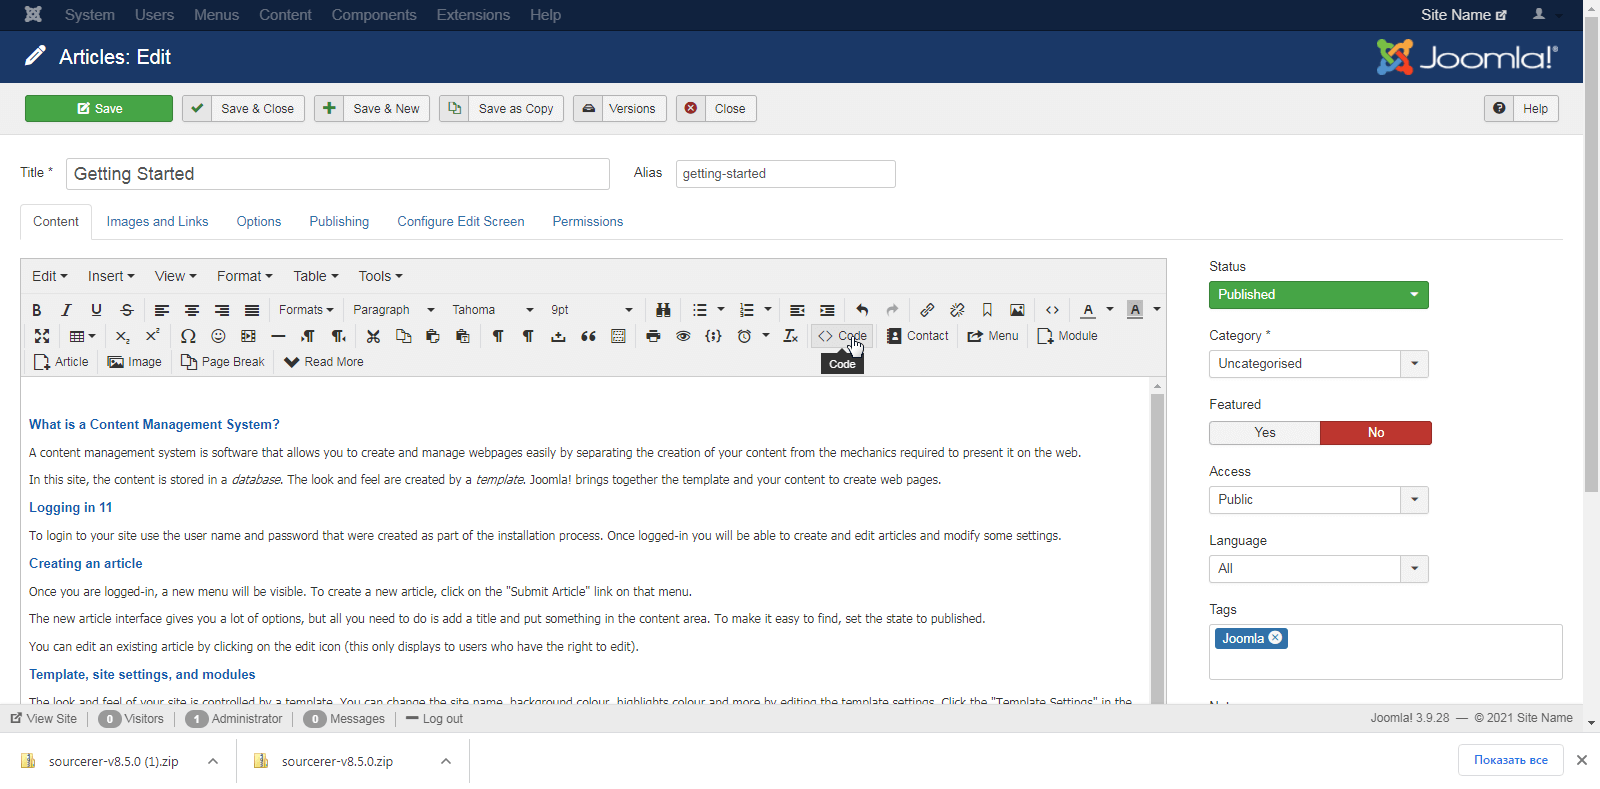
If the Sourcerer plugin is installed correctly, the "Code" button should appear on the visual editor. Before pressing it, you need to put the cursor where you want to see the map.
After that, click on this button. A window appears where you can enter the source code. Copy the following into it:
<div id="map_container"></div>
<link rel="stylesheet" href="media/flamap/map.css"/>
<script src="media/flamap/raphael.min.js"></script>
<script src="media/flamap/settings.js"></script>
<script src="media/flamap/paths.js"></script>
<script src="media/flamap/map.js"></script>
<script>
    let map=new FlaMap(map_cfg);
    map.drawOnDomReady('map_container');
</script>
This will look like this:
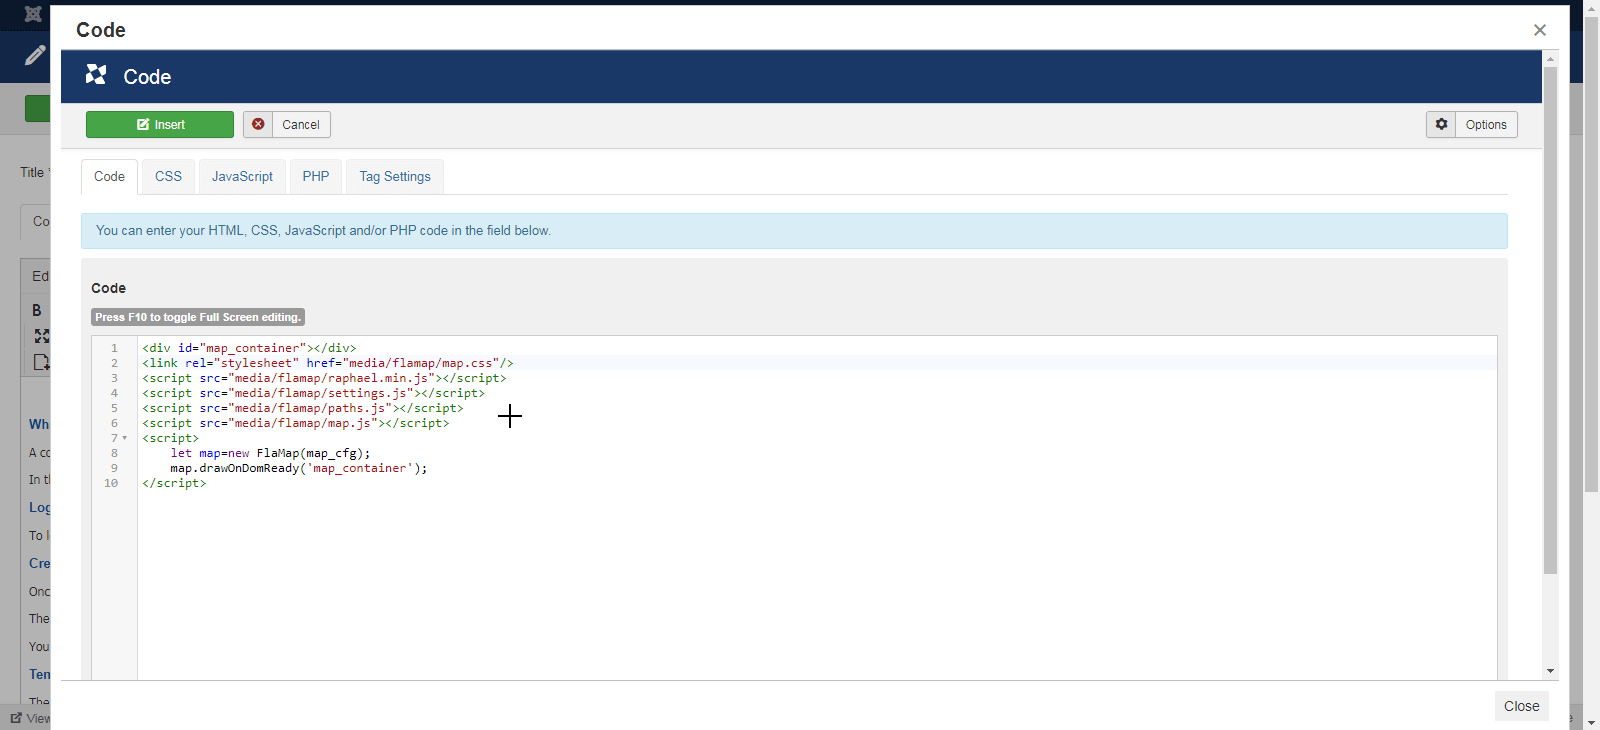
After inserting the code, press the "Insert" button. We see that in the article, the code appeared inside the {source} and {/source} tags. If necessary, you can change it right there without clicking on the "Code" button. In addition, this entire block can be transferred to the desired place on the article and even copied to another.
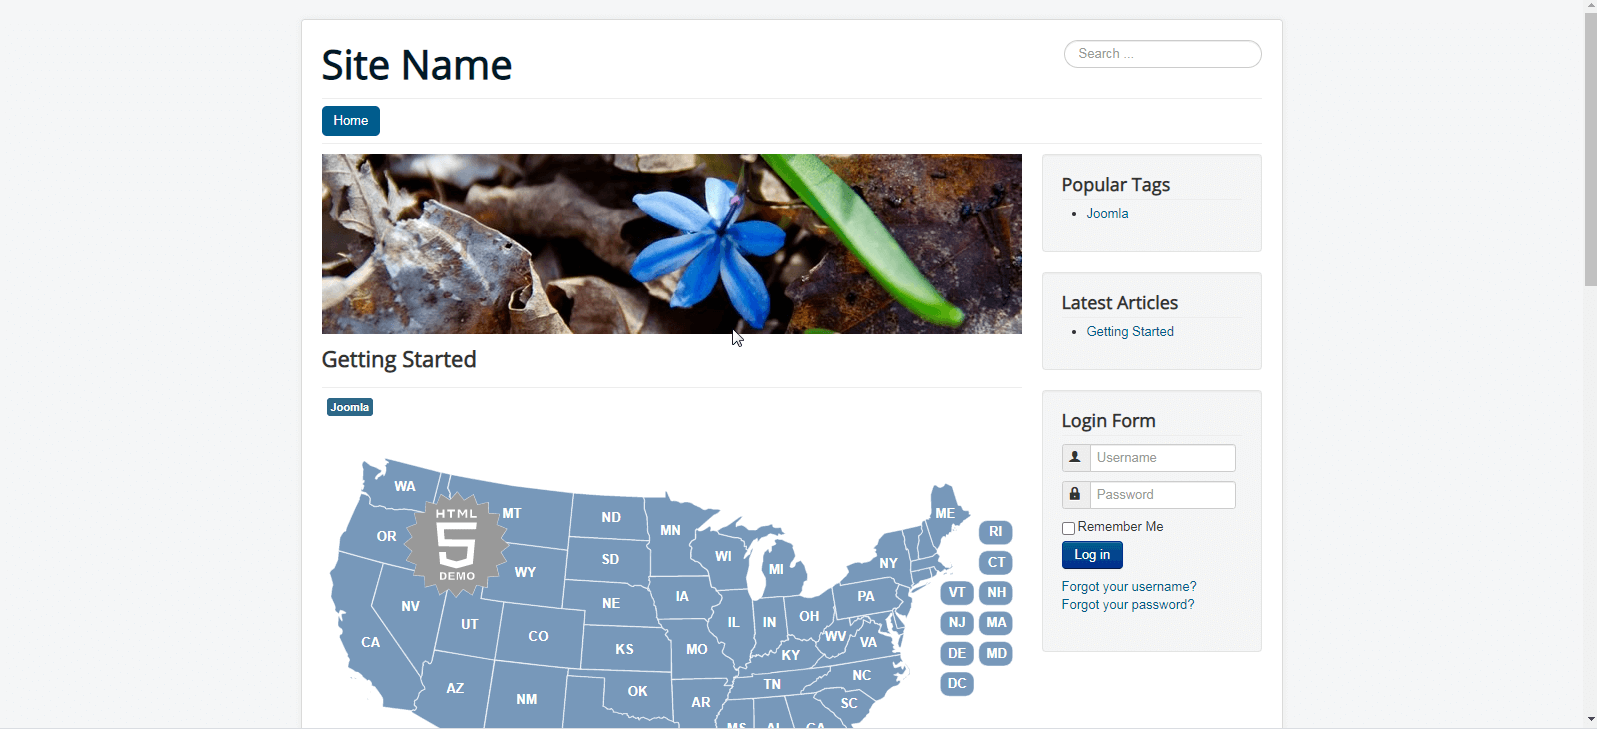
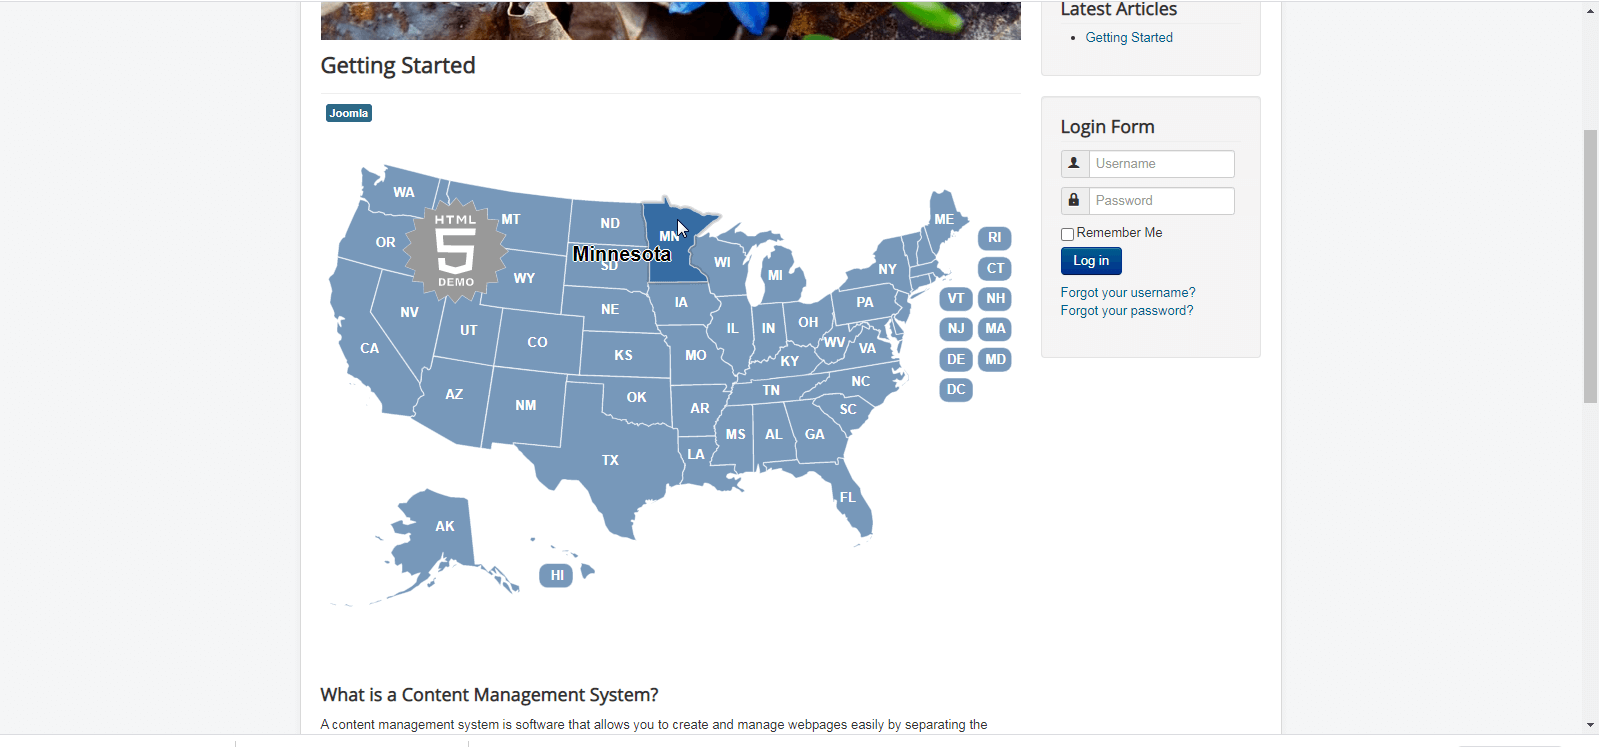
Click on the button to save the article, go to the site where it should be displayed and see that the map is visible there.
Conclusions
This article describes three ways to add maps to a site under the Joomla content management system. Their general essence is to insert the link and script tags and JavaScript code in the right place on the article. And they differ in the way we insert them. One thing that complicates matters is that Joomla itself can cut tags, and its visual editor TinyMCE cuts them by default, so in both of them, the removal of tags used in the map’s code must be disabled.