How to Add an Interactive Map to Squarespace
Interactive maps help Squarespace website owners display business locations, service areas, or regional information in a clear and engaging way.

Squarespace allows you to add custom HTML via the Code and Embed blocks, which makes it possible to place interactive maps from Fla-shop.com on your site. Our platform offers two different products for this purpose:
- Embedded Maps (widget) — quick setup with no file hosting.
- JS/CSS HTML5 Map — full control for developers who prefer hosting files themselves.
Table of Contents
Product 1 — Embedded Maps (Widget)
Best when you want the simplest setup with no file hosting.
Step 1 — Create your map
- Sign in to your account or create a free one:
- Click 'Choose a map' and select a template (e.g., USA).
- The visual editor opens automatically. Use the tabs to:
- Colors: fill regions with one or multiple colors.
- Links & Tooltips: add links, rich-text tooltips, and details per region.
- Markers: place points, pins, labels, and optional links/tooltips.
- Preview: switch between tooltip and side panel/modal modes.
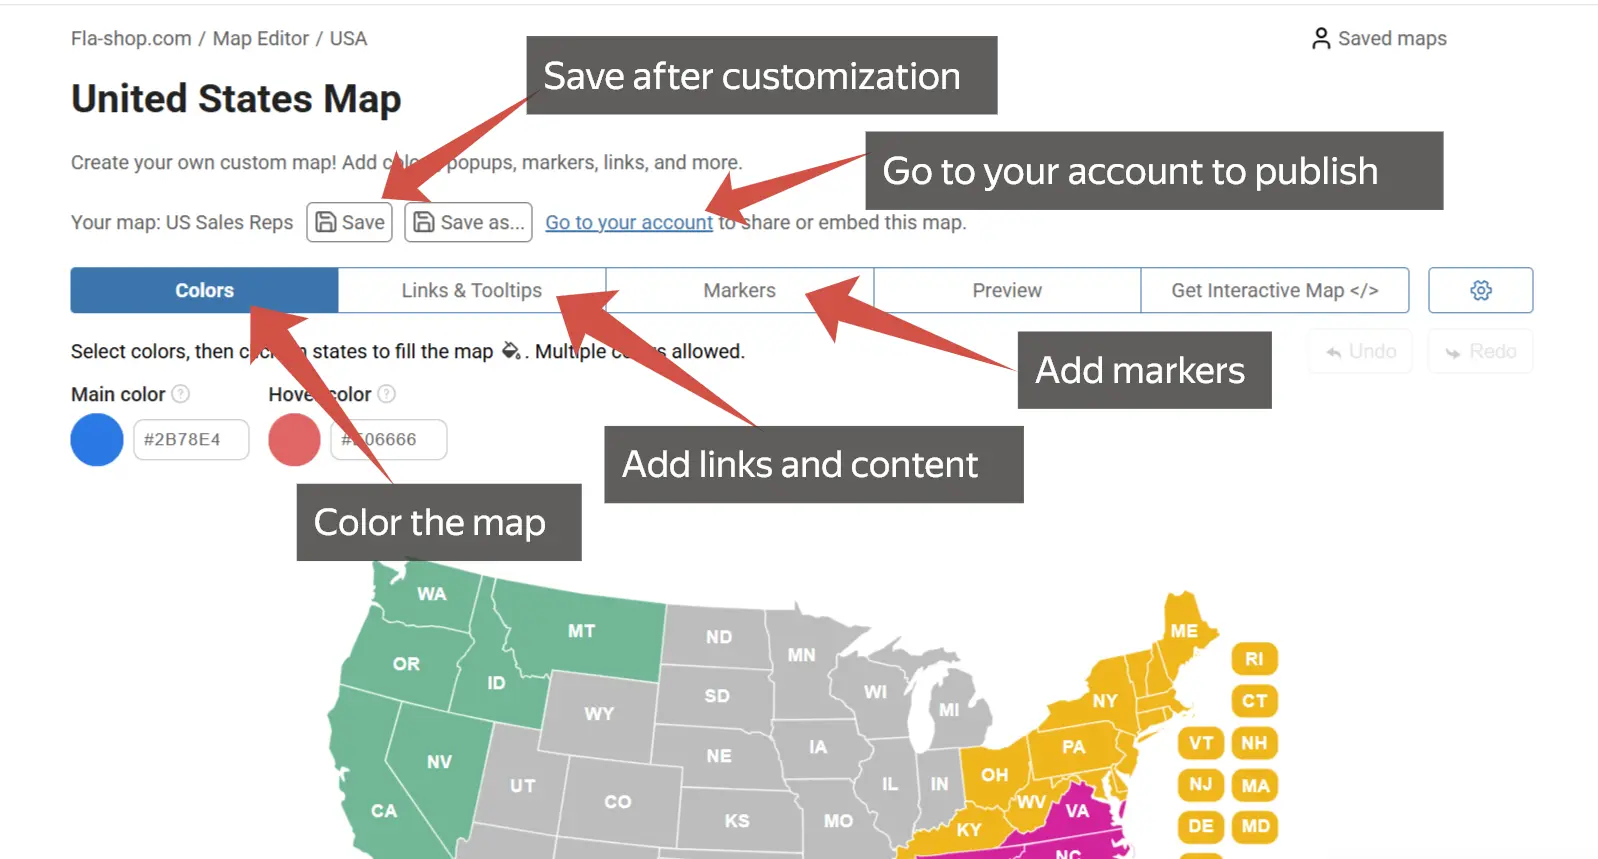
- Click Save.
Step 2 — Copy the installation code
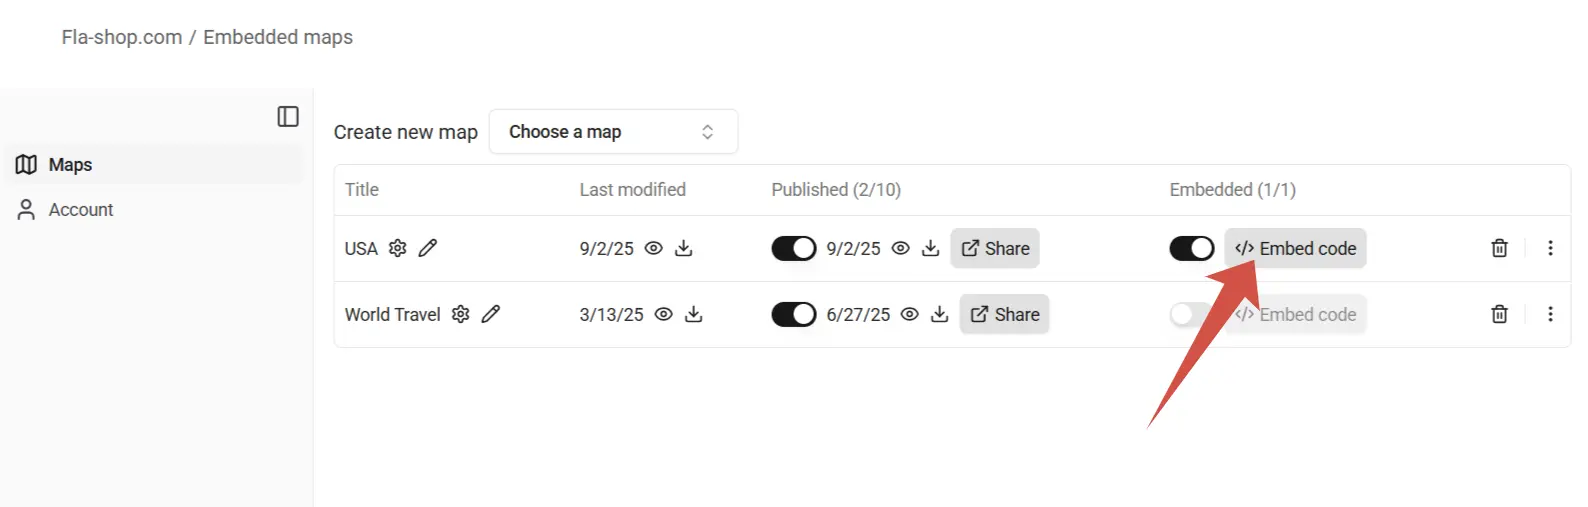
- In your account, open Embed code for the map.
- Click Copy to clipboard.
Step 3 — Add the code in Squarespace
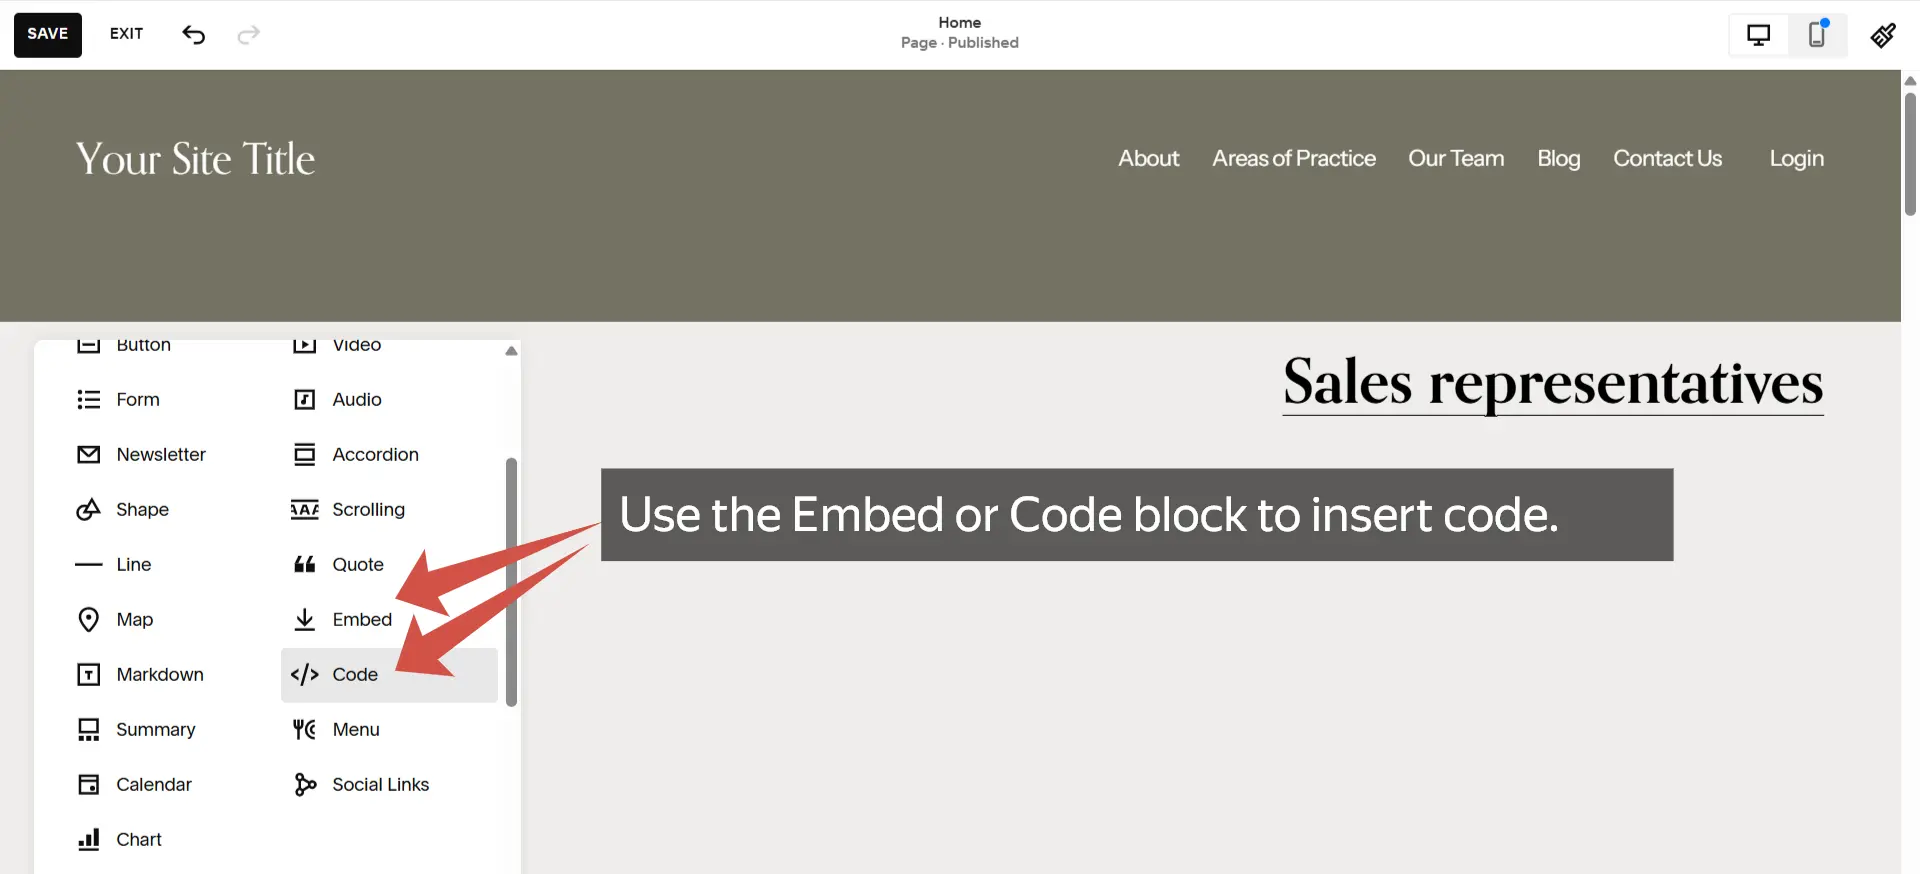
- Open the page editor in Squarespace.
- Click + ADD BLOCK and choose Code (or Embed, if you prefer).”
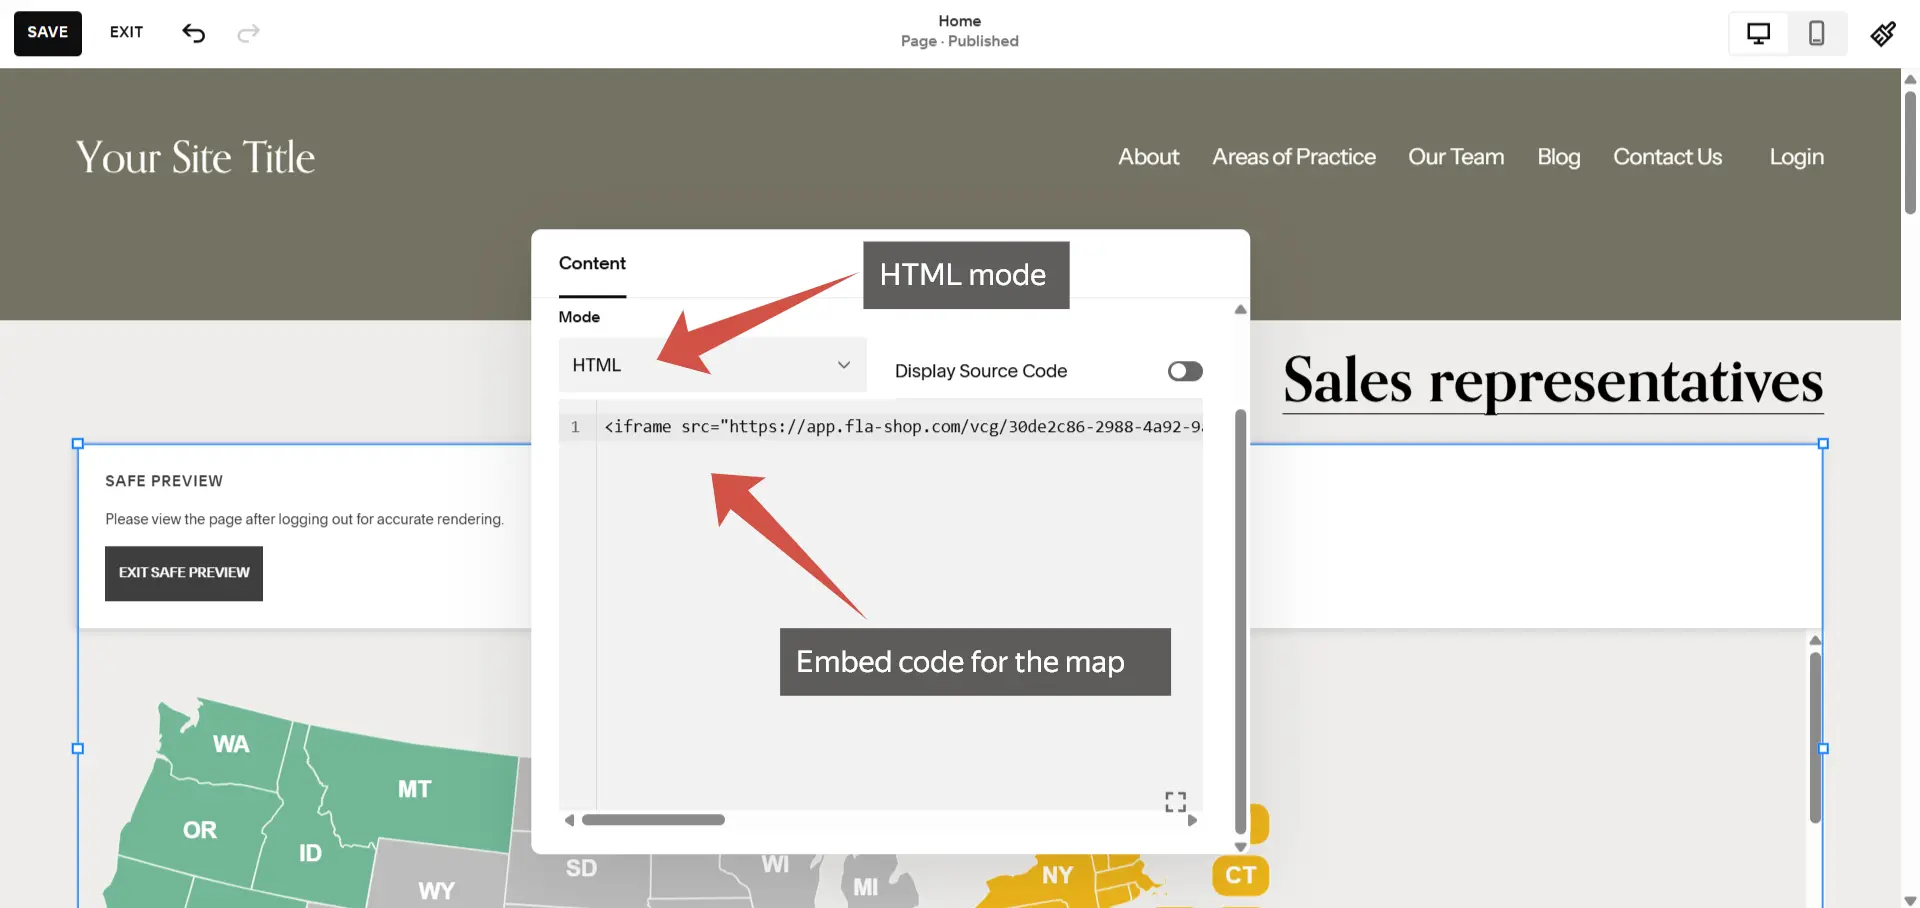
- Paste the copied HTML snippet.
- Save and publish the page.

Step 4 — Update and manage
- To change colors, tooltips, or markers, edit the map in your Fla-shop account and click Save — the embedded map reflects changes automatically.
- Trial embedding runs for 7 days; you can upgrade anytime to keep maps continuously online.
Try it now:
Try the map editor · Create a free account · View pricing plans
Product 2 — JS/CSS HTML5 Map
Best when you’re comfortable with HTML and want full control over assets.
Squarespace doesn’t host your custom JS/CSS files; place them on external hosting (GitHub Pages, your own server, etc.) and reference them from a Code/Embed block.
Step 1 — Host the files externally
Upload these files to a publicly accessible HTTPS location:
raphael.min.jsmap.jspaths.jssettings.jsmap.css
Make sure you have direct URLs for each file (they should open in the browser).
Step 2 — Insert the code in Squarespace
In the Squarespace editor:
- Click + ADD BLOCK and choose Code.
- Paste the snippet below, replacing
https://your-host.example.com/...with your actual URLs.
<!-- start Fla-shop.com HTML5 Map -->
<div id='map-container'></div>
<link href="https://your-host.example.com/map.css" rel="stylesheet">
<script src="https://your-host.example.com/raphael.min.js"></script>
<script src="https://your-host.example.com/settings.js"></script>
<script src="https://your-host.example.com/paths.js"></script>
<script src="https://your-host.example.com/map.js"></script>
<script>
  var map = new FlaMap(map_cfg);
  map.drawOnDomReady('map-container');
</script>
<!-- end HTML5 Map -->
Troubleshooting (JS/CSS)
- Check all URLs in the snippet: no typos, correct filename case (e.g.,
Map.js≠map.js). - Each file must have a public HTTPS URL that opens directly.
- Use browser Console to spot 404/403 errors and fix the corresponding path.
Which Product Fits You?
- Embedded Maps (widget):
You want the fastest path to a live map, hosted for you, no asset management, and a visual editor for customization. - JS/CSS HTML5 Map:
You prefer full control over code and styling, are comfortable hosting files, and may want to integrate with your own build or CDN.
FAQ
Can I customize colors, tooltips, and markers?
Yes. Both products include a visual editor for colors, per-region content, and markers. The JS/CSS version also allows code-level tweaks.
Will the map work on mobile?
Yes. The map is responsive. When using the side panel mode, narrow containers automatically switch to a modal over the map for better readability.