Easily Display Maps on Shopify Using Fla-shop.com’s Interactive HTML5 Maps
In this tutorial, you’ll learn how you can add maps to your Shopify eCommerce store using Fla-shop.com’s interactive HTML5 maps.

Table of contents
Brief instruction
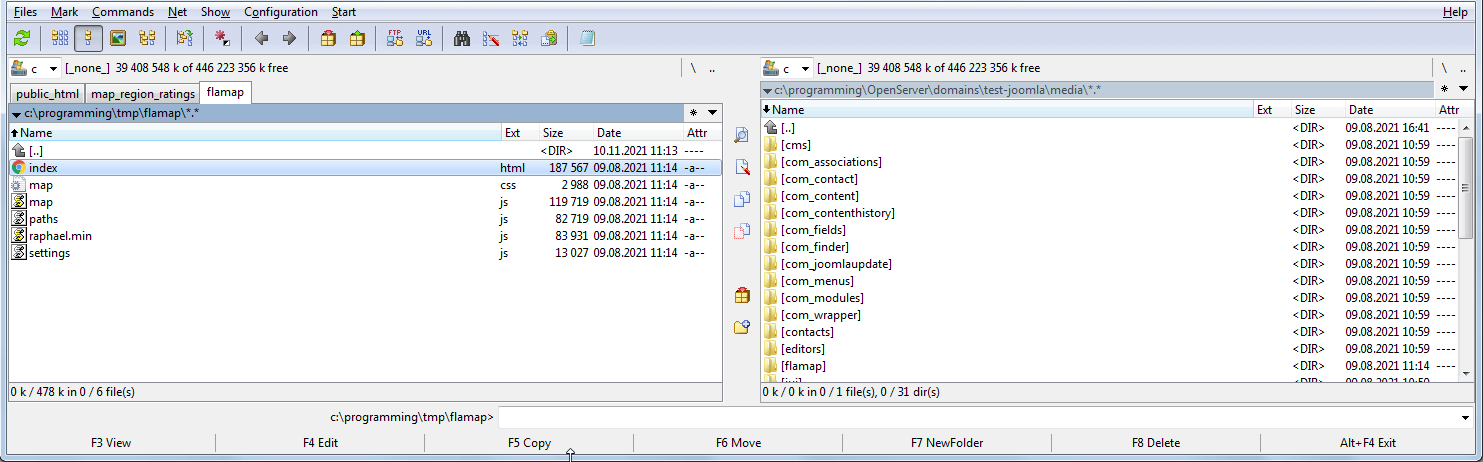
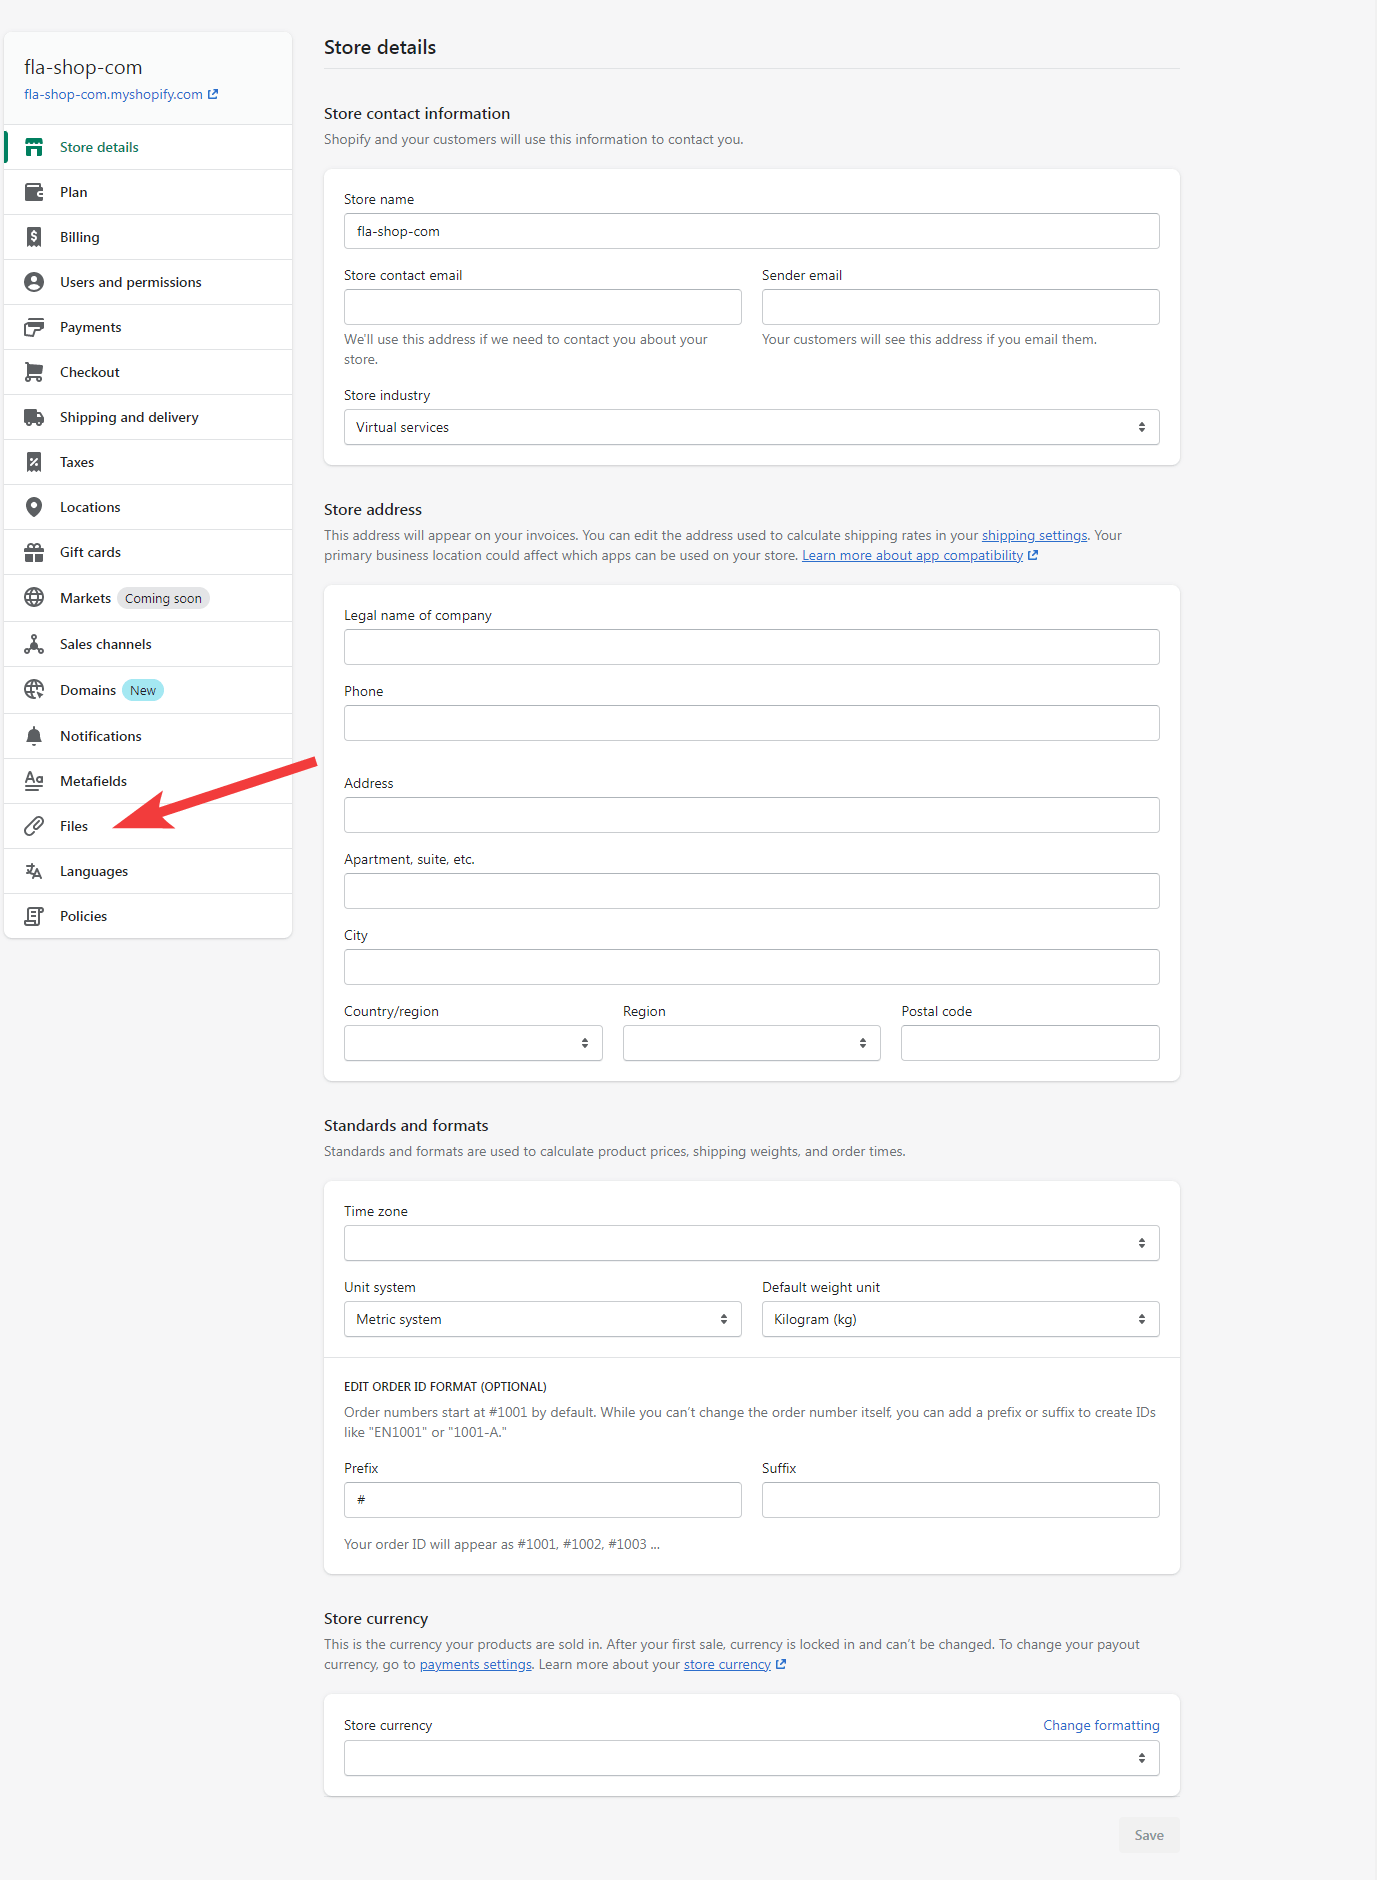
To connect a map to a site on Shopify, you need to unpack the archive into a temporary folder on your PC if the map is archived. After that, you need to upload its files to the server. You need to use the "Files" tool in the site settings inside the administrative panel to download.
Having loaded them, you can go to editing the page or create it, and then display the HTML page using the “Show HTML” button on the editor panel. There you need to insert the standard code used to connect maps:
<!-- start Fla-shop.com HTML5 Map -->
<div id='map-container'></div>
<link href="map.css" rel="stylesheet">
<script src="raphael.min.js"></script>
<script src="settings.js"></script>
<script src="paths.js"></script>
<script src="map.js"></script>
<script>
var map = new FlaMap(map_cfg);
map.drawOnDomReady('map-container');
</script>
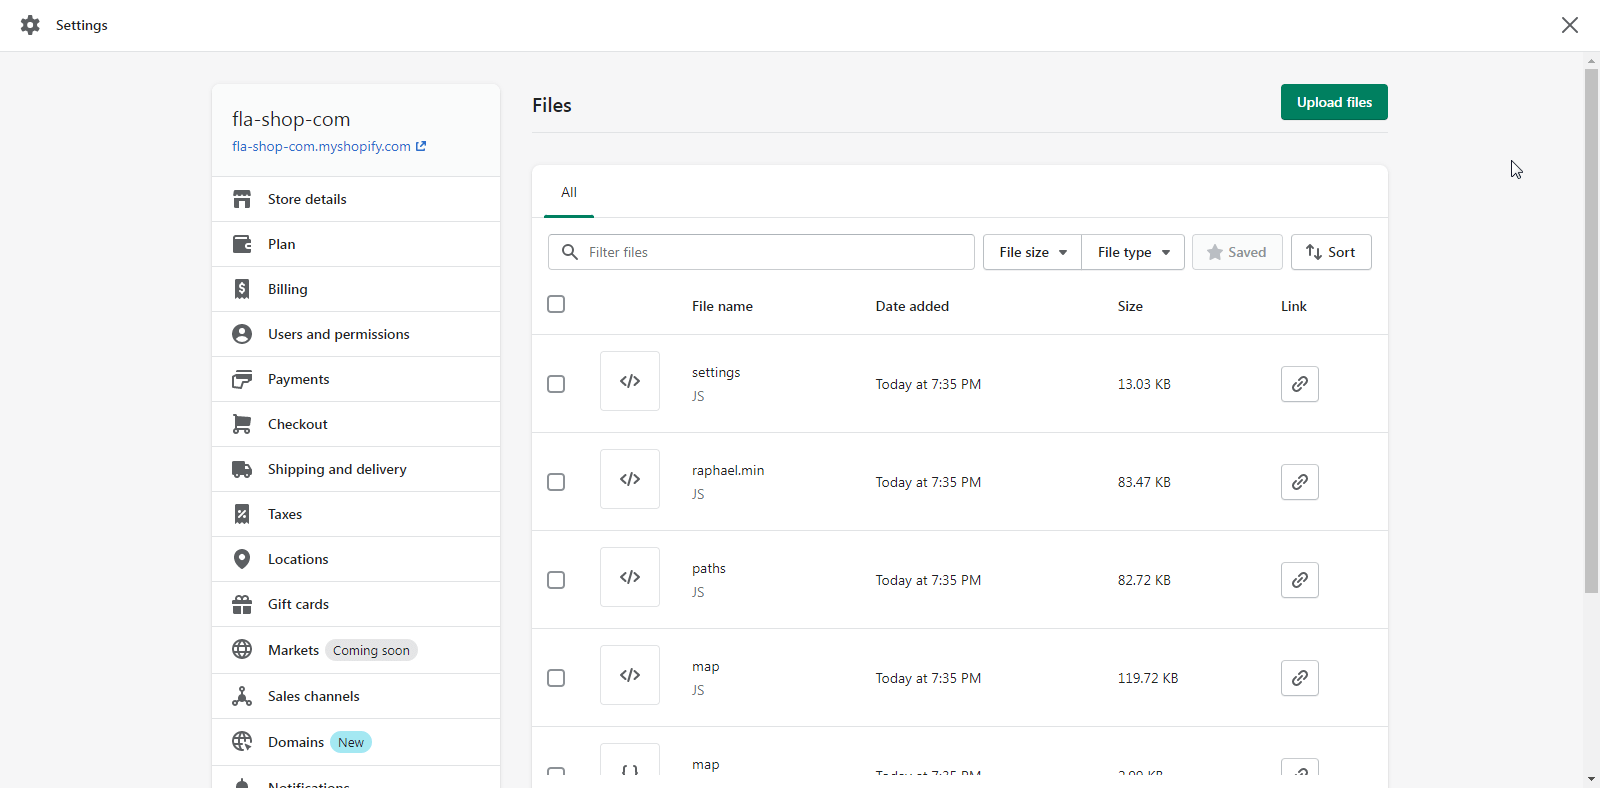
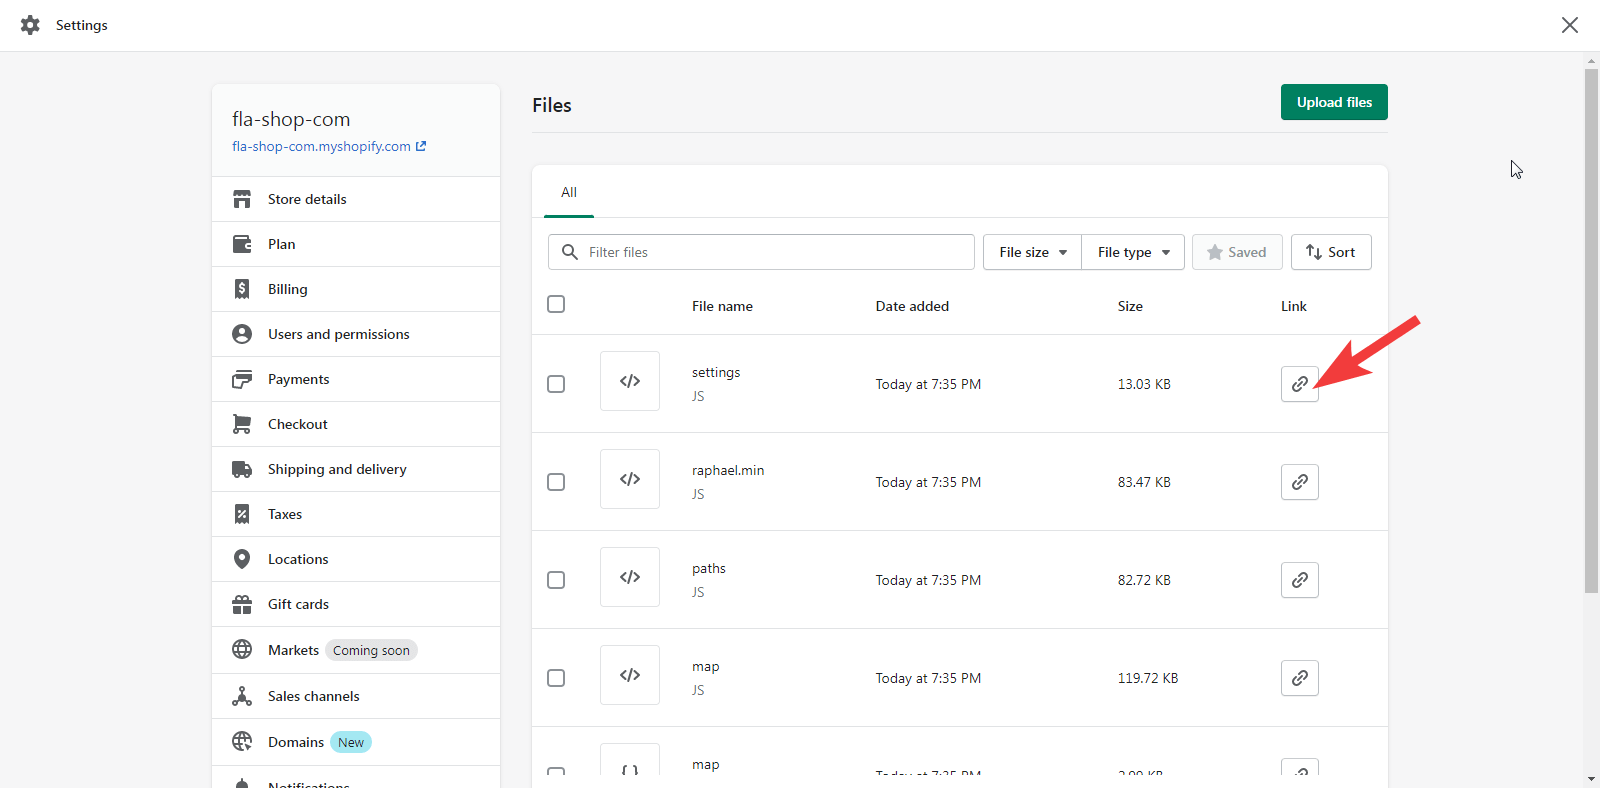
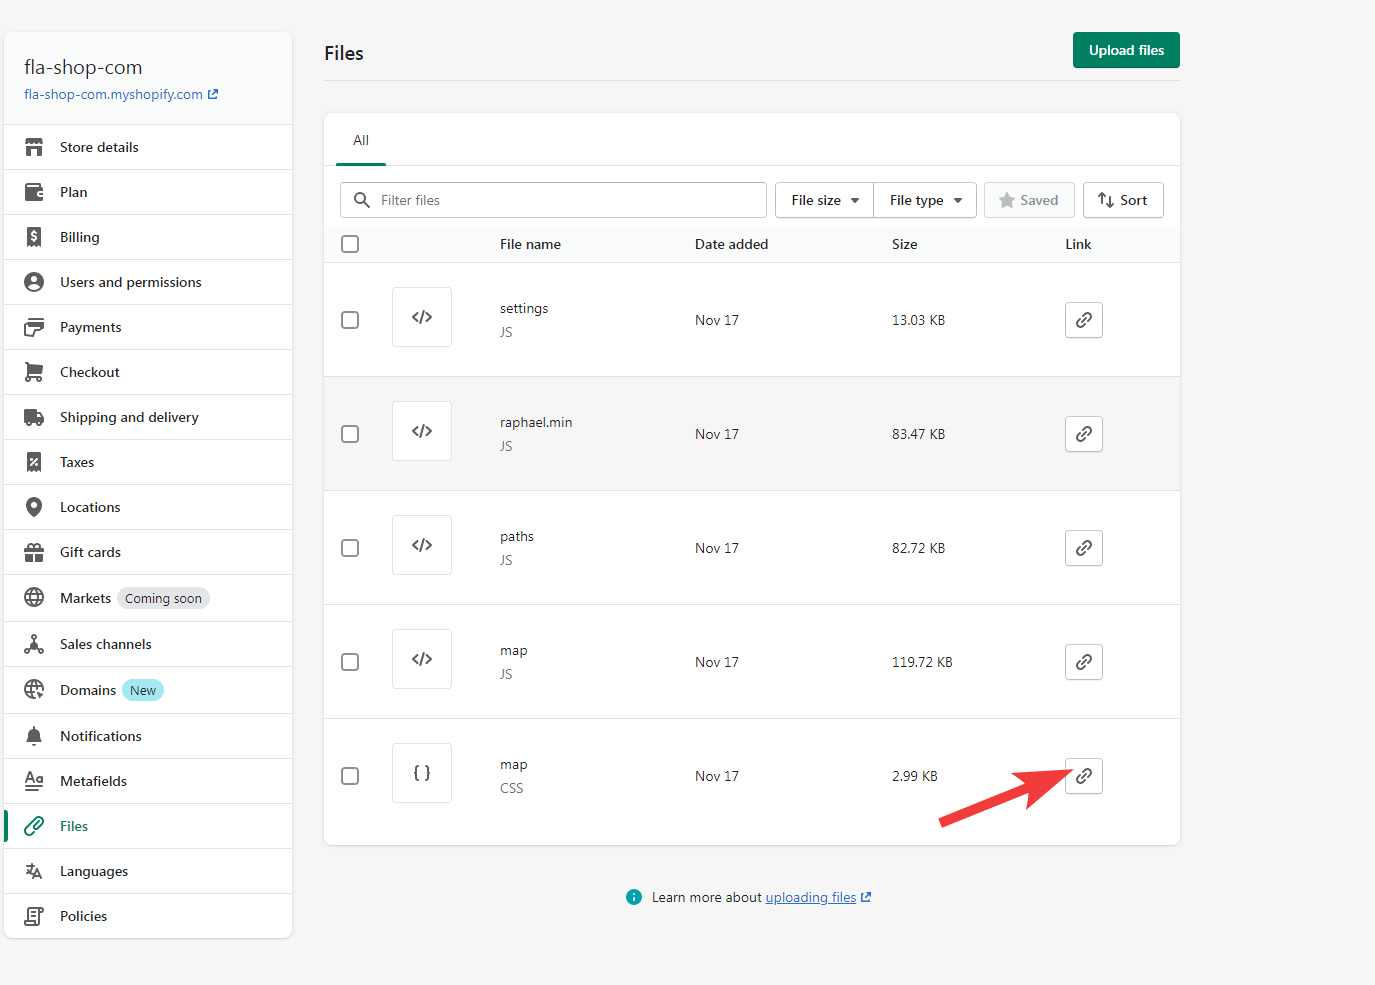
<!-- end HTML5 Map -->However, the paths to the files will not work because when uploading to the server, the Shopify system adds a special path to the file names. To get real URL, in the “Files” tool in the site settings; copy each of them to the clipboard by clicking on the button in the “Link” column of the table with files. Refer to the following screenshot.
Then, it can be inserted into the map connection code that you added to the page:
<script src="https://cdn.shopify.com/s/files/1/0611/2732/7998/files/settings.js?v=1637166926"></script>Here, the address is inserted instead of the line with the file name “settings.js”; because we clicked the line with this file on the file page. You must perform this operation for all map files - map.css, raphael.min.js, settings.js, paths.js, map.js.
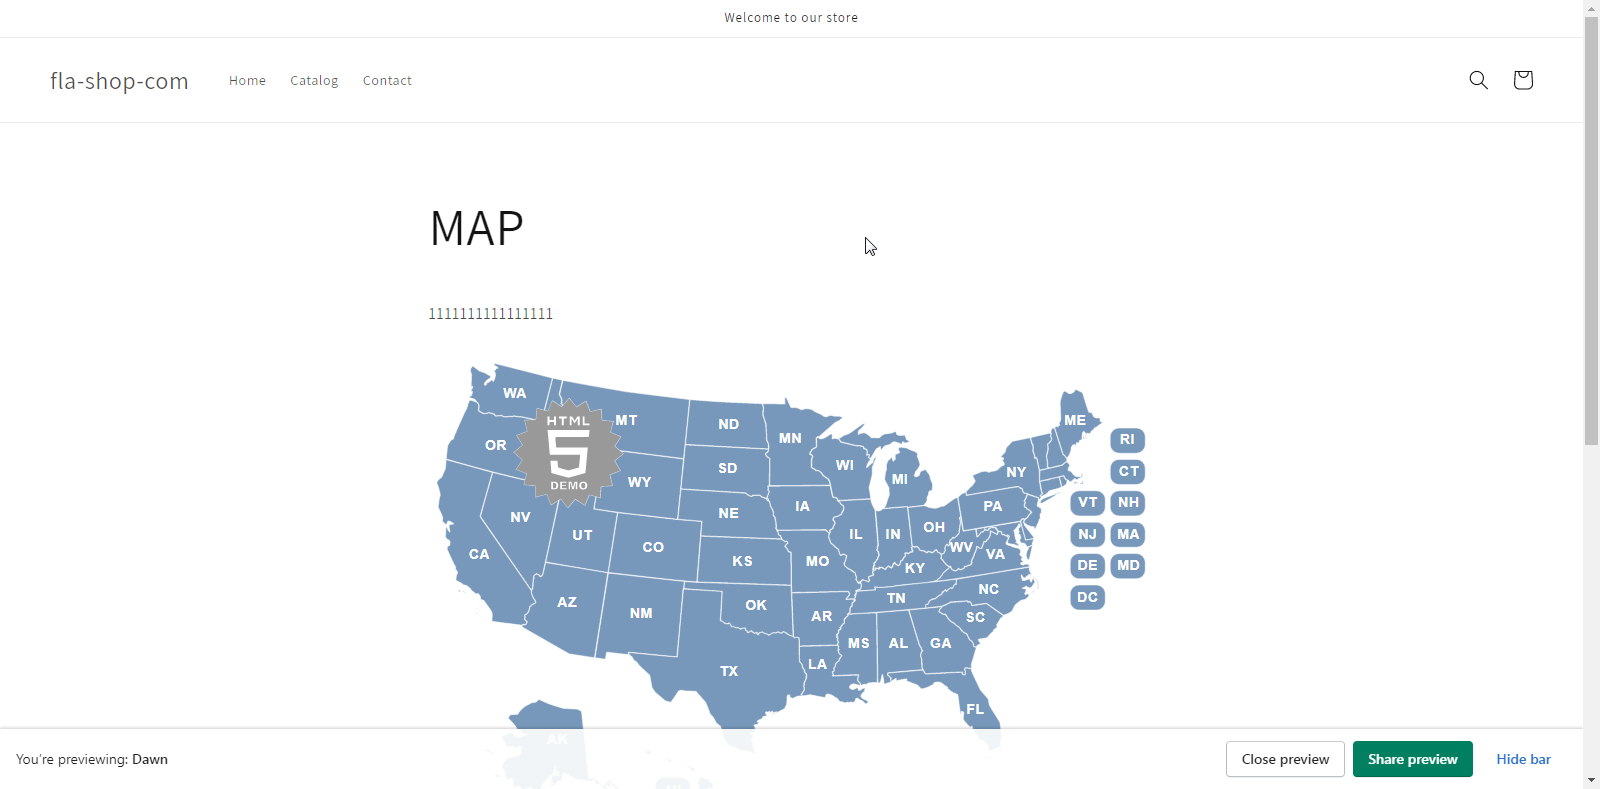
After that, you can save the page, navigate to it on your website, and the map should appear there:
Uploading map files to the server
First, unpack the ZIP archive with the map.
After that, go to your Shopify account. After logging into Your account, go to the settings section.
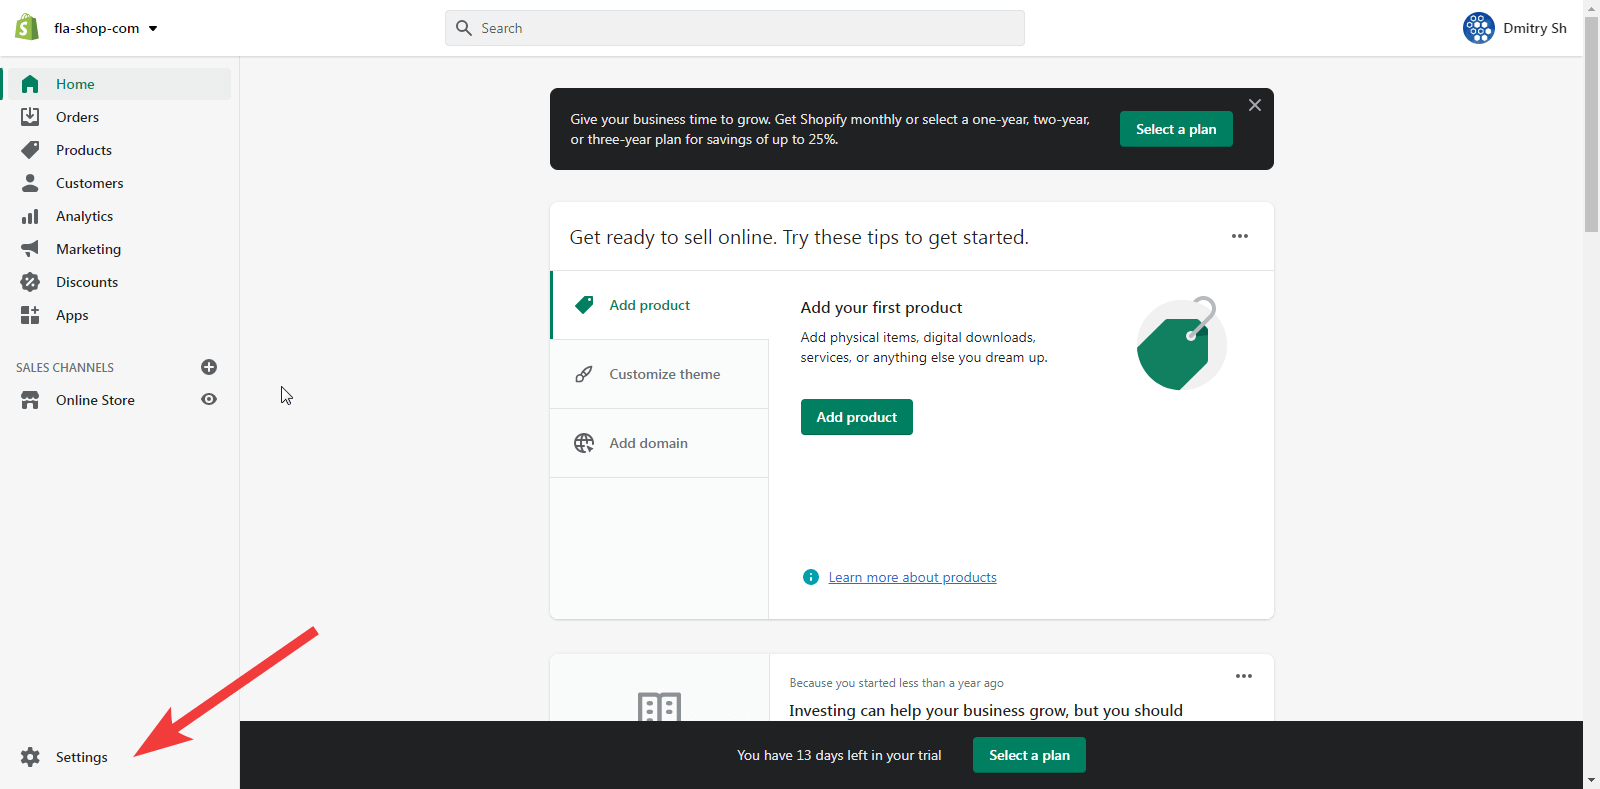
In the settings, click on the "Files" menu item:
Now, to upload files, click on the "Upload files" button:
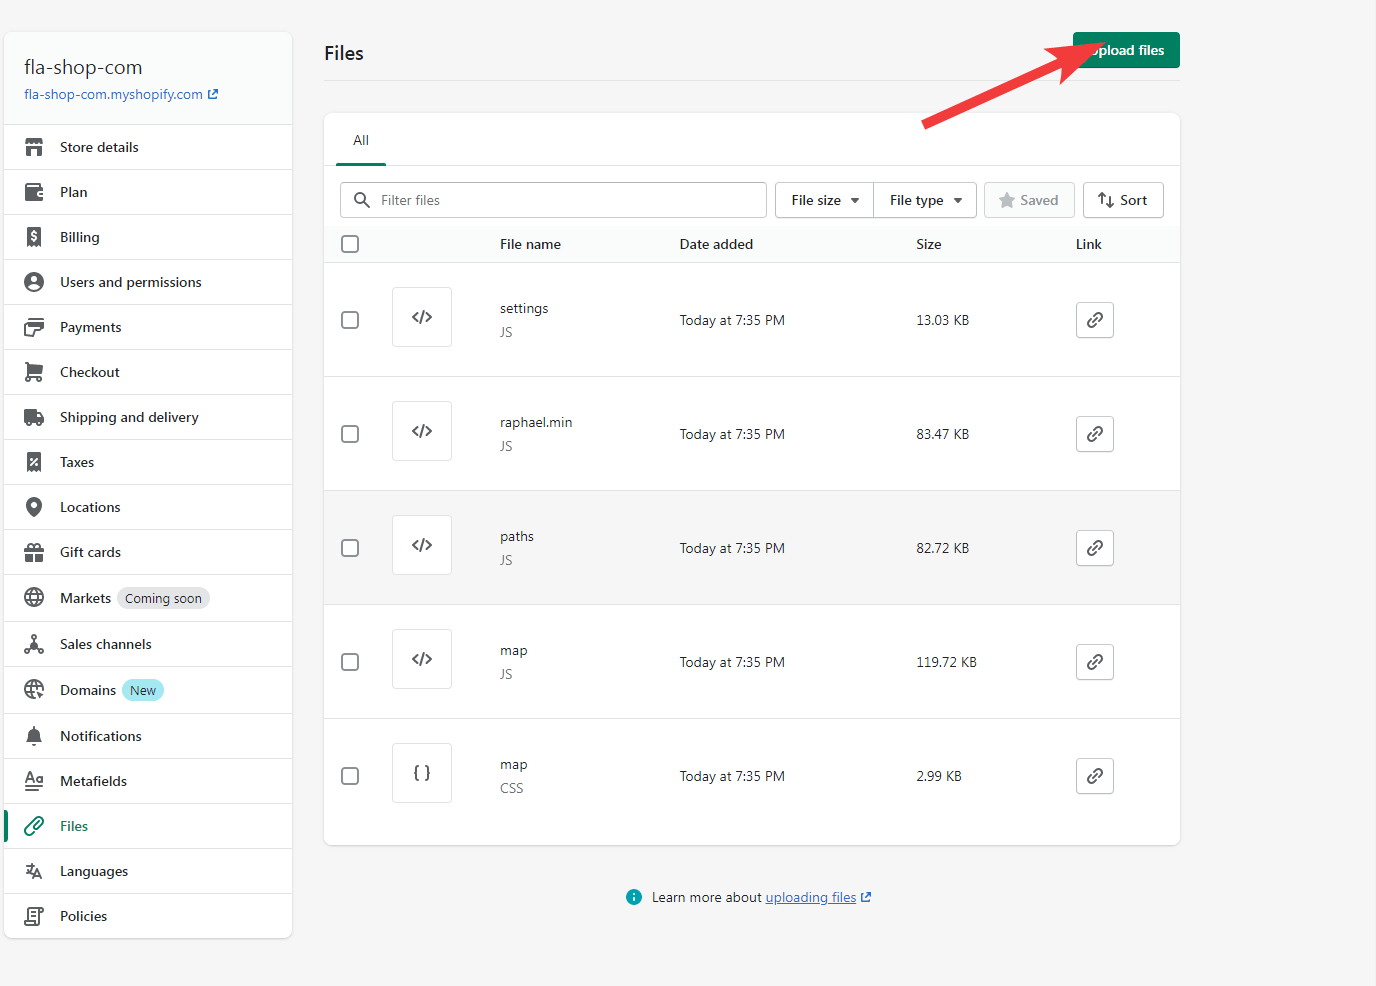
This screenshot shows the already uploaded map files. However, in your case, they will not be there yet, but instead of them, there may be others if you uploaded them earlier. After clicking the button, a file selection dialog box will appear. You can select several of them at once by holding down the Ctrl key on the keyboard and clicking on the files with the left mouse button. You can also use the shift key, which works a little differently. For the map to work, you need to load the files map.css, raphael.min.js, settings.js, paths.js, map.js. If you need to use several sets of settings, you must download them as well. After selecting the necessary files, you must click the "Open" button in the window.
As a result of these operations, they should be uploaded to the server in CMS Shopify and appear in the table, as you can see in the previous screenshot.
Before performing the next step, it is better not to close this browser tab and not perform further actions but to open the CMS administration panel in a new tab. The reason is that you will have to return to this page several times.
Connecting the map to the page
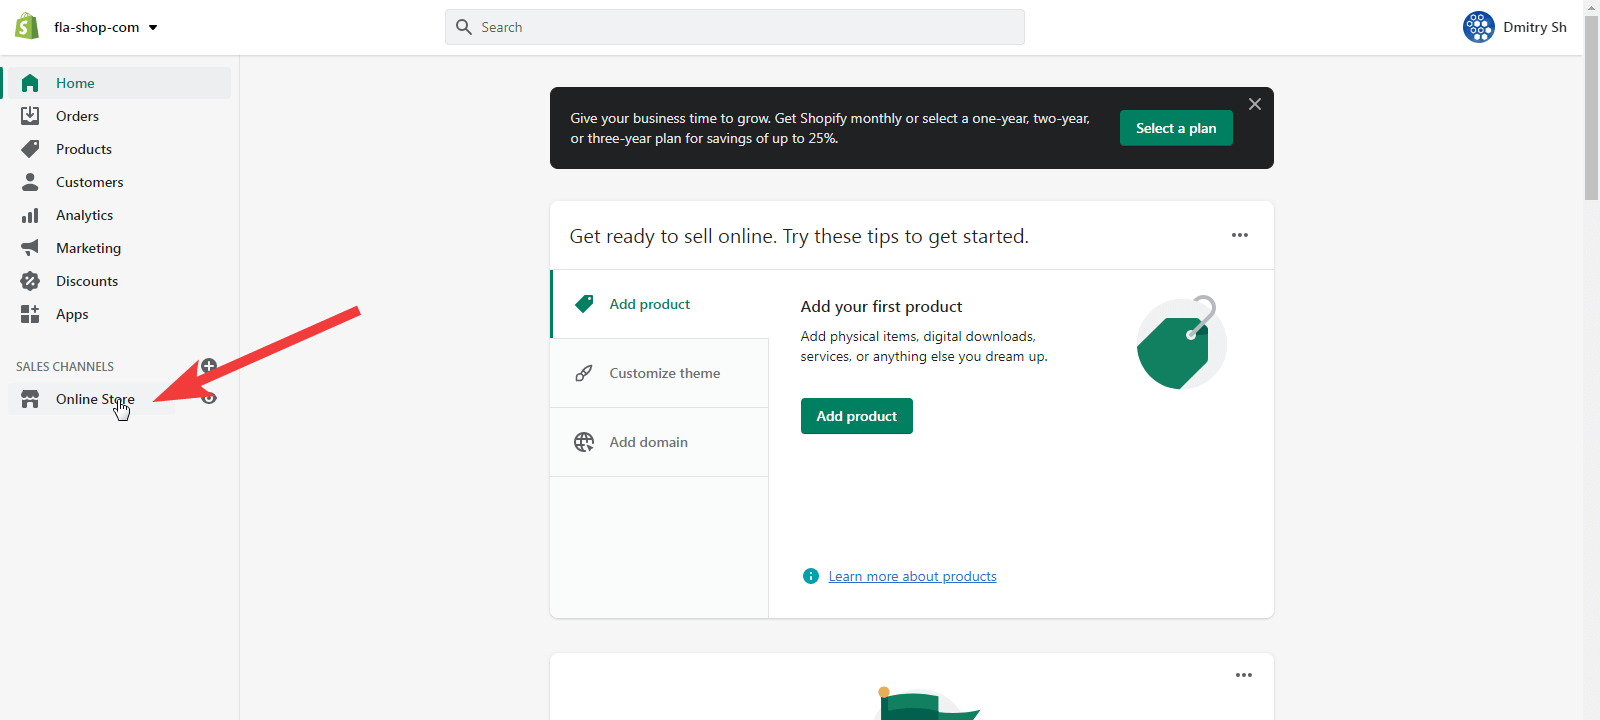
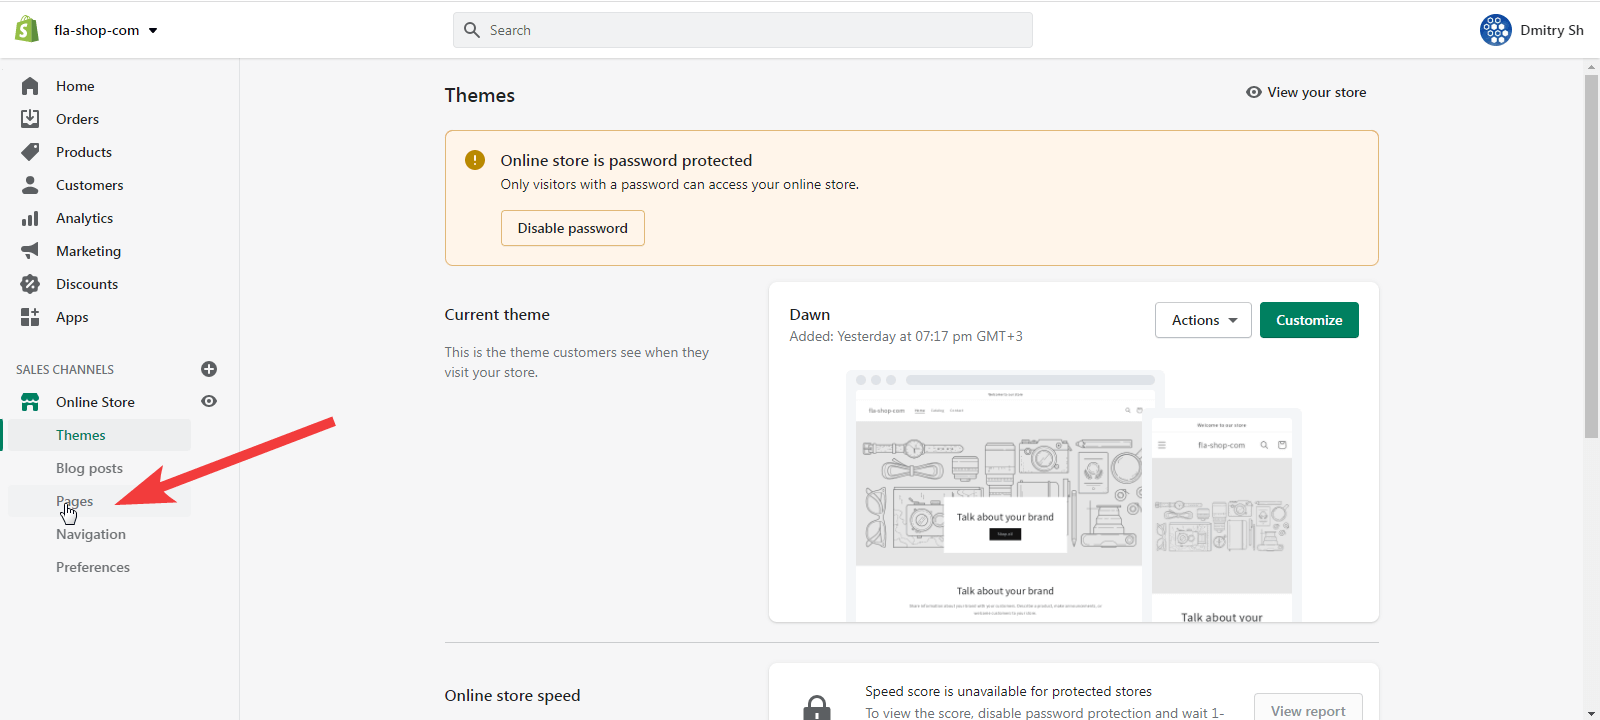
Create a page, or go to edit one of the existing ones. In a new tab, go to the CMS administration panel by entering its address in the address bar or using any other way. After that, click on the Sales channel menu item where you want to add the map.
In the Sales channel, go to the Pages menu item.
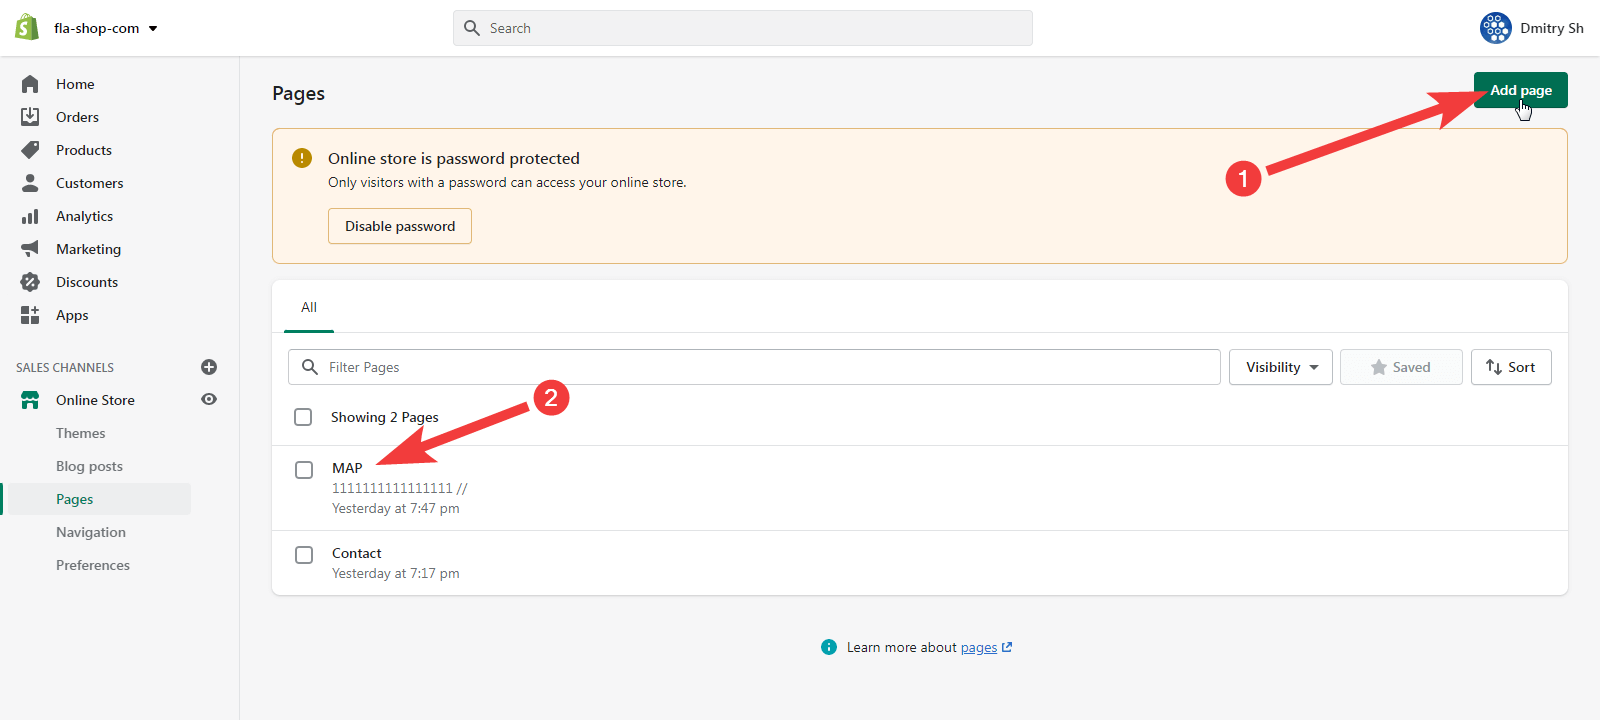
Create a new page for the map by clicking on the “Add page” (1) button. Or navigate to edit the page (2).
On the editor panel, click on the “Show HTML” button.
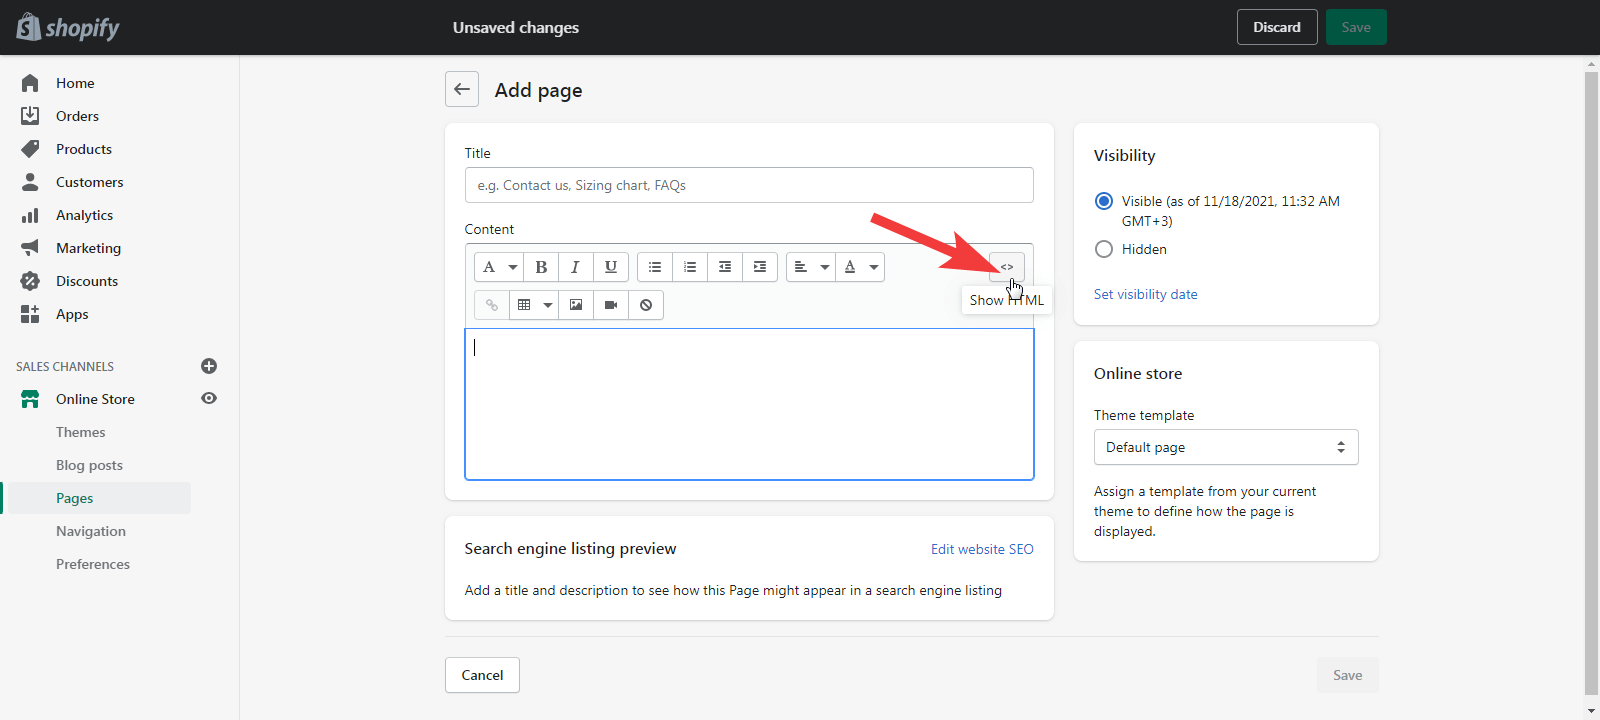
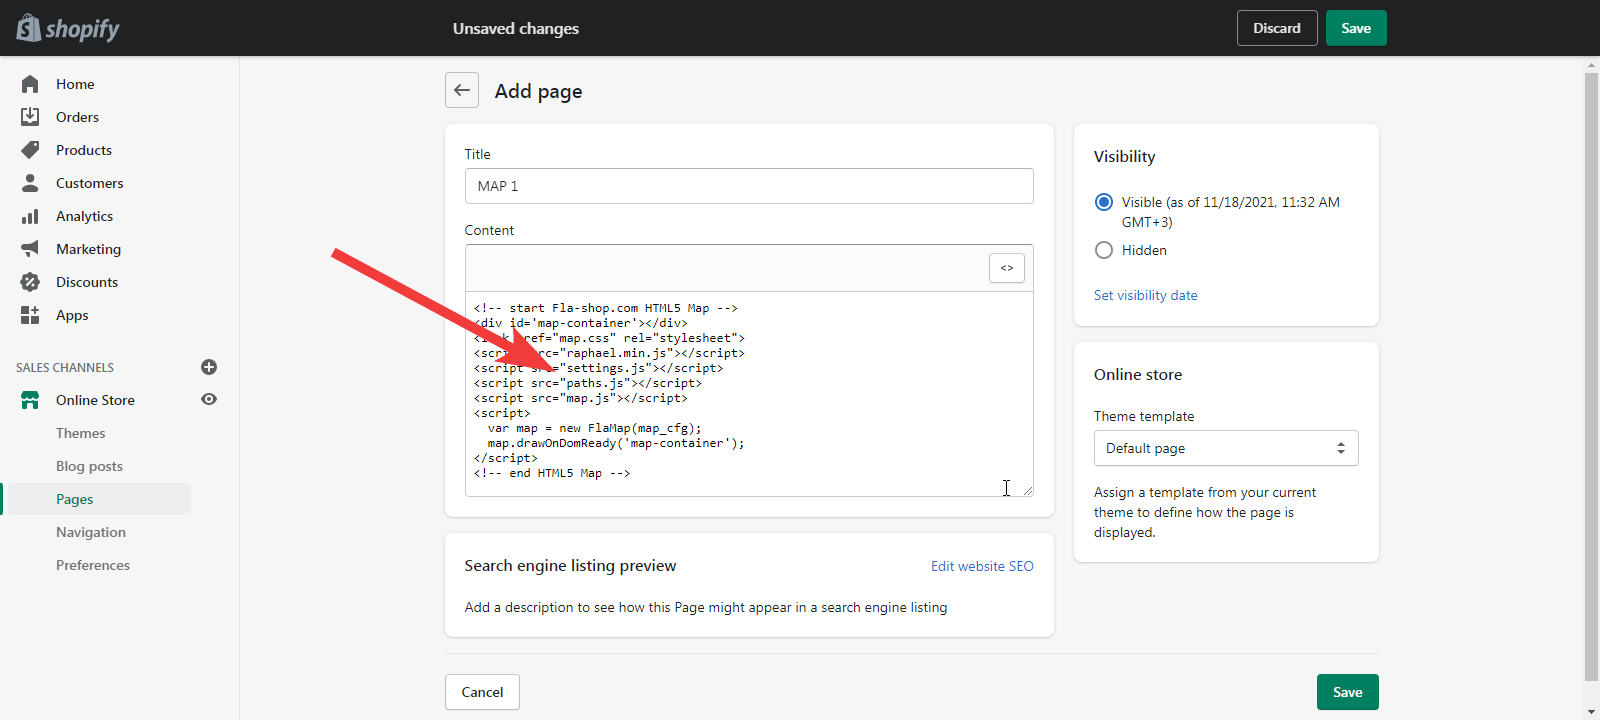
In the “Content” field, copy and paste the standard map connection code on the page where we want to see it.
<!-- start Fla-shop.com HTML5 Map -->
<div id='map-container'></div>
<link href="map.css" rel="stylesheet">
<script src="raphael.min.js"></script>
<script src="settings.js"></script>
<script src="paths.js"></script>
<script src="map.js"></script>
<script>
  var map = new FlaMap(map_cfg);
  map.drawOnDomReady('map-container');
</script>
<!-- end HTML5 Map →
At this stage, it should look like the following screenshot:
But you will have to perform several more actions. The fact is that when files are uploaded to the server at stage 2, their addresses change. Therefore, you need to replace their standard names with the corresponding real addresses on the CMS Shopify server. The main files needed for the map to work are map.css, raphael.min.js, settings.js, paths.js, map.js. If you use several files with map settings, or their name is different in your case, then add them to this list (in our case, the settings are stored in the settings.js file).
If you look at the code for connecting the map given above, you can see that all the files from this list are present in it. Therefore, we act according to the following algorithm:
We take a file from the list—for example, map.css.
Go to the tab with the files uploaded to the CMS (if you closed it, you need to open the tab again by going to the file management page but leaving the current one). The file management is located in the Settings-> Files section of the Shopify dashboard. Click on the button in the “Link” column in the line corresponding to the selected file (in our case, this is the line corresponding to map.css).
 A button to get the URL of the file on the Shopify server.
After clicking on this button, the correct address will be on the clipboard. Now, we return to the tab where we edit the page. There, the map code has already been added.
Select with the mouse the name of the file for which we are operating.
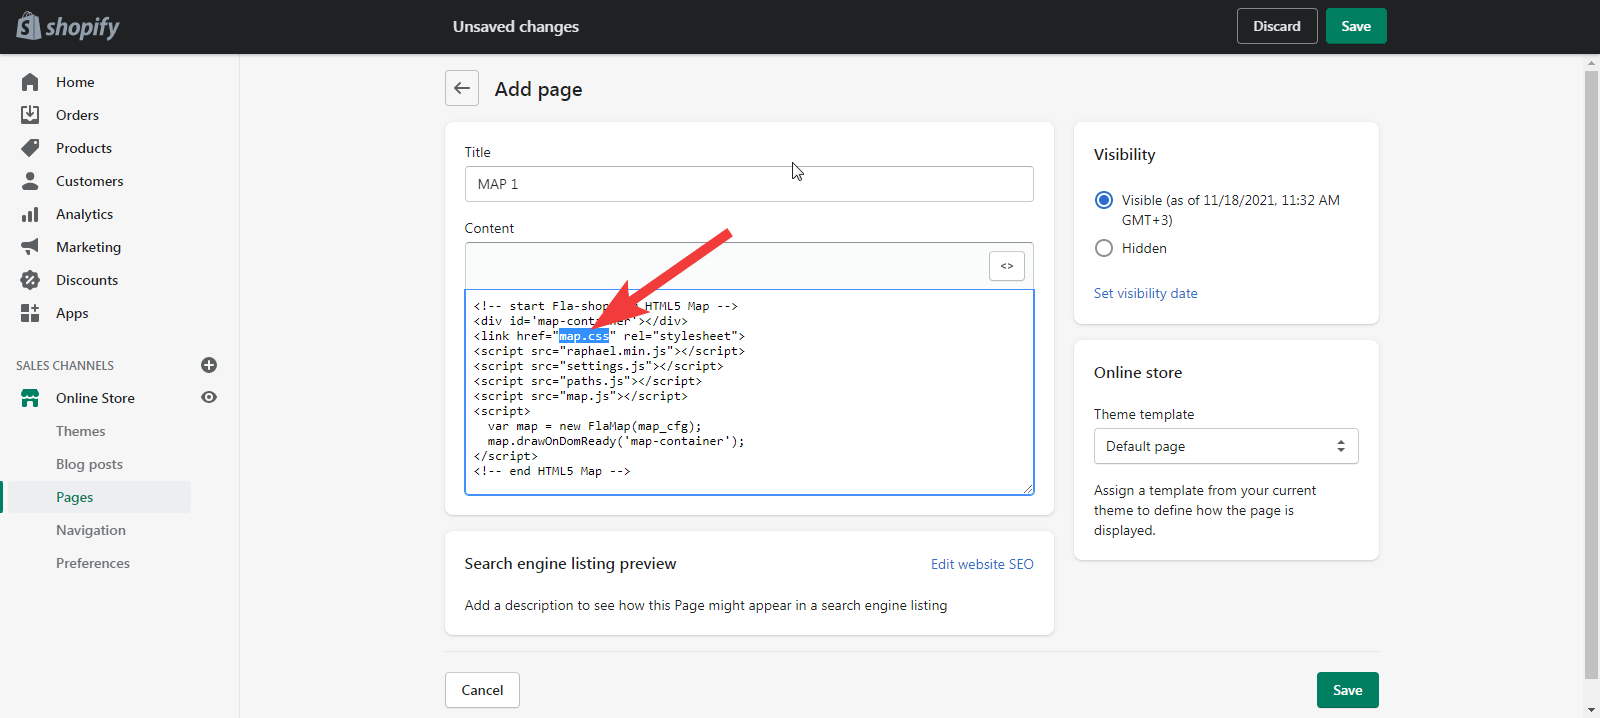 Selected file name to replace.
Press the Ctrl+v key combination on the keyboard; as a result, its actual address will be inserted in the place of the selected name.
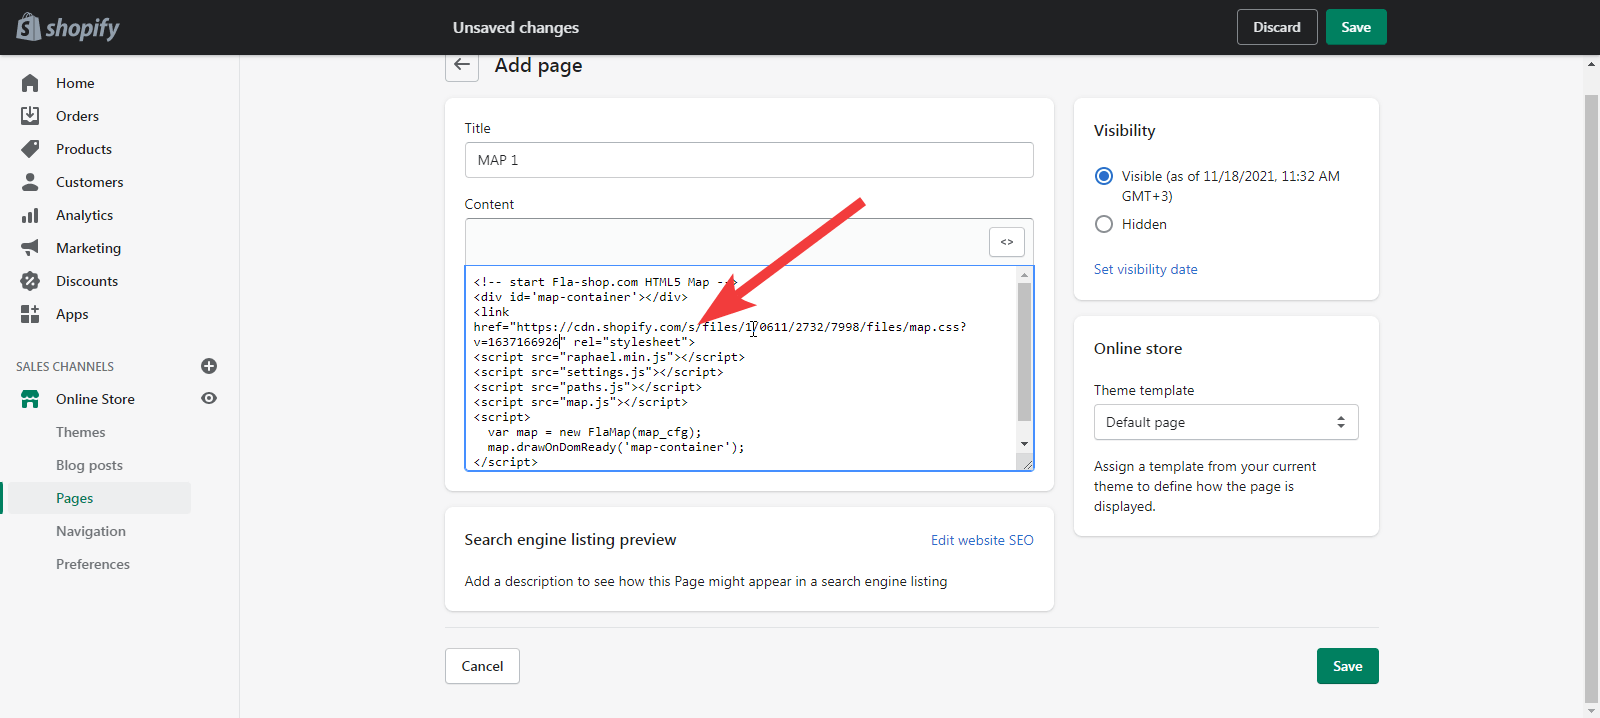 Pasted from the clipboard correct file path.
We repeat this sequence of operations for all map files included in the code from the list presented above.
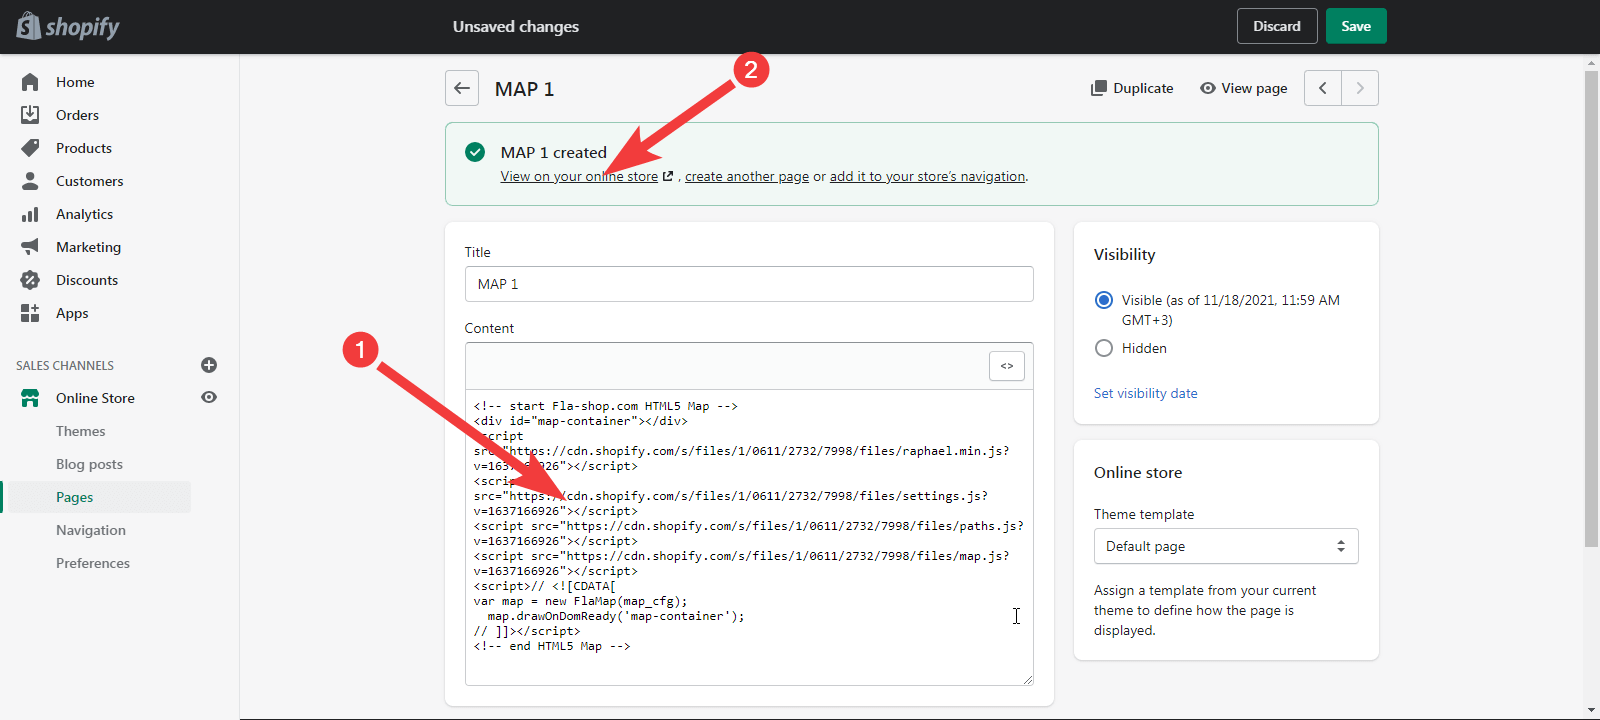
As a result, we will receive approximately the following HTML code (1) (the paths to the files will most likely differ for you):

After that, click on the “Save” button (2). Since we created a new page in this example, we see a message that it has been created. If we enter only the map connection code on the page, then the “Content” field of the created page will be empty (1).
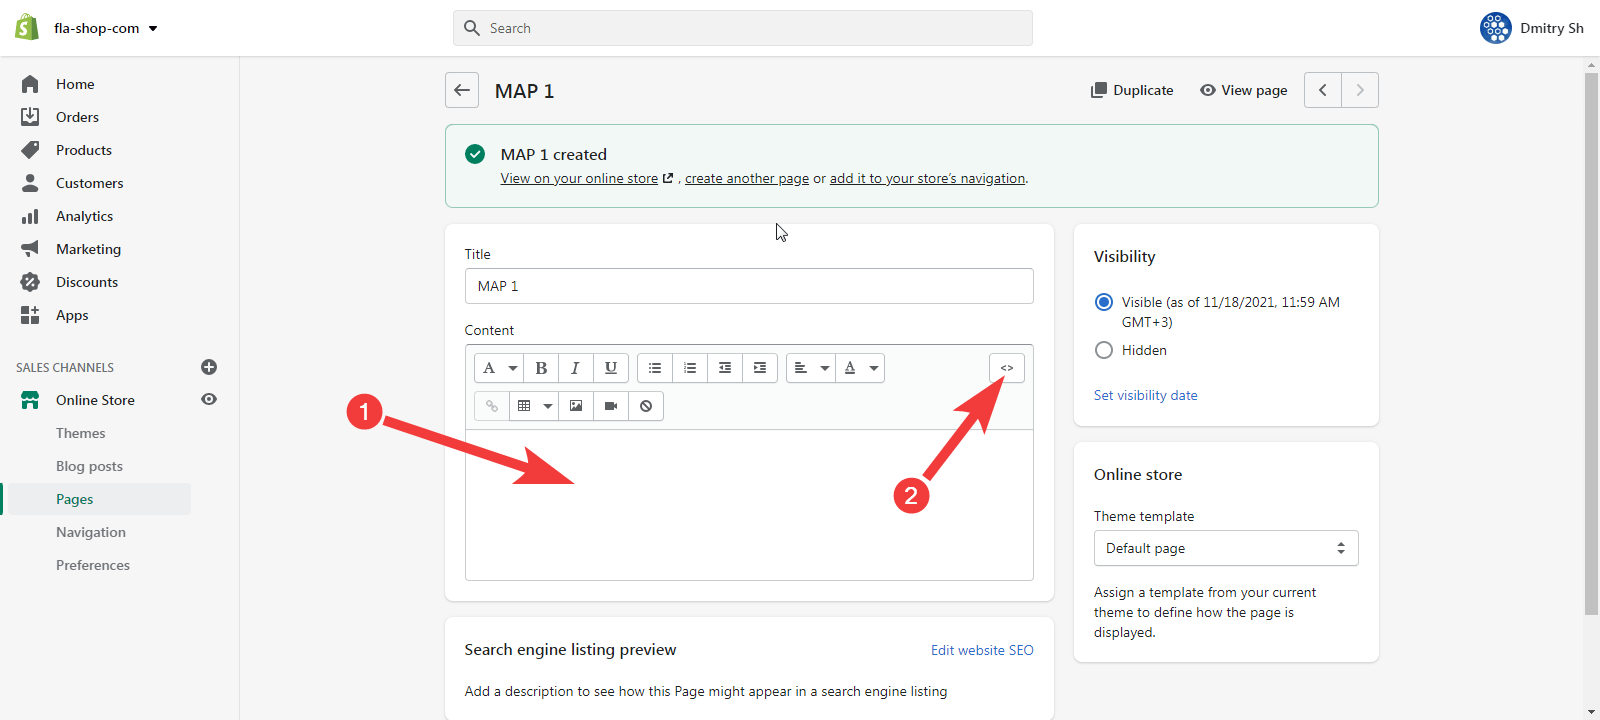
This happens because the map connection code is not displayed since it is not textual content and therefore invisible. But it is already there. We can verify this by clicking on the “Show HTML” button in the editor (2) again. In this case, we will see something like the following (1):
This means that the map is in place.
Follow the link to view the page with the map (2 in the previous screenshot) and see that it appeared on your website.

Conclusion
This guide describes adding an HTML map from Fla-shop.com to a site powered by CMS Shopify. Above, you can find brief and detailed instructions with screenshots.