Review of the US Map for WP. Part 2: General Settings
The “General settings” tab allows the website administrator to set up the main settings for WordPress interactive maps, such as map name, width, zooming, etc. So, this article is a comprehensive review of each general map setting.
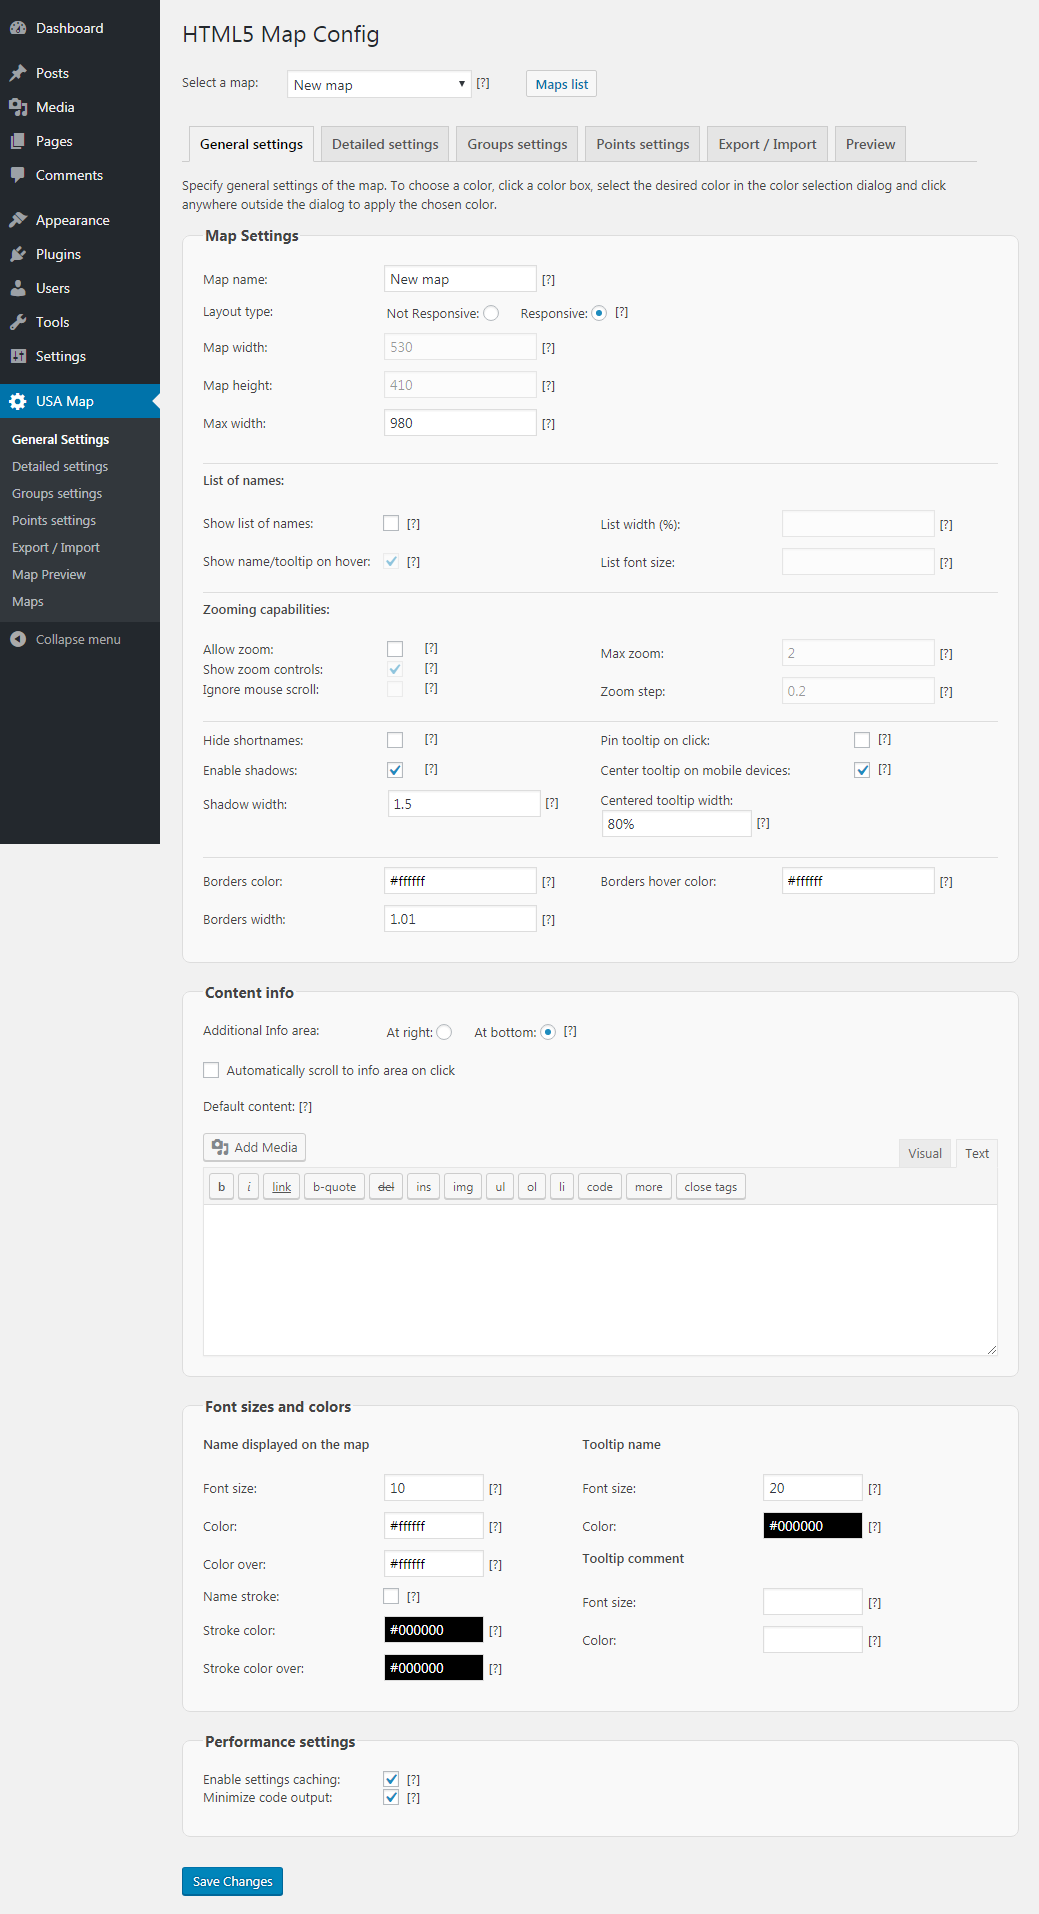
The section can be opened by selecting the “General settings” link on the WordPress interactive map admin dashboard. In the screenshot below you can see the “General settings” window.
For your convenience, we provided the screenshot with arrows and numbers. It will navigate you while reading our review.
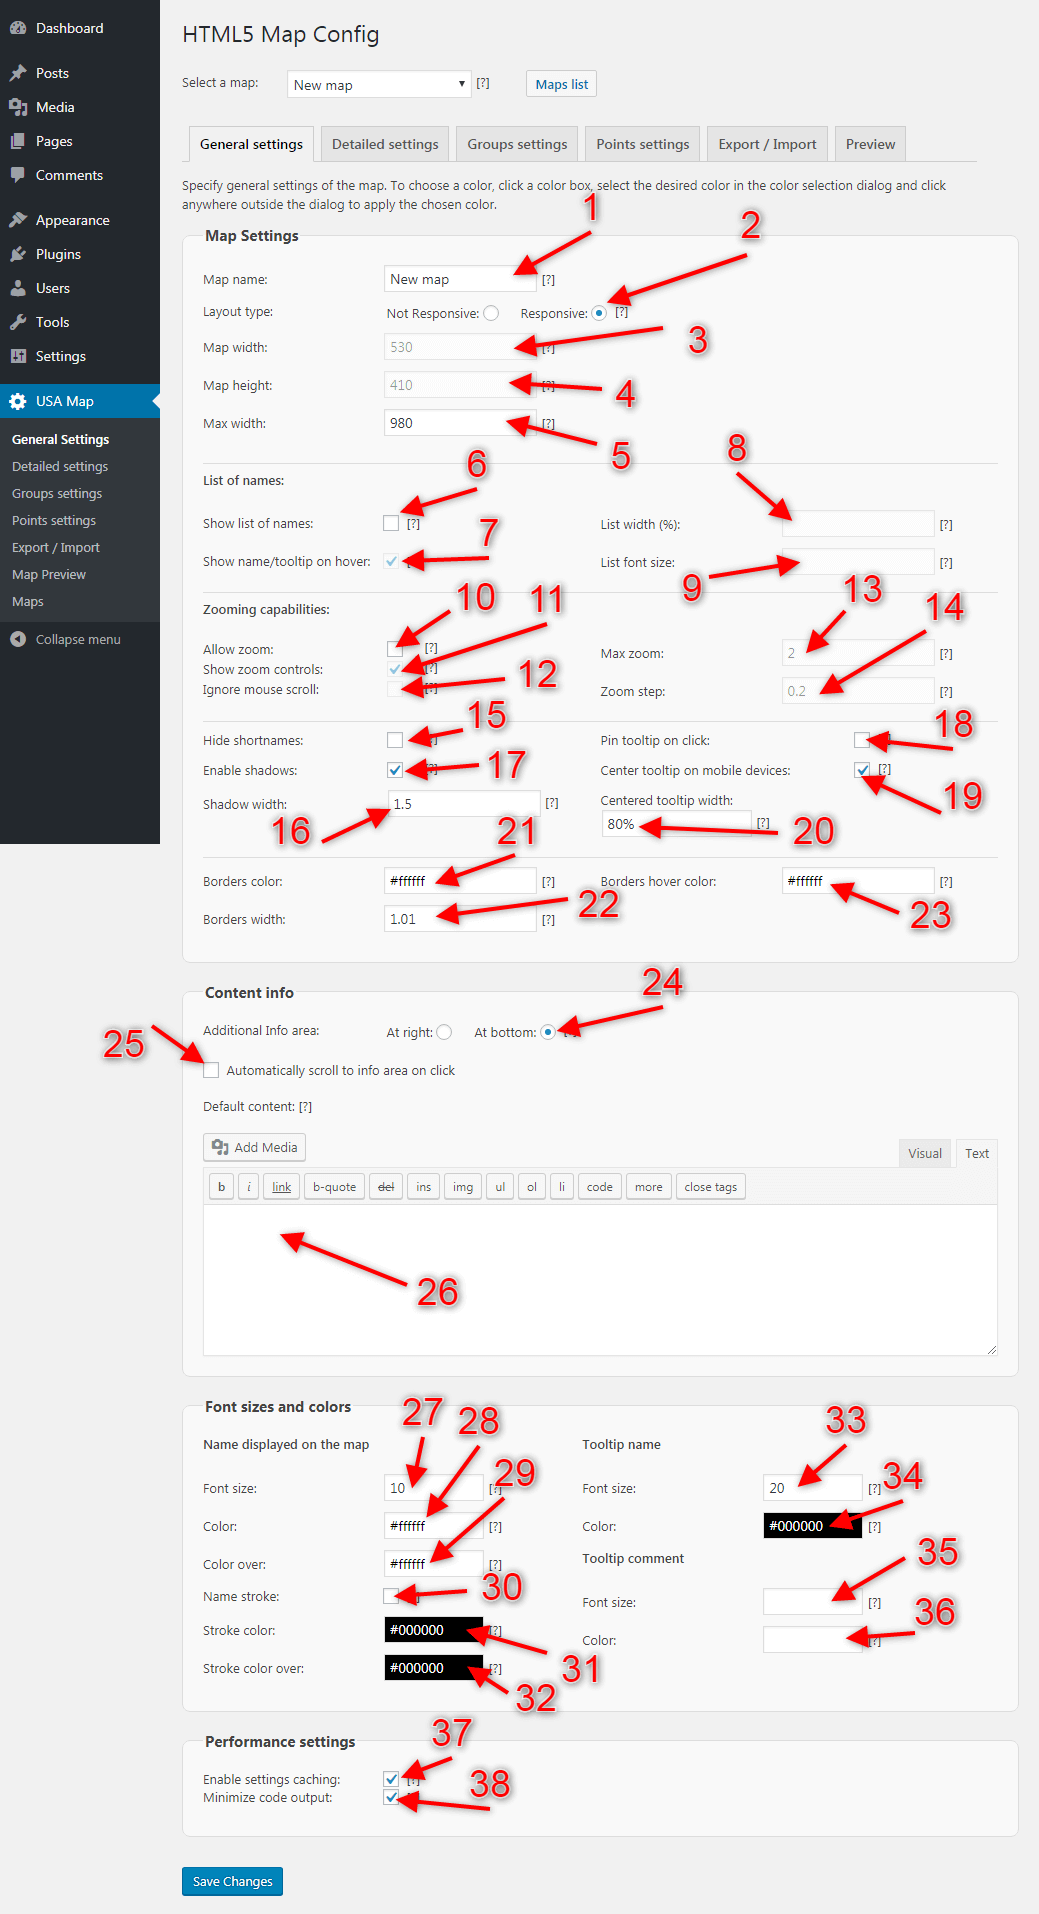
“Map settings” group
- [1] “Map name” – Here you can set up the name of your interactive map.
- [2] “Layout type” -The interactive WordPress maps from Fla-shop.com can be responsive. After you select “responsive” layout, the map size will automatically change on mobile device screens.
- [3] “Map width” – Sets up the width of the map. Please note: while the “responsive” layout checkbox is active, this section will not be available for editing.
- [4] “Map height” – Sets up the height of the map. Please note: while the “responsive” layout checkbox is active, this section will not be available for editing.
- [5] “Max width” – Sets up the max interactive map width.
“List of names” settings group
This group sets up the list of state names on the left side of the map. When the user hovers the mouse over the list of elements, the selected state is highlighted on the interactive map.
- [6] “Show list of names” – when this checkbox is checked, the list of names will be shown.
- [7] “Show name/tooltip on hover” – shows the state name or the tooltip when the user hovers the mouse cursor on the list element.
- [8] “List width” – sets up the width of the names list.
- [9] “List font size” – sets up the font size of the list elements.
“Zooming capabilities” group
This group sets up interactive map zooming capabilities. Zooming is one of the exciting features of Fla-shop.com interactive maps. It allows for adding more usability to the website.
- [10] “Allow zoom” – this checkbox enables zooming for the interactive map.
- [11] “Show zoom controls” – shows zooming controls (“-” and “+” signs at the bottom left corner of the map).
- [12] “Ignore mouse scroll” – when this option is enabled, the user will not zoom the map while the mouse scrolling.
- [13] “Max zoom” – sets up max zooming level, from 0 to 10.
- [14] “Zoom step” – sets up the zooming steps.
“Shortnames” group
- [15] “Hide shortnames“ – when this option is enabled, all short names of states will be hidden.
- [16] “Shadow width” – sets up the width of the shadow for the map.
- [17] “Enable shadows” – enables/disables an eye-catching shadowing when the user hovers the mouse cursor over the state.
- [18] “Pin tooltip on click” – normally the tooltip appears when the user hovers the mouse cursor over the state. The “Pin tooltip on click” option allows the freezing of the tooltip when the user clicks the mouse button somewhere in the state.
- [19] “Center tooltip on mobile devices” – centers the tooltip on mobile devices for user convenience.
- [20] “Centered tooltip width” – sets up the width of the centered tooltip on mobile devices.
- [21] “Borders color” – sets up the border colors for states.
- [22] “Borders width” – sets up the border width in pixels.
- [23] “Borders hover color” – sets up the border colors when the user hovers the mouse cursor over the state.
“Content info” group
Additional information windows are useful when, for example, you need to give the website visitors any information about your company or about its state departments.
- [24] “Additional info area” – sets up the place, where to show the additional info window. Two values are possible:
- at the top right corner of the map (“At right” radio button)
- at the bottom of the map (“At bottom” radio button)
- [25] “Automatically scroll to info area on click” – when the user clicks on the state and an additional information window is placed at the bottom side of the map, it scrolls to it automatically.
- [26] “Default content” – this WYSIWYG editor sets up the default content for the additional information window.
“Font sizes and colors” group
This section manages the interactive map font sizes and colors for the tooltip window and for state names.
“Name displayed on the map” – manages the settings for state names.
- [27] “Font size” – sets up the state name font size.
- [28] “Color” – sets up the state name color.
- [29] “Color over” – sets up the color of the state name when the user hovers the mouse cursor over it.
- [30] “Stroke color” – sets up the stroke color for state names.
- [31] “Stroke color over” – sets up the stroke color when the user hovers the mouse cursor over it.
“Tooltip name” – manages the settings for the tooltip name.
- [33] “Font size” – sets up the tooltip font size.
- [34] “Color” – sets up the tooltip text color.
“Tooltip comment” – manages the settings for tooltip comment.
- [35] “Font size” – sets up the font size for the tooltip comment.
- [36] “Color” – sets up the text color for the tooltip comment.
“Performance settings” group
This section is important, so it can improve the interactive map (and, as the result, the whole website) performance.
- [37] “Enable settings caching” – enables the map settings caching, so it can significantly increase the website working speed.
- [38] “Minimize code output” – this option allows minimizing the code output when the interactive map is placed into the blog post or a separate page. It can also reduce the website’s working speed.
In this review, we tried to give you a complete review of the “General settings” section of the WordPress interactive map plugin from Fla-shop.com. We hope that after reading this review you can manage the general settings of your interactive map without any effort.