How to install the WordPress plugin from Fla-shop.com?
How to install the WordPress plugin from Fla-shop.com? This article is a complete review of WordPress interactive map plugin installation. We will make a comprehensive review of the installation process from downloading a ZIP file up to the plugin activation.

Short installation guide
Note that you first need to select the plugin at Fla-shop.com and download the ZIP-archive to your local hard drive. After that:
- Go to your WordPress admin panel;
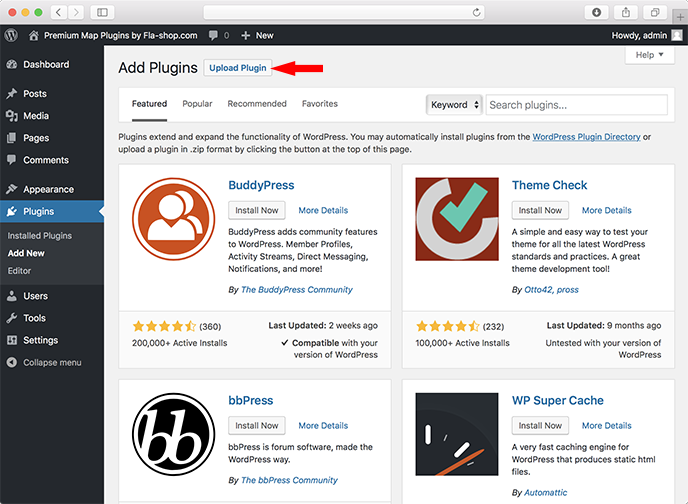
- Select the “Plugins” tab, then select “Add new” link;
- In the appeared window click on “Upload Plugin” button;
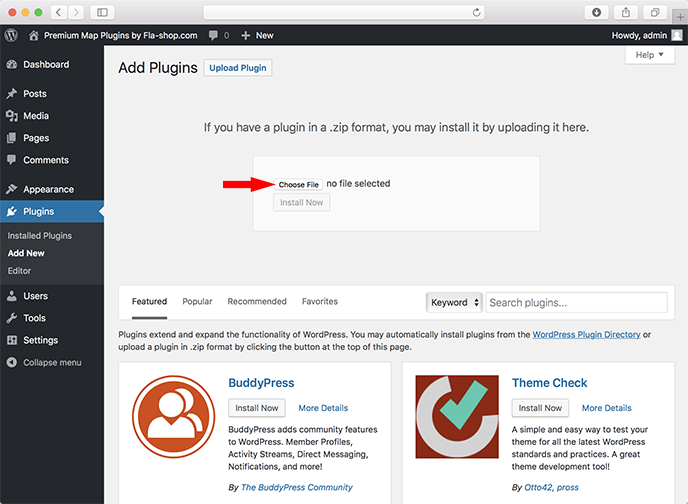
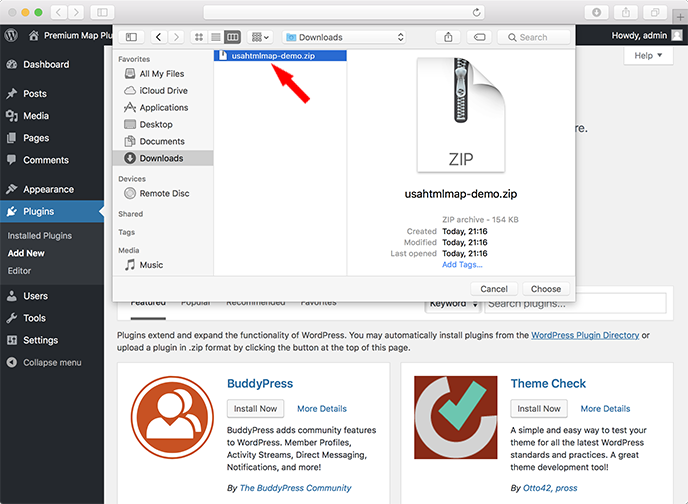
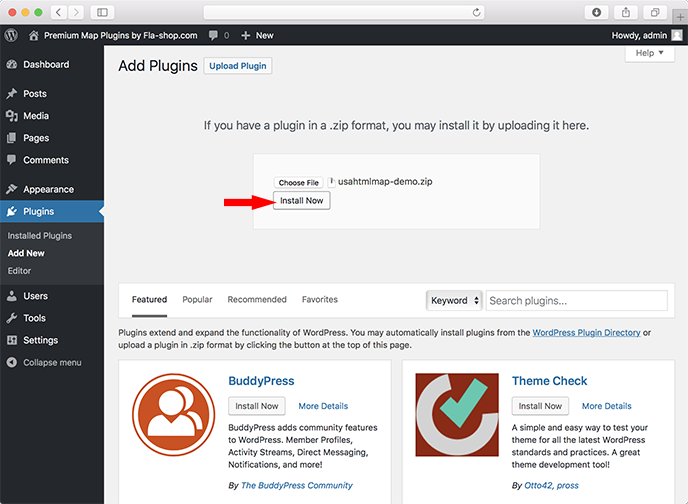
- Click “Browse” button and select ZIP archive with the plugin. Click “Install Now” button;
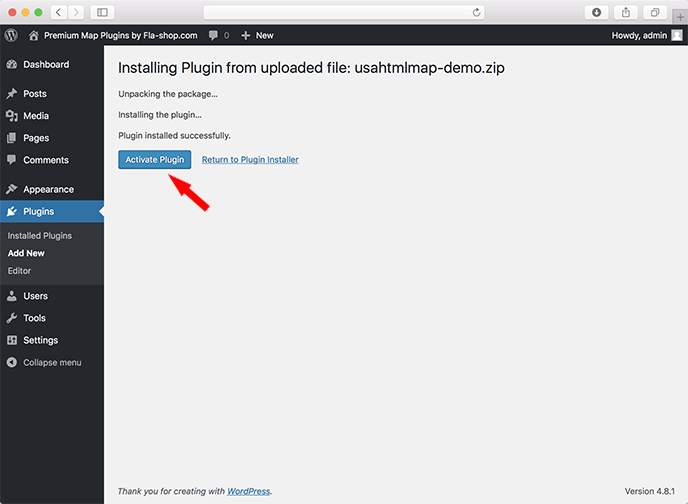
- When the plugin has been installed, activate it by clicking the “Activate Plugin” link;
- Great job! Now you can see a new section in WordPress admin panel, where you can manage all plugin settings.
Step-by-step installation guide
This comprehensive instruction will undoubtedly help you to answer the question “How to install WordPress plugin from Fla-shop.com” and to make it in an easy and accurate way.
Click on the “Upload Plugin” button
When the upload window appears, click on the “Choose file” button
Choose the ZIP archive with the plugin at your local hard drive
When the ZIP file has been downloaded into your website directory, click on the “Install Now” button
Click on the “Activate Plugin” button to activate the plugin.
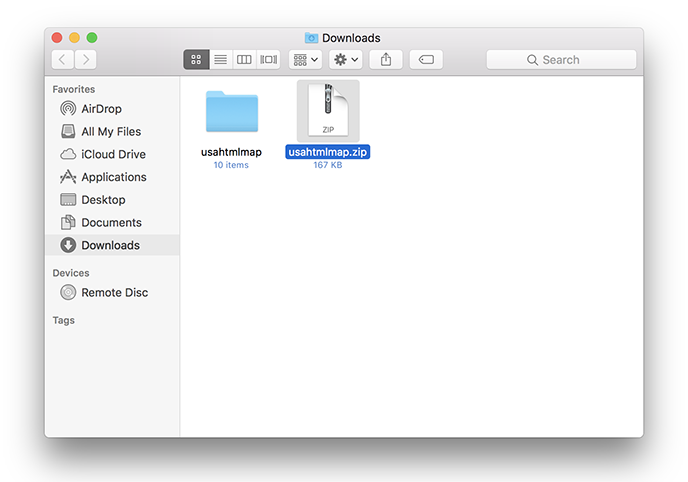
Installation of the plugin on macOS (iMac, MacBook)
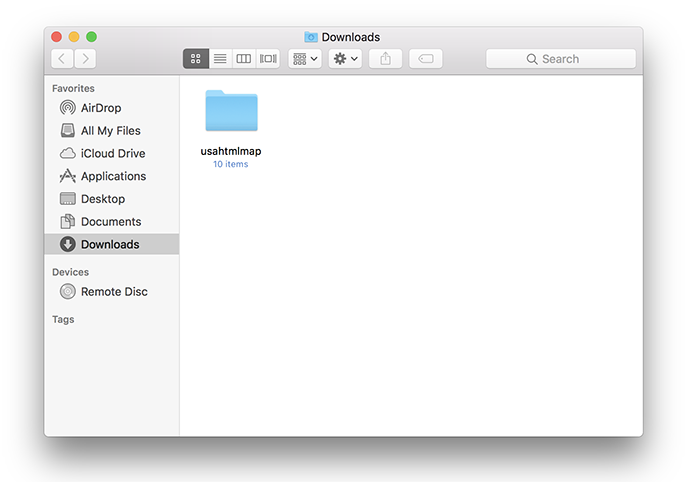
One of the main differences between the macOS and Windows installation process is that compressed files are being unzipped directly after the download process. It means that after downloading the plugin ZIP archive in macOS you will see something like that:
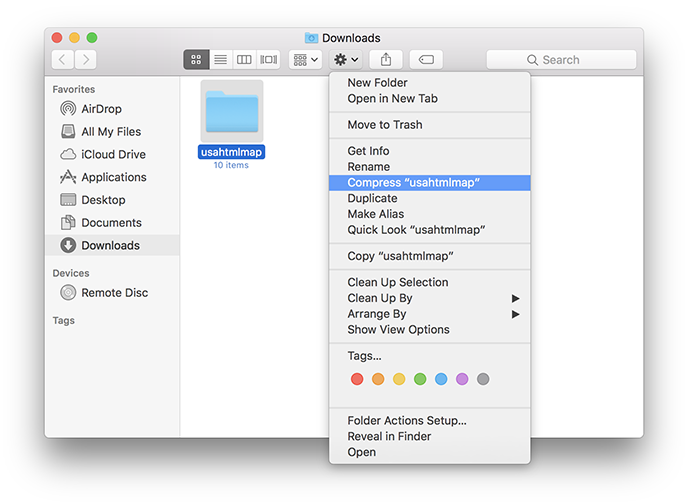
Please note that you will need to compress this folder into a ZIP archive again in order to upload it to the WordPress website correctly. For this purpose follow the instructions on the screenshot below.
Do a Right-click on the folder icon and choose “compress folder”.
As you can see on a screenshot below after the compression process you will have a ready ZIP archive that can be uploaded to a WordPress website.
Installing the full version of the plugin after testing the demo version
If you have tested the demo version of the plugin and purchased a license, we warn you to delete all old plugin files right before the installation process. You can export your settings into the new plugin. We will describe that in the next articles.
Please note that if you still see an “HTML5 Demo” badge after the installation and activation of the full plugin version, you will need to clear the browser cache:
- for Windows users: press CTRL + F5 at “Map preview” page in WordPress admin panel;
- for macOS users: press Command + R at “Map preview” page in WordPress admin panel.
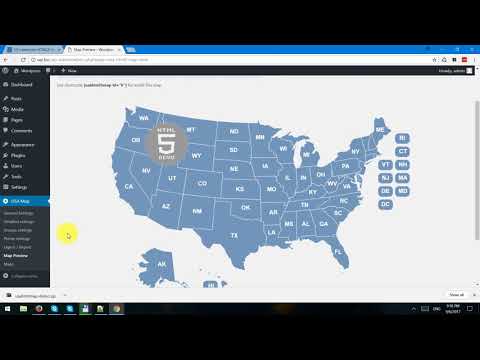
Video guide
For your convenience, we prepared a short video instruction where we show the complete installation process.
What’s next?
When your interactive map is installed, it is time to configure it, as we described earlier. After that, just embed a simple shortcode into your WordPress blog post or page and enjoy an eye-catching interactive map!
Take a look at the examples of interactive maps that demonstrate the plugin’s capabilities.